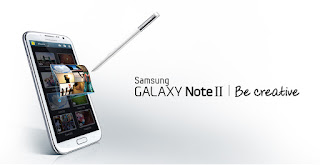
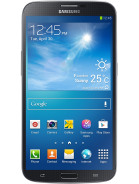
Announced in April 2013, Samsung Galaxy Mega 6.3 is now available for purchase in several countries in the world. The Samsung Galaxy Mega 6.3 - as in a 6.3" Lcd, comes with 3G (GT-I9200) and LTE (GT-I9205) version that runs on Android 4.2.2 Jelly Bean.
Followed by the market rollout, XDA-Developers member VCore has released root method for both I9200 and I9205 version of Galaxy Mega 6.3.
Samsung Galaxy Mega 6.3 users who wish to root their devices, may follow our step-by-step guide.
Disclaimer: Rooting voids the warranty of your device. We and the developer of this rooting procedures shall not be held responsible if any undesirable outcomes may happen to your device. use of this root guide is solely at your own risk!
Pre-requisites
1. Install USB Driver for Samsung Galaxy Mega 6.3 on the computer.
2. Enable USB Debugging Mode on the phone by navigating to Settings >> Developer Options.
3. Make a backup of all your important data before following the guide.
4. The Galaxy Mega 6.3 should be factory unlocked and not locked to any particular carrier.
5. Ensure the battery of the phone is charged more than 80 per cent.
6. The Root Package file works only on Samsung Galaxy Mega 6.3. Applying these to any incorrect variant might brick the device. Verify the model number of the Galaxy Mega 6.3 by navigating to Settings >> About Phone.
Files Required
1. Root Package for Galaxy Mega 6.3 (vcoreroot-v2.tar)
2. Odin 3.07 (Mirror Link)
Steps to Root Galaxy Mega 6.3 Running on Android 4.2.2 Jelly Bean Firmware
Step 1: Extract Odin 3.07 file using WinRAR/7-Zip/WinZip or any other extracting tool.
Step 2: Switch off the Galaxy Mega 6.3. Then boot the device into Download Mode by pressing and holding Volume Down, Home and Power buttons together until a construction Android robot icon with a warning triangle appears on Lcd. Now press the Volume Up button to enter Download Mode.
Step 3: Launch Odin on the computer as an Administrator.
Step 4: Connect the Galaxy Mega 6.3 to the computer using USB cable while it is in the Download Mode. Wait until Odin detects the device. When the device is connected successfully, the ID: COM box will turn blue with the COM port number. Additionally, the successful connected will be indicated by a message saying Added.
Note: If the Added message does not appear, then try re-install USB drivers or changing the port on the computer.
Step 5: In Odin, click the PDA button and select the vcoreroot-v2.tar file.
Step 6: Verify that Auto Reboot and F.Reset Time checkboxes are selected in Odin. Also, ensure the Re-Partition option in Odin is not selected.
Step 7: Double-check and click Start in Odin. The installation process will now begin.
Step 8: Once the installation process is completed, your phone will restart and soon you will see a PASS message with green background in the left-most box at the very top of the Odin. You can now unplug the USB cable to disconnect your device from computer.
Samsung Galaxy Mega 6.3 running on Android 4.2.2 Jelly Bean firmware is now rooted successfully. You can now install any app that requires root permission. Verify the root status of the device by downloading Root Checker app from Google Play Store.
Thanks to all fellas at XDA who first tried out this rooting technique. This method was originally posted via XDA-Developers original thread.
Showing posts with label samsung. Show all posts
Thursday, December 11, 2014
Samsung S5620 Display Jumper Solutions

Samsung S5620 Display Jumper Hardware Repairing Jumper Solution Solutions
Friday, November 7, 2014
Hard Reset Samsung Galaxy Mini Gt s5570
How To Hard Reset Your Samsung Galaxy Mini s5570
When You Have To Hard Reset Your Galaxy Mini ?
You Can Apply Hard Reset In Many Cases We Will Tell You Some Example * Forgotten Pattern Lock
* Forgotten Phone Lock
* Forgotten User Code
* If Your Phone Seems Frozen Due To Any Cases.Take Care oi These Factors Before You Reset Your Phone
* Please Backup Your Datas Using any Backup Software
* Please Maintain 50% Battory Charge
How To Hard Reset Your Samsung Galaxy Mini
![hard]()
* Switch Off Your Galaxy Mini
* Take Out Your Sim And Memmory Card* Press And Hold Home Key + Power On Your Phone
* Hold Pressing Keys Untill The Second Logo Appears
* When Scond Logo . Release All Keys
* Then You Will Get Factory Reset Menu
* Select Wipe Data/ Factory Reset Option . Scroll Using Volume Key . Then Confirm
* By Select Yes Delete All User Data. Using Volume Down Key . Confirm It
* Wait Some Seconds. Then Select Reboot System Now Option And Confirm
* Now Your Phone Will Restarted. After Completing The Hard Reset Prosses
* Done !
* Forgotten Phone Lock
* Forgotten User Code
* If Your Phone Seems Frozen Due To Any Cases.
* Please Maintain 50% Battory Charge
* Hold Pressing Keys Untill The Second Logo Appears
* When Scond Logo . Release All Keys
* Then You Will Get Factory Reset Menu
* Select Wipe Data/ Factory Reset Option . Scroll Using Volume Key . Then Confirm
* By Select Yes Delete All User Data. Using Volume Down Key . Confirm It
* Wait Some Seconds. Then Select Reboot System Now Option And Confirm
* Now Your Phone Will Restarted. After Completing The Hard Reset Prosses
* Done !
Tuesday, November 4, 2014
Samsung Galaxy Note 2 tips and tricks
The Samsung Galaxy Note 2 is the second in Samsungs series of giant-screened mobiles. It improves the stylus, gets a sleeker look and nabs all the best bits from the Samsung Galaxy S3. Weve spent a lot of close and personal time with the phone. Here are the secrets, tips and tricks weve uncovered.

OLED-based screens like the Samsung Galaxy Note 2s tend to bring oversaturated colours that make skin tones look unnatural. They pop, but they pop a little too much. Theres a solution, though. In the settings menu is a Display Setting submenu that lets you choose how vivid the colours are. We recommend the "natural" or "movie" settings.
The Samsung Galaxy Note 2 has an excellent inbuilt media player, but there are some files it cant handle. We found that high-quality 1080p MKVs were too much for it. Snag a third-party media player like MX Player from the Google Play app store, though, and youll be flying. These can use software encoding to fill gaps in natuve video support.
One of the neatest additional features of the Samsung Galaxy S3 and Galaxy Note 2 is that you can overlay a video playback screen on top of any part of the phone. Just press a button in the nav bar of the media player and a little window will pop-up on the homescreen, playing the vid. Watch an episode of Peep Show while browsing the web? Dont mind if I do.
One of the best ways to show off the Sasmung Galaxy Note 2s screen is with a fancy 3D game. Top free picks to try include Dead Trigger.
The standard setting of the Samsung Galaxy Note 2 uses automatic brightness, which judges the intensity of screen brightness using an ambient light sensor on the front. If its still not bright enough at the max slider point, switch off the auto mode for real searing intensity. But it will affect battery life.
The Samsung Galaxy Note 2s microUSB port is more special than you might guess. It has MHL capabilities when used with a special Samsung cable, letting it output HD video and surround audio. The Samsung adapter, which is essentially an MHL-to-HDMI converter costs around £25. The Samsung Galaxy Note 2 does not come bundled with one, though.
If you want to output surround sound, make sure you tick the Surround box within the Settings menu. This isnt within the Audio bit, which you might expect, but is actually in the Accessory submenu.
The Samsung Galaxy Note 2 has a massive 3100mAh battery. Stamina is good at the worst of times, but theres also an auto power management mode to make the most of the phones juice. Its called Power Saving and has its own section within the main Settings menu. It can throttle the CPU, change the background of the web browser to conserve power (it turns the white background blue), and turns off haptic feedback. These are compromises, but they do work.
The best way to conserve power in any phone is to switch off features - most importantly 3G mobile internet. You can do this manually in the Samsung Galaxy Note 2, directly from the pull-down notifications menu, and apps such as MySettings let you do the same thing.
Another dead simple trick is to reduce the screen timeout time. This is in the Display submenu within settings, and lets you choose between 15 sec and 10 minutes of time the screen stays lit after a screen press. Its hardly a secret, but it is something not enough people consider.
In a time of non-removable batteries - the HTC One X and iPhone 5 to name but two - we love that the Samsung Galaxy Note 2 has a removable battery. You can swap it out within about 15 seconds. Spare batteries are available from eBay for well under £10. We recommend shopping around for a reliable brand though as some third-party batteries are as dodgy as Del Boys VCRs.
The S Pen digitser sucks away at the Note 2s battery life a little, so its a good idea to switch off the detection feature entirely if youre unlikely to use it for an extended period. Youll find it within the S Pen sub-menu in Settings.
An S Pen feature thats easy to miss is Quick Commands. This lets you launch any app on the phone with a quick flick of the S Pen. Just press the stylus button and swipe up the screen, and the Quick commands box will pop-up. Draw your pre-determined character or symbol and key-presto, the right app will launch.
The Samsung Galaxy Note 2 features excellent OCR, optical character recognition, and its built into the Samsung keyboard. Whip out the S Pen and the keyboard area will turn into a little box for you to write in, whether youre writing an email, text or searching the web. Its remarkably clever at working out your scribbles too although we havent tested it on a doctor yet.
We love the S Pen, but the thing is terribly easy to lose. Samsung has devised a way to make sure you dont leave home without it. Its called S Pen keeper. Using the accelerometer and the digitiser sensor of the Note 2, the phone can tell when youre walking away without the stylus in its little hole in the bottom of the device. Walk far enough and it bleats out an alarm tone.
The stylus of the Samsung Galaxy Note 2 makes it an obvious choice for creative types, business types and a host of other busy folk. But itll keep the kids entertained too. S Note has a feature called Idea Sketch, which lets you write the name of an object, only for it to appear in your sketch. Its a perfect educational tool, and a fun one too.
The Samsung Galaxy Note 2 comes setup for right-handers as standard, but theres also a mode for lefties in the Settings menu. This offsets the digitiser sensor, to compensate for the way those strange left-handed types hold pens. A creepy bunch, arent they?
Heres one feature we were a little surprised to see in a device thats such a geeks dreamphone. The Samsung Galaxy Note 2 has a mode called Easy home screen, which simplifies the layout of the phones home screens in a way that even your technophobe grandma might be able to get along with.
The music player of the Samsung Galaxy Note 2 features a fun little extra called Music square. This scans through your music library, arranging the tracks by mood - passionate, calm, exciting, joyful or a little in-between. Tap a block in the 5x5 square grid and youll be greeted with a tune to match your mood.
If youre out to spend as little as possible (and the Note 2 doesnt come cheap as it is), your best bet is to buy the cheapest 16GB model, and supplement any other storage needs with a microSD card. Top retailers for bargain basement-price memory cards include 7DayShop and Ebuyer. A 32GB microSD card these days will set you back less than £15 if you shop hard enough.
Cloud storage is the future - you may not like it, but you may as well embrace it. Samsung Galaxy Note 2 owners get to benefit from 50GB of free cloud storage from one of the best providers out there - Dropbox. There are Dropbox apps for mobiles, tablets and computers, and it honestly works like a dream. If this wont convert you, nothing will. You only normally get 2GB of free from Dropbox, making it a pretty sweet deal.
Samsung Galaxy Note 2 Contacts
Nab contacts from Facebook and Twitter
When we first got our Samsung Galaxy Note 2 in, it didnt have any of the usual social apps installed. Even if youre not a massive mobile Facebook-er, its worth giving the app a download because it lets you harvest contacts from the network, making populating your contacts book a good deal easier.
Do you have a bug-a-boo stalking you? Is there a creep who keeps calling? The Samsung Galaxy Note 2 lets you keep them away with the blocking mode. It restricts notifications and calls from all but your approved contacts - and that can be at all times, or just during the hours you choose.
Samsung Galaxy Note 2 Camera and Video
Use HDR mode in mixed lighting - or all the time
The 8-megapixel sensor of the Samsung Galaxy Note 2 is pretty good on its own, but the neat camera app ups its skills significantly. One of our favourite bonus bits is the HDR mode. This effectively combines multiple exposure in a single shot to bring out extra detail in shadows. Both the HDR and normal shots are saved, meaning theres very little downside - other than that taking shots is a little bit slower.
Nestled within the menus of the video camera app are fast and slow motion modes, capturing either more or fewer frames per second than normal. Its not quite the 120fps mode you get in some dedicated cameras, but will come in handy if youre trying to video a sports event, for example.
The Samsung Galaxy Note 2 doesnt have the fun face-distorting video effects you get with a vanilla Jelly Bean phone, but it does have a range of funky filters. There are colour pop modes, extracting all but certain shades from your videos, and the cartoon filter is perfect for some arty rotoscope-style vids.
Each time you take a photo, a shutter sound plays in the Samsung Galaxy Note 2. However, we found that occasionally the phone needs a little bit longer to attain a solid focus. Hold still for an extra half-second for good measure.
Using Air View, if you hold the pen over the transport bar of a movie clip in the media player, youll be given a preview of whats going on in the film at that point. It makes finding the right part of a film or TV ep a doddle.
Samsung Galaxy Note 2 Connectivity
Dont go over you allowance, with Data Usage
A staple Android feature is the Data Usage counter. This can be found within the Settings menu, and it monitors your data usage, showing it as a colourful graph. You can use it to cut off your mobile data connection once you reach a certain limit, to ensure you wont get charged by your carrier.
Weve already endorsed drag n drop file transfers over Kies syncing, but if youre a Kies fan, dont forget that you can also sync wirelessly. To set this feature up, scroll to the bottom of the More Settings sub-menu, where youll find the Kies via Wi-Fi option.
S Beam
A feature introduced with the Samsung Galaxy S3, S Beam uses a mixture of NFC and Wi-Fi Direct to let you transfer files between compatible Samsung phones. You just need to tap the phones together to get them playing. S Beam needs to be switched on, though, from within the Wireless and Networks menu.
NFC lets you buy coffee
The NFC connectivity of the Samsung Galaxy Note 2 also let you buy small items such as cups of coffee, sandwiches and the like. Several big high street chains have taken the NFC plunge, including Starbucks and EAT, using apps to let you dump credit onto your phone.
Share screens with AllShare Cast
AllShare used to be just about sending a video file from, say, your phone to your Blu-ray player. But now it does a lot more. AllShare Cast lets you send your Galaxy Note 2s screen contents to another display, a bit like AirPlay Mirroring.
Forget Bluetooth, Wi-Fi Direct is better
Wi-Fi Direct is tied into the S Beam transfer feature, but you can also use it easily on its own. This is a version of Wi-Fi that doesnt need an internet connection, as it can hook-up directly with another compatible device. It some ways its a successor to Bluetooth, letting you transfer files, and at a much greater speed than old Bluetooth could handle.
Watch your 4G
If you want to get a 4G-capable Note 2, be aware that the LTE edition is separate from the standard one. EE says itll stock the LTE Galaxy Note 2 from October 15.
Read More..

Samsung Galaxy Note 2 Screen and video
Get AMOLED colours in check
OLED-based screens like the Samsung Galaxy Note 2s tend to bring oversaturated colours that make skin tones look unnatural. They pop, but they pop a little too much. Theres a solution, though. In the settings menu is a Display Setting submenu that lets you choose how vivid the colours are. We recommend the "natural" or "movie" settings.
Fill video codec gaps with third-party players
The Samsung Galaxy Note 2 has an excellent inbuilt media player, but there are some files it cant handle. We found that high-quality 1080p MKVs were too much for it. Snag a third-party media player like MX Player from the Google Play app store, though, and youll be flying. These can use software encoding to fill gaps in natuve video support.
Video multi-tasking is in
One of the neatest additional features of the Samsung Galaxy S3 and Galaxy Note 2 is that you can overlay a video playback screen on top of any part of the phone. Just press a button in the nav bar of the media player and a little window will pop-up on the homescreen, playing the vid. Watch an episode of Peep Show while browsing the web? Dont mind if I do.
Free games to show off the screen
One of the best ways to show off the Sasmung Galaxy Note 2s screen is with a fancy 3D game. Top free picks to try include Dead Trigger.
Not bright enough? Turn off auto
The standard setting of the Samsung Galaxy Note 2 uses automatic brightness, which judges the intensity of screen brightness using an ambient light sensor on the front. If its still not bright enough at the max slider point, switch off the auto mode for real searing intensity. But it will affect battery life.
The microUSB port can output video
The Samsung Galaxy Note 2s microUSB port is more special than you might guess. It has MHL capabilities when used with a special Samsung cable, letting it output HD video and surround audio. The Samsung adapter, which is essentially an MHL-to-HDMI converter costs around £25. The Samsung Galaxy Note 2 does not come bundled with one, though.
Mini home cinema? Tick the surround box
If you want to output surround sound, make sure you tick the Surround box within the Settings menu. This isnt within the Audio bit, which you might expect, but is actually in the Accessory submenu.
Samsung Galaxy Note 2 Battery life
Keep battery life riding high with auto management
The Samsung Galaxy Note 2 has a massive 3100mAh battery. Stamina is good at the worst of times, but theres also an auto power management mode to make the most of the phones juice. Its called Power Saving and has its own section within the main Settings menu. It can throttle the CPU, change the background of the web browser to conserve power (it turns the white background blue), and turns off haptic feedback. These are compromises, but they do work.
Switch off features for extra battery life
The best way to conserve power in any phone is to switch off features - most importantly 3G mobile internet. You can do this manually in the Samsung Galaxy Note 2, directly from the pull-down notifications menu, and apps such as MySettings let you do the same thing.
Reduce screen timeout time
Another dead simple trick is to reduce the screen timeout time. This is in the Display submenu within settings, and lets you choose between 15 sec and 10 minutes of time the screen stays lit after a screen press. Its hardly a secret, but it is something not enough people consider.
Grab a spare battery, live forever
In a time of non-removable batteries - the HTC One X and iPhone 5 to name but two - we love that the Samsung Galaxy Note 2 has a removable battery. You can swap it out within about 15 seconds. Spare batteries are available from eBay for well under £10. We recommend shopping around for a reliable brand though as some third-party batteries are as dodgy as Del Boys VCRs.
Turn off S Pen
The S Pen digitser sucks away at the Note 2s battery life a little, so its a good idea to switch off the detection feature entirely if youre unlikely to use it for an extended period. Youll find it within the S Pen sub-menu in Settings.
Samsung Galaxy Note 2 S Pen
Quick commands let you launch… anything
An S Pen feature thats easy to miss is Quick Commands. This lets you launch any app on the phone with a quick flick of the S Pen. Just press the stylus button and swipe up the screen, and the Quick commands box will pop-up. Draw your pre-determined character or symbol and key-presto, the right app will launch.
OCR means you can forget the virtual keyboard
The Samsung Galaxy Note 2 features excellent OCR, optical character recognition, and its built into the Samsung keyboard. Whip out the S Pen and the keyboard area will turn into a little box for you to write in, whether youre writing an email, text or searching the web. Its remarkably clever at working out your scribbles too although we havent tested it on a doctor yet.
S Pen keeper - its a keeper
We love the S Pen, but the thing is terribly easy to lose. Samsung has devised a way to make sure you dont leave home without it. Its called S Pen keeper. Using the accelerometer and the digitiser sensor of the Note 2, the phone can tell when youre walking away without the stylus in its little hole in the bottom of the device. Walk far enough and it bleats out an alarm tone.
Keep the kids happy with S Note
The stylus of the Samsung Galaxy Note 2 makes it an obvious choice for creative types, business types and a host of other busy folk. But itll keep the kids entertained too. S Note has a feature called Idea Sketch, which lets you write the name of an object, only for it to appear in your sketch. Its a perfect educational tool, and a fun one too.
Air View - hover pen fun
Somethingthat makes the Samsung Galaxy Note 2 S Pen so much more than a standard stylus is that it can be sensed without even touching the screen. Samsung makes great use of this with Air View. Its used throughout Samsungs apps, and makes info pop-up when the S Pen hovers over items. For example, you can read the first lines of emails, see previews of pictures and take a closer look at calendar events. Its fantastic.You can scribble - on anything
The Samsung Galaxy Note 2 S Pen also let you scribble notes on anything. Just hold the button on the stylus down, press the nib down on the screen and hold it there until you see a flash around the screen edges. This is the phone taking a screenshot of whats on-screen, which you can then write notes on. This is further integrated into apps like S Planner, which have dedicated handwriting modes.Other apps use S Pen pressure sensitivity
Now that the Note series is fairly established, a bunch of excellent apps already make use of the pressure sensitive S Pen stylus. Top picks include Sketchbook Pro and Infinite Painter. Its not just S Note that shows the S Pen off these days.The S Pen takes screengrabs
Heres a really neat S Pen tool to show off to your "non stylus" friends. Press down the button on the Galaxy Note 2 stylus, draw a shape on the screen and whatevers on-screen within the shape will be saved as a screengrab.For full S Pen compatibility, check out Samsung Apps
Samsung says that if you want full S Pen certified apps, youll need to go to the Samsung Apps store. This comes built into the Note 2, and theres even an S Pen apps section. At present, youre still best off using the Play Store as well, though, as the Samsung Apps store isnt exactly rammed full of Note 2 apps yet.Left handers need a tweak
The Samsung Galaxy Note 2 comes setup for right-handers as standard, but theres also a mode for lefties in the Settings menu. This offsets the digitiser sensor, to compensate for the way those strange left-handed types hold pens. A creepy bunch, arent they?
Samsung Galaxy Note 2 Interface
One for your grandma? Easy home screen modeHeres one feature we were a little surprised to see in a device thats such a geeks dreamphone. The Samsung Galaxy Note 2 has a mode called Easy home screen, which simplifies the layout of the phones home screens in a way that even your technophobe grandma might be able to get along with.
Full screengrabs are easy
Like the Samsung Galaxy S3, the Note 2 makes it pretty easy to take screengrabs of whatevers on the phones display. Just hold down the home button and the power button at the same time, wait or a white flash and a screengrab will be taken and whisked over to the Gallery app.Use one-handed operation mode for on-the-go use
The big screen is one of the main selling points of the Samsung Galaxy Note 2, but it doesnt half make it hard to use one-handed. Knowing this, Samsung as included a one-handed mode, which organises things like the keypad, virtual keyboard and the unlock pattern screen so that you can operate them with one mitt. Youll find it in the Settings menu.Dont forget side-loading of apps
The Samsung Galaxy Note 2 is an Android device, with all the benefits that brings. You dont have to rely on the official Google Play app store for one, with APK installation files available for all sorts of other apps online. Be careful, though, as Android viruses are a real issue.Customise your phone with non-Samsung widgets
Samsung supplied a nice handful of widgets with which you can customise your home screens, but far too few people try a new look with third-party widgets from Google Play. And there are loads out them out there. Some of our old faves include those of the Beautiful Widgets package.Samsung Galaxy Note 2 Gadgets and Gimmicks
Motion control Heres one were not big fans of, but some of you may like it. The Samsung Galaxy Note 2 lets you control things like the photo gallery and the navigation of you home screens using the accelerometer - by tilting your phone, basically. You can turn it off, though, and its set to "off" as standard. Phew.Face unlock
A bit Minority Report, this one. The Samsung Galaxy Note 2 can scan your face to unlock your phone. It takes a picture of your mug, remembers the basic geometry of it and then scans your face whenever you try and unlock the phone. It works pretty well, but as a security measure is about as flimsy as the padlock on a filofax.Smart Stay
The last user-facing camera gimmick is one that sounds kinda neat in principle. It scans for your eyes to check if youre reading, and if it spots them, Smart Stay stops the backlight from turning off. Its designed to make reading on the Samsung Galaxy Note 2 a good deal less frustrating. Its a feature youll find in the Settings menu.Jelly Bean easter egg
The Jelly Bean easter egg has made it in the Samsung Galaxy Note 2. Go to Settings menu > About device and tap on the Android version number entry. Youll be transported to a screen with a picture of a giant jelly bean on it. Hold your finger down on said jelly bean and the screen will fill up with dozens of the blighters, which you can flick around. Pure joy.Arrange your music by moods
The music player of the Samsung Galaxy Note 2 features a fun little extra called Music square. This scans through your music library, arranging the tracks by mood - passionate, calm, exciting, joyful or a little in-between. Tap a block in the 5x5 square grid and youll be greeted with a tune to match your mood.
Samsung Galaxy Note 2 Storage
Expandable storage - where to get it cheap
If youre out to spend as little as possible (and the Note 2 doesnt come cheap as it is), your best bet is to buy the cheapest 16GB model, and supplement any other storage needs with a microSD card. Top retailers for bargain basement-price memory cards include 7DayShop and Ebuyer. A 32GB microSD card these days will set you back less than £15 if you shop hard enough.
Flush the cache for extra memory
If you find yourself running low on memory, you can easily delete the cache and temporary files of any apps you have installed. To do this, go to the Applications Manager section within settings and tap on an app to see how much memory its leeching. There will be buttons to wipe the cache and data for the app here.Comes with 50GB of dropbox storage
Cloud storage is the future - you may not like it, but you may as well embrace it. Samsung Galaxy Note 2 owners get to benefit from 50GB of free cloud storage from one of the best providers out there - Dropbox. There are Dropbox apps for mobiles, tablets and computers, and it honestly works like a dream. If this wont convert you, nothing will. You only normally get 2GB of free from Dropbox, making it a pretty sweet deal.
Dont sync, drag n drop
If you chose to go Android rather than opting for an iPhone, theres a good chance that the open-ness of the platform had something to do with it. Samsung is keen on trying to make its users adopt the Kies desktop software, but its actually completely unnecessary. Plug the Samsung Galaxy Note 2 into a computer with a microUSB cable and itll show up as a media player drive, which you can drag and drop all kinds of files onto. Transfer speeds are impressively fast too.Samsung Galaxy Note 2 Contacts
Nab contacts from Facebook and Twitter When we first got our Samsung Galaxy Note 2 in, it didnt have any of the usual social apps installed. Even if youre not a massive mobile Facebook-er, its worth giving the app a download because it lets you harvest contacts from the network, making populating your contacts book a good deal easier.
Blocking Mode
Do you have a bug-a-boo stalking you? Is there a creep who keeps calling? The Samsung Galaxy Note 2 lets you keep them away with the blocking mode. It restricts notifications and calls from all but your approved contacts - and that can be at all times, or just during the hours you choose.
Samsung Galaxy Note 2 Camera and Video
Use HDR mode in mixed lighting - or all the time The 8-megapixel sensor of the Samsung Galaxy Note 2 is pretty good on its own, but the neat camera app ups its skills significantly. One of our favourite bonus bits is the HDR mode. This effectively combines multiple exposure in a single shot to bring out extra detail in shadows. Both the HDR and normal shots are saved, meaning theres very little downside - other than that taking shots is a little bit slower.
Check out slow and fast motion modes
Nestled within the menus of the video camera app are fast and slow motion modes, capturing either more or fewer frames per second than normal. Its not quite the 120fps mode you get in some dedicated cameras, but will come in handy if youre trying to video a sports event, for example.
Dont forget video effects
The Samsung Galaxy Note 2 doesnt have the fun face-distorting video effects you get with a vanilla Jelly Bean phone, but it does have a range of funky filters. There are colour pop modes, extracting all but certain shades from your videos, and the cartoon filter is perfect for some arty rotoscope-style vids.
Give the exposure longer time than the sound effect suggests
Each time you take a photo, a shutter sound plays in the Samsung Galaxy Note 2. However, we found that occasionally the phone needs a little bit longer to attain a solid focus. Hold still for an extra half-second for good measure.
Get vid previews with Air View
Using Air View, if you hold the pen over the transport bar of a movie clip in the media player, youll be given a preview of whats going on in the film at that point. It makes finding the right part of a film or TV ep a doddle.
Samsung Galaxy Note 2 Connectivity
Dont go over you allowance, with Data Usage A staple Android feature is the Data Usage counter. This can be found within the Settings menu, and it monitors your data usage, showing it as a colourful graph. You can use it to cut off your mobile data connection once you reach a certain limit, to ensure you wont get charged by your carrier.
Wi-Fi sync with Kies
Weve already endorsed drag n drop file transfers over Kies syncing, but if youre a Kies fan, dont forget that you can also sync wirelessly. To set this feature up, scroll to the bottom of the More Settings sub-menu, where youll find the Kies via Wi-Fi option.
S Beam
A feature introduced with the Samsung Galaxy S3, S Beam uses a mixture of NFC and Wi-Fi Direct to let you transfer files between compatible Samsung phones. You just need to tap the phones together to get them playing. S Beam needs to be switched on, though, from within the Wireless and Networks menu.NFC lets you buy coffee
The NFC connectivity of the Samsung Galaxy Note 2 also let you buy small items such as cups of coffee, sandwiches and the like. Several big high street chains have taken the NFC plunge, including Starbucks and EAT, using apps to let you dump credit onto your phone.Share screens with AllShare Cast
AllShare used to be just about sending a video file from, say, your phone to your Blu-ray player. But now it does a lot more. AllShare Cast lets you send your Galaxy Note 2s screen contents to another display, a bit like AirPlay Mirroring. Forget Bluetooth, Wi-Fi Direct is better
Wi-Fi Direct is tied into the S Beam transfer feature, but you can also use it easily on its own. This is a version of Wi-Fi that doesnt need an internet connection, as it can hook-up directly with another compatible device. It some ways its a successor to Bluetooth, letting you transfer files, and at a much greater speed than old Bluetooth could handle. Watch your 4G
If you want to get a 4G-capable Note 2, be aware that the LTE edition is separate from the standard one. EE says itll stock the LTE Galaxy Note 2 from October 15.Saturday, October 25, 2014
How to install Clockworkmod CWM Recovery on Verizon Samsung Galaxy S3 I535
This guide helps to flash CWM Recovery image for the root users on their Verizon Galaxy S III smartphone (model number I535). In this article if you’ll read all the instructions above presented, you’ll be able to install the ClockworkMod Recovery in one easy and friendly way normally if you’re an advanced Android user.
If your Android phone was rooted then is important to install CWM Recovery,this thing helps root android phone owners to install and custom ROMs, with CMW Recovery you’ll add new functions in the administration on your phone, will improve the performances with new options in a unique look and give you control to do everything you want in your Galaxy S3 without restrictions.
This tutorial is available only if you have a rooted Galaxy S3 on Verizon, be sure to apply all this information showed in this guide to make a good configuration for preparing your computer and your smartphone which you’ll needs for installation process .
If your Android phone was rooted then is important to install CWM Recovery,this thing helps root android phone owners to install and custom ROMs, with CMW Recovery you’ll add new functions in the administration on your phone, will improve the performances with new options in a unique look and give you control to do everything you want in your Galaxy S3 without restrictions.
This tutorial is available only if you have a rooted Galaxy S3 on Verizon, be sure to apply all this information showed in this guide to make a good configuration for preparing your computer and your smartphone which you’ll needs for installation process .
Below we have what its need to know before make the CWM Recovery on Verizon S3 phone installation:
- First step is to root your devices using the guide for: Root Verizon Samsung Galaxy S3 I535 .
- Now enable USB debugging option on your Samsung Galaxy S3 device.
- Go to charge the smartphone’s battery, is important because if your phone going to power OFF while flashing the ClockworkMod is very bad for your device.
- Now disable the antivirus protection and antimalware programs which running on your phone.
- Use this CMW Recovery installation only on Verizon Samsung Galaxy S3 devices with the I535 model number.
- This guide should be applied only by advanced Android users. If you don’t have enough experience with the advanced configuration in Android operating systems, you should read this tutorial multiple times, and be sure that you know exactly how to apply this instruction on your devices. Also we recommend reading other tutorials more detailed in the same subject.
Disclaimer: Follow all the instructions carefully mentioned in this article, we should not be held responsible in any manner if you damage your device during the installation of custom recovery image and you should know that you’re applying these changes at your own risk.
Now you can start installing the custom recovery image file. If you cannot install CWM please feel free to ask for our help in comments section. But explain exactly step by step your problem.
Guide to “How to install Clockworkmod Recovery on Verizon Samsung Galaxy S3 I535”
- First download the CWM recovery image file from HERE
- Now connect your smartphone to your PC use the original USB cable.
- Copy the recovery.img file on your Galaxy S III Verizon on internal SDcard, be carefully, don’t make another new folder, just drag and drop the file on the internal SDcard on main folder.
- Now disconnect your phone device from your PC.
- Go to download and then install Terminal Emulator application on your smartphone from Google Play Store download .
- Now launch application the Terminal Emulator.
- In the Terminal Emulator app enter the next command: su
- Tap ‘Allow/ Grant’ button to allow root access for TE.
- Enter following command to install the CWM Recovery file: dd if=/sdcard/recovery.img of=/dev/block/mmcblk0p18 (this command will install the Clockworkmod Recovery on your device).
- Now test to see if was successfully installed. Type this command in Terminal Emulator app: reboot recovery
- Your device will restart into CWM Recovery menu and now you can use it to flash new custom ROMs and other file and applications.
Note: If you want to restart your Galaxy S3 Verizon phone into normal Android mode, please select the ‘reboot system now’ option from the CWM Recovery main menu and now wait for doing this process.
Now your phone has CWM Recovery installed. If you have problems and you didn’t manage to flash the files, feel free to ask us in comments section and let us to know step by step all the details and we will try to help you to complete the installation.
Remember you’ve installed this all files at your own risk and you shouldn’t blame us in case your smartphone got damage or you lost any files during the installation
Wednesday, September 24, 2014
Samsung Galaxy Star S5282 hard reset
How to hard reset:
If you forgot your Lcd lock combination or password follow these steps.
Warning !All data will be lost!
1.Press together home button + power button
2.Release your fingers of the phone when Samsung logo appear
3.Choose with volume buutons "wipe data/factory reset" and select it with home button
4.Choose "yes" with volume buttons and select it with home button
5.Wait untiil format is complete
6.Select "reboot"
Read More..
If you forgot your Lcd lock combination or password follow these steps.
Warning !All data will be lost!
1.Press together home button + power button
2.Release your fingers of the phone when Samsung logo appear
3.Choose with volume buutons "wipe data/factory reset" and select it with home button
4.Choose "yes" with volume buttons and select it with home button
5.Wait untiil format is complete
6.Select "reboot"
Sunday, September 21, 2014
Tuesday, September 16, 2014
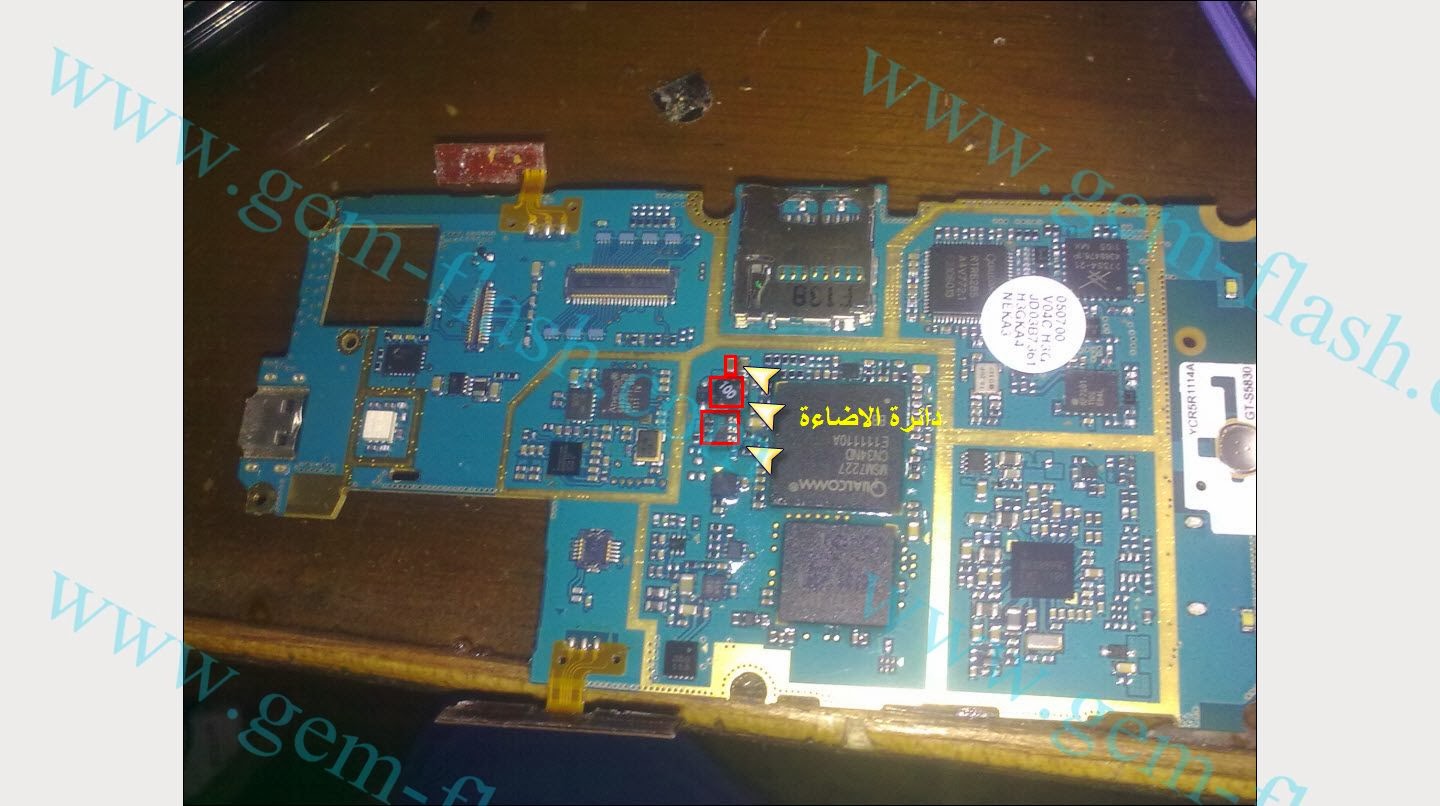
Samsung S5830 Cellular Phone No Network Solution
Samsung S5830 Cellular Phone No Network Solution,Samsung S5830 Cellular Phone No Network Ways Solution,Samsung S5830 Cellular Phone No Network Jumper Solution,Samsung S5830 Cellular Phone No Network Repair Solution,Samsung S5830 Cellular Phone No Network Tricks Solution,Samsung S5830 Cellular Phone No Network Ways Damage Solution,Samsung S5830 Cellular Phone Network Weak Solution,Samsung S5830 Cellular Phone No Service Network Solution,Can You Filling Borred Your Samsung S5830 Cellular Phone White Screen Problem,Not Show Display Text Now See Our Previous Post & Making Smile Your Face ,Samsung S5830 Cellular Phone Limited Service Network Solution,Samsung S5830 Cellular Phone No Network Ic Jumper Solution,How To Working Samsung S5830 Cellular Phone No Network Solution Guide On Red Marked Shown On Diagram,Samsung S5830 Cellular Phone No Network Solution Besttricks ,Samsung S5830 Cellular Phone No Network Solution Procedure Step By Step Here Work It Your OWn Risk Mustbe Share This Post If You Tested & tnxx To Visit Again Our Best Cellular Phone Repairing Store.
Saturday, September 13, 2014
Samsung Galaxy S3 Lcd Light fix problem
Samsung Galaxy S3 Lcd Light How to Fix problem,Samsung Galaxy S3 Lcd backLight How to Fix problem,Samsung Galaxy S3 no Light How to Fix problem,Samsung Galaxy S3 Lcd Light ic damage How to Fix problem,Samsung Galaxy S3 Lcd Light repair How to Fix problem,Samsung Galaxy S3 Lcd Light parts ways How to Fix problem,Samsung Galaxy S3 no Lcd Light How to Fix problem which parts are damage repair Guide.
Friday, September 12, 2014
samsung tool usb smart
200, 210, 216, 225, 230
D Series:
100, 307, 347, 357, 407, 410 415, 418, 428, 488, 500, 500E, 508, 510, 550, 600, 710, 720, 730, 800, 820,
E Series:
100, 105, 217, 300, 310, 315, 316, 317, 318, 320, 330, 335, 338, 340, 350, 400, 418, 530, 560, 600, 608, 610, 620, 630, 635, 700, 710, 715, 720, 730, 760, 770, 800, 810, 820, 850, 860, 880, 910
I Series:
300, 505, 700
N Series:
700, 710
P Series:
100, 207, 400, 705, 710, 720, 730, 735, 738, 777
S Series:
100, 105, 200, 300, 341, 342, 400, 410, 500, 500I
T Series:
309, 609, 719, 809
V Series:
100, 200
X Series:
100, 105,120, 138, 140, 150, 156, 200, 400, 426, 427, 430, 450, 460, 466, 475, 478, 480, 486, 490, 495, 497, 507, 600, 610, 620, 630, 640, 660, 700, 800, 810, 900
Z Series:
100, 105, 107, 110, 130, 140, 300, 500, 510, 700, M60, V10, V30, X10
Download
http://rapidshare.com/files/170173805/samsung_tool_usb-smart_fixedgsm.blogspot.com.rar
Samsung Gt S3653 mmc solution tested
Samsung Gt-S3653 mmc
Thursday, September 11, 2014
Samsung Galaxy Ace 3 LTE S7275R with Android 4 2 2 XXUANA3 Jelly Bean Official Firmware How To Guide
Samsung Galaxy Ace 3 with LTE connectivity has just received the latest Android 4.2.2 Jelly Bean update with firmware build number S7275RXXUANA3. The new official firmware is now available as an Over-The-Air (OTA) update as well as through Samsung KIES.
Firmware details
PDA: S7275RXXUANA3
CSC: S7275ROLBANA1
MODEM: S7275RXXUAML1
Version: Android 4.2.2
Build date: Jan 13, 2014
Regions: Singapore, Malaysia
Samsung Galaxy Ace 3 (LTE) S7275R users who missed the OTA update notification or unable to access the update over Samsung KIES, can now download and install the same manually using our step-by-step guide.
Pre-requisites
1. Install USB Drivers for Samsung Galaxy Ace 3 on the computer.
2. Enable USB Debugging Mode on the phone by navigating to Settings >> Developer Options.
3. Make a backup of all your important data before following the guide.
4. The Galaxy Ace 3 should be factory unlocked and not locked to any particular carrier.
5. Ensure the battery of the phone is charged more than 80 percent.
6. The Android 4.2.2 XXUANA3 Jelly Bean firmware is compatible only with the LTE version of Samsung Galaxy Ace 3 (GT-S7275R). Applying this to any incorrect variant might brick the device. Verify the model number of the Galaxy Ace 3 by navigating to Settings >> About Phone.
Files Required
1. Android 4.2.2 XXUANA3 Jelly Bean Firmware (Mirror Link) for Galaxy Ace 3 (LTE) S7275R
2. Odin 3.07 (Mirror Link)
Steps to Update Galaxy Ace 3 (LTE) S7275R with Android 4.2.2 XXUANA3 Jelly Bean Firmware
Step 1: Extract Firmware zip file using WinRAR/7-Zip/WinZip or any other extracting tool, you will get a .tar.md5 file and some other files (optional).
Step 2: Extract Odin zip file and you will get Odin3 v3.07.exe along with few other files.
Step 3: Switch off the Galaxy Ace 3.
Step 4: Boot the device into Download Mode by pressing and holding Volume Down, Home and Power buttons together until a construction Android robot icon with a warning triangle appears on Lcd. Now press the Volume Up button to enter Download Mode.
Step 5: Run Odin on the computer as an Administrator.
Step 6: Connect the Galaxy Ace 3 to the computer using USB cable while it is in the Download Mode. Wait until Odin detects the device. When the device is connected successfully, the ID: COM box will turn to light blue with the COM port number. Additionally, the successful connected will be indicated by a message saying Added.
Note: If the Added message does not appear, then try re-install USB drivers or changing the port on the computer.
Step 7: Select the following files in Odin from extracted S7275RXXUANA3 firmware folder:
Firmware details
PDA: S7275RXXUANA3
CSC: S7275ROLBANA1
MODEM: S7275RXXUAML1
Version: Android 4.2.2
Build date: Jan 13, 2014
Regions: Singapore, Malaysia
Samsung Galaxy Ace 3 (LTE) S7275R users who missed the OTA update notification or unable to access the update over Samsung KIES, can now download and install the same manually using our step-by-step guide.
Pre-requisites
1. Install USB Drivers for Samsung Galaxy Ace 3 on the computer.
2. Enable USB Debugging Mode on the phone by navigating to Settings >> Developer Options.
3. Make a backup of all your important data before following the guide.
4. The Galaxy Ace 3 should be factory unlocked and not locked to any particular carrier.
5. Ensure the battery of the phone is charged more than 80 percent.
6. The Android 4.2.2 XXUANA3 Jelly Bean firmware is compatible only with the LTE version of Samsung Galaxy Ace 3 (GT-S7275R). Applying this to any incorrect variant might brick the device. Verify the model number of the Galaxy Ace 3 by navigating to Settings >> About Phone.
Files Required
1. Android 4.2.2 XXUANA3 Jelly Bean Firmware (Mirror Link) for Galaxy Ace 3 (LTE) S7275R
2. Odin 3.07 (Mirror Link)
Steps to Update Galaxy Ace 3 (LTE) S7275R with Android 4.2.2 XXUANA3 Jelly Bean Firmware
Step 1: Extract Firmware zip file using WinRAR/7-Zip/WinZip or any other extracting tool, you will get a .tar.md5 file and some other files (optional).
Step 2: Extract Odin zip file and you will get Odin3 v3.07.exe along with few other files.
Step 3: Switch off the Galaxy Ace 3.
Step 4: Boot the device into Download Mode by pressing and holding Volume Down, Home and Power buttons together until a construction Android robot icon with a warning triangle appears on Lcd. Now press the Volume Up button to enter Download Mode.
Step 5: Run Odin on the computer as an Administrator.
Step 6: Connect the Galaxy Ace 3 to the computer using USB cable while it is in the Download Mode. Wait until Odin detects the device. When the device is connected successfully, the ID: COM box will turn to light blue with the COM port number. Additionally, the successful connected will be indicated by a message saying Added.
Note: If the Added message does not appear, then try re-install USB drivers or changing the port on the computer.
Step 7: Select the following files in Odin from extracted S7275RXXUANA3 firmware folder:
- Click the PDA button and select the .tar.md5 file.
- Click the Phone button and select file with MODEM in its name. Ignore if there is no such file.
- Click the CSC button and select file with CSC in its name. Ignore if there is no such file.
- Click the PIT button and select the .pit file. Ignore if there is no such file.
Step 8: In Odin, enable Auto Reboot and F. Reset Time checkboxes. Also, ensure the Re-Partition checkbox is chosen only if a .pit file was chosen in the previous step.
Step 9: Verify everything suggested in Step 7 and Step 8 is done correctly. Then hit the Start button to begin the installation process.
Step 10: Once the installation process completes, your phone will restart and soon you will see a PASS message with green background in the left-most box at the very top of the Odin. You can now unplug the USB cable to disconnect your device from the computer.
Samsung Galaxy Ace 3 (LTE) S7275R should be now updated with Android 4.2.2 XXUANA3 Jelly Bean official firmware. Head over to Settings >> About Phone to verify the software version running on the device.
Note: If Galaxy Ace 3 (LTE) S7275R stuck at booting animation after Step 10 then go to recovery mode (press and hold the Volume Up, Home and Power buttons together) and perform Wipe data/Factory Reset and Wipe Cache Partition task before selecting reboot system now function. In recovery mode use Volume keys to navigate between options and Power key to select the option. Please note, performing wiping task will erase your device internal memory data and not external SD card data.
Step 9: Verify everything suggested in Step 7 and Step 8 is done correctly. Then hit the Start button to begin the installation process.
Step 10: Once the installation process completes, your phone will restart and soon you will see a PASS message with green background in the left-most box at the very top of the Odin. You can now unplug the USB cable to disconnect your device from the computer.
Samsung Galaxy Ace 3 (LTE) S7275R should be now updated with Android 4.2.2 XXUANA3 Jelly Bean official firmware. Head over to Settings >> About Phone to verify the software version running on the device.
Note: If Galaxy Ace 3 (LTE) S7275R stuck at booting animation after Step 10 then go to recovery mode (press and hold the Volume Up, Home and Power buttons together) and perform Wipe data/Factory Reset and Wipe Cache Partition task before selecting reboot system now function. In recovery mode use Volume keys to navigate between options and Power key to select the option. Please note, performing wiping task will erase your device internal memory data and not external SD card data.
Samsung S4 i9505 Lcd Light Problem fix problem
Samsung S4 i9505 Lcd Light How to Fix problem, Samsung Galaxy S4 i9505 Display Light How to Fix problem,Samsung i9505 Lcd Light Ways Problem SOlution 100% Tested ,Check first the display.
Wednesday, September 10, 2014
Samsung Galaxy Mega 5 8 I9152 with Android 4 2 2 XXUANA1 Jelly Bean Official Firmware Install Easily Using Odin Guide
Firmware details
PDA: I9152XXUANA1
CSC: I9152OXEANA1
MODEM: I9152XXUANA1
Version: Android 4.2.2
Build date: Jan 28, 2014
Regions: Russia, Kazakhstan, Ukraine, Uzbekistan
Samsung Galaxy Mega 5.8 I9152 users who missed the OTA update notification or unable to access the update over Samsung KIES, may follow our step-by-step guide to install the update manually.
Pre-requisites
1. Install USB Drivers for Samsung Galaxy Mega 5.8 on the computer.
2. Enable USB Debugging Mode on the phone by navigating to Settings >> Developer Options.
3. Make a backup of all your important data before following the guide.
4. The Galaxy Mega 5.8 should be factory unlocked and not locked to any particular carrier.
5. Ensure the battery of the phone is charged more than 80 percent.
6. The Android 4.2.2 XXUANA1 Jelly Bean firmware is compatible only with the Samsung Galaxy Mega 5.8 (GT-I9152). Applying this to any incorrect variant might brick the device. Verify the model number of the Galaxy Mega 5.8 by navigating to Settings >> About Phone.
Files Required
1. Android 4.2.2 XXUANA1 Jelly Bean Firmware (Mirror Link) for Galaxy Mega 5.8 I9152
2. Odin 3.07
Steps to Update Galaxy Mega 5.8 I9152 with Android 4.2.2 XXUANA1 Jelly Bean Firmware
Related Article:Samsung Galaxy Mega 5.8 I9152 with Android 4.2.2 XWUANA6 Jelly Bean Official Firmware & How to Update Using Odin Guide
Samsung Galaxy Mega 5.8 I9152 with Android 4.2.2 XWUANA5 Jelly Bean Official Firmware & Install Odin Guide
Step 1: Extract Firmware zip file using WinRAR/7-Zip/WinZip or any other extracting tool, you will get a .tar.md5 file and some other files (optional).
Step 2: Extract Odin zip file and you will get Odin3 v3.07.exe along with few other files.
Step 3: Switch off the Galaxy Mega 5.8.
Step 4: Boot the device into Download Mode by pressing and holding Volume Down, Home and Power buttons together until a construction Android robot icon with a warning triangle appears on Lcd. Now press the Volume Up button to enter Download Mode.
Step 5: Run Odin on the computer as an Administrator.
Step 6: Connect the Galaxy Mega 5.8 to the computer using USB cable while it is in the Download Mode. Wait until Odin detects the device. When the device is connected successfully, the ID: COM box will turn to light blue with the COM port number. Additionally, the successful connected will be indicated by a message saying Added.
Note: If the Added message does not appear, then try re-install USB drivers or changing the port on the computer.
Step 7: Select the following files in Odin from extracted I9152XXUANA1 firmware folder:
- Click the PDA button and select the .tar.md5 file.
- Click the Phone button and select file with MODEM in its name. Ignore if there is no such file.
- Click the CSC button and select file with CSC in its name. Ignore if there is no such file.
- Click the PIT button and select the .pit file. Ignore if there is no such file.
Step 8: In Odin, enable Auto Reboot and F. Reset Time checkboxes. Also, ensure the Re-Partition checkbox is chosen only if a .pit file was chosen in the previous step.
Step 9: Verify everything suggested in Step 7 and Step 8 is done correctly. Then hit the Start button to begin the installation process.
Step 10: Once the installation process completes, your phone will restart and soon you will see a PASS message with green background in the left-most box at the very top of the Odin. You can now unplug the USB cable to disconnect your device from the computer.
Samsung Galaxy Mega 5.8 I9152 should be now updated with Android 4.2.2 XXUANA1 Jelly Bean official firmware. Head over to Settings >> About Phone to verify the software version running on the device.
Note: If Galaxy Mega 5.8 I9152 stuck at booting animation after Step 10 then go to recovery mode (press and hold the Volume Up, Home and Power buttons together) and perform Wipe data/Factory Reset and Wipe Cache Partition task before selecting reboot system now function. In recovery mode use Volume keys to navigate between options and Power key to select the option. Please note, performing wiping task will erase your device internal memory data and not external SD card data.
Click here to know How to Root Galaxy Mega 5.8 I9152 running on Android 4.2.2 Jelly Bean firmware.
Step 9: Verify everything suggested in Step 7 and Step 8 is done correctly. Then hit the Start button to begin the installation process.
Step 10: Once the installation process completes, your phone will restart and soon you will see a PASS message with green background in the left-most box at the very top of the Odin. You can now unplug the USB cable to disconnect your device from the computer.
Samsung Galaxy Mega 5.8 I9152 should be now updated with Android 4.2.2 XXUANA1 Jelly Bean official firmware. Head over to Settings >> About Phone to verify the software version running on the device.
Note: If Galaxy Mega 5.8 I9152 stuck at booting animation after Step 10 then go to recovery mode (press and hold the Volume Up, Home and Power buttons together) and perform Wipe data/Factory Reset and Wipe Cache Partition task before selecting reboot system now function. In recovery mode use Volume keys to navigate between options and Power key to select the option. Please note, performing wiping task will erase your device internal memory data and not external SD card data.
Click here to know How to Root Galaxy Mega 5.8 I9152 running on Android 4.2.2 Jelly Bean firmware.
Sunday, September 7, 2014
Saturday, September 6, 2014
Samsung Galaxy Young Tips and Tricks
How to Factory Reset (Hard Reset) Samsung Galaxy Young
We have our own reasons why we factory reset our device. Maybe we want to delete all the files and restore the device to its original state. It could also be the device may be malfunctioning or so slow and it needs to be reset.
Restoring the default settings or factory reset your Samsung Galaxy Young will delete all your existing files. It is recommended to backup your important files on your computer before attempting to reset your device.
The steps below are the instructions on how to factory reset your Samsung Galaxy Young:
Step 1. On your Homescreen, tap on MENU icon.
Step 2. Select "Settings", then scroll down and tap "Backup and reset" option.
Step 3. Then tap on “Factory Data Reset”.
Step 4. Read warning carefully before tapping the “Reset Device”.
Step 5. If you want to proceed in resetting your device, tap on “Erase everything” to confirm the Reset.
Now, you just need to wait while your device is resetting. It should reboot itself and you will have a new start on your Samsung Galaxy S3.
You may also use the shortcut method using the code: Enter *2767*3855# on your device.
Hard Reset:
1. Turn off your device.
How to Reduce the Battery Consumption on Samsung Galaxy Young
Battery Life depends on how you use your device. For Samsung Galaxy Young device, if you want to save your battery to last longer hours, you may need to adjust your settings.
All of us want to have a longer battery life on our phones. Follow these suggestions to reduce the battery consumption:
How to Reformat Memory Card on Samsung Galaxy Young
Formatting the memory card on your Samsung Galaxy Young will delete all the files that is stored on the memory card. It is recommended to backup your important files on your computer before attempting to format your memory card.
You may not be able to reformat your memory card on your computer. So try it through your device:
1. On your Home screen, tap Apps.
2. Select Settings.
3. Go to Storage.
4. Then tap Format SD card > Format SD card.
5. Tap Erase everything to confirm the action.
How to Import Contacts From Old Phone to New Phone (on Sony, iPhone, Samsung, HTC and Nokia)
Contacts is very important for everyone of us. We cant connect to our friends without a contact number. If you have a new phone, saving contacts on the phone one by one is so hassle. But now, theres an easy way how to transfer or import your contacts from your old phone to your new phone.
Use your PC to transfer contacts to your new phone. This process is applicable in several phone brands, including iPhone, Samsung, HTC and Nokia.
You just need an Internet Connection on your PC, your old and new phone and their own USB cable.
If you are not prompted with a pop-up window to install the PC Companion, you can also download the PC Companion here.
How to Secure Your Samsung Galaxy Young (Pattern, PIN and Password)
How to Upgrade With the Latest Software on Samsung Galaxy Young
Keeping your device updated with the latest software fixes bugs on your handset thus contributing to its efficiency and life span. Samsung allows you to install those updates in two ways- through Samsung Kies or Over-the-Air. Well heres how you can install those latest software firmware using this two methods.
Upgrading with Samsung Kies
1. First launch Samsung Kies.
2. Then connect your phone to the computer using the USB cable that came with it.
3. Now Samsung Kies will automatically recognizes your device and a dialogue box
appears showing the available updates, if any.
4. Click the update button in the dialogue box to start upgrad ting to te latest software.
While youre upgrading the device, you shouldnt turn off the computer or disconnect
te USB cable and dont connect other media devices to the computer as it may interfere
the upgrading process.
Upgrading over-the-air
1. Go the Applications screen and then tap Settings.
2. Then go to About device.
3. Select Software Update then hit on Update.
How to Make Your Samsung Galaxy Young a Portable Wi-Fi Hotspot
Smartphones these days can now share its mobile data connection and act as a portable Wi-Fi hotspot. And like those high-end gadgets, Samsung Galaxy Young is sure to let you experience the benefits of making it as a portable Wi-Fi hotspot. Heres how you can make your Samsung phone the next Wi-Fi hotspot.
1. On your device, go to Settings screen first.
2. Then tap Wi-Fi and tap
for more options.
3. Select Advanced options to customize your Wi-Fi settings.
4. Go to Tethering and portable hotspot.
5. And choose Portable Wi-Fi hotspot to share the devices mobile network connection.
And you now have a portable Wi-Fi hotspot using your Samsung Galaxy Young.
How to Install and Uninstall Apps on Samsung Galaxy Young
Read More..
Restoring the default settings or factory reset your Samsung Galaxy Young will delete all your existing files. It is recommended to backup your important files on your computer before attempting to reset your device.
The steps below are the instructions on how to factory reset your Samsung Galaxy Young:
Step 1. On your Homescreen, tap on MENU icon.
Step 2. Select "Settings", then scroll down and tap "Backup and reset" option.
Step 3. Then tap on “Factory Data Reset”.
Step 4. Read warning carefully before tapping the “Reset Device”.
Step 5. If you want to proceed in resetting your device, tap on “Erase everything” to confirm the Reset.
Now, you just need to wait while your device is resetting. It should reboot itself and you will have a new start on your Samsung Galaxy S3.
You may also use the shortcut method using the code: Enter *2767*3855# on your device.
Hard Reset:
1. Turn off your device.
2. Then press and hold Volume Down + Home Button + Power On.
3. Wait for a few seconds until the Factory reset menu appears.
4. Select "wipe data/factory reset" by using the Volume Down button.
How to Reduce the Battery Consumption on Samsung Galaxy Young
Battery Life depends on how you use your device. For Samsung Galaxy Young device, if you want to save your battery to last longer hours, you may need to adjust your settings.
All of us want to have a longer battery life on our phones. Follow these suggestions to reduce the battery consumption:
- Switch to Sleep mode by pressing the Power key when you are not using your device.
- Close any apps or features when you are done using it so they will not continuously running in the background.
- Turn off the network connection if you are out of range so that your device will stop searching for a network signal. (deactivate the Bluetooth feature, turn off the Wi-Fi feature when not in use, etc).
- Deactivate auto-syncing of applications.
- Decrease the backlight time.
- Lessen the screen brightness and the screen lock timeout.
How to Reformat Memory Card on Samsung Galaxy Young
Formatting the memory card on your Samsung Galaxy Young will delete all the files that is stored on the memory card. It is recommended to backup your important files on your computer before attempting to format your memory card.
You may not be able to reformat your memory card on your computer. So try it through your device:
1. On your Home screen, tap Apps.
2. Select Settings.
3. Go to Storage.
4. Then tap Format SD card > Format SD card.
5. Tap Erase everything to confirm the action.
How to Import Contacts From Old Phone to New Phone (on Sony, iPhone, Samsung, HTC and Nokia)
Contacts is very important for everyone of us. We cant connect to our friends without a contact number. If you have a new phone, saving contacts on the phone one by one is so hassle. But now, theres an easy way how to transfer or import your contacts from your old phone to your new phone.
Use your PC to transfer contacts to your new phone. This process is applicable in several phone brands, including iPhone, Samsung, HTC and Nokia.
You just need an Internet Connection on your PC, your old and new phone and their own USB cable.
Then you need to install the PC Companion program. This is a free application and the installation files are already saved on your new phone. This program can also be used in updating your phone software.
Please note that if you are using the Microsoft Windows 7 operating system on your PC, make sure that the AutoPlay setting is enabled.
To check your settings:
Click Start > Control Panel, then type "autoplay" on the search box. Click the AutoPlay, and mark the check box Use AutoPlay for all media and devices.
Installing the PC Companion:
- Turn on your new Phone and connect it to your PC.
- On your new Phone, tap "Install" to install PC Companion on the PC.
- On your computer, if a pop-up window that appears notifies you about available PC Software, select Run Startme.exe.
- Then click Install to start the installation and then follow the instructions to complete the installation.
If you are not prompted with a pop-up window to install the PC Companion, you can also download the PC Companion here.
Transferring your contacts to your new phone:
- Make sure that PC Companion is installed on your PC.
- Open the PC Companion application on your PC.
- Then click Contacts Setup and follow the instructions to transfer your contacts.
Securing your Samsung Galaxy Young is also important, specially if you have a private files that you dont want others to access it. So to prevent others from using your or accessing your personal data without your permission, then you may need to activate the security features. The device requires an unlock code whenever unlocking it.
Setting a pattern:
1. On the Applications screen, tap Settings.
2. Select Lock screen.
3. Then choose Screen lock.
4. Tap Pattern.
Draw a pattern by connecting four dots or more, and then draw the pattern again to verify it. Set a backup unlock PIN to unlock the screen when you forget the pattern.
Setting a PIN:
1. On the Applications screen, tap Settings.
2. Select Lock screen.
3. Then choose Screen lock.
4. Tap PIN.
Enter at least four numbers, and then enter the password again to verify it.
Setting a password:
1. On the Applications screen, tap Settings.
2. Select Lock screen.
3. Then choose Screen lock.
4. Tap Password.
Enter at least four characters including numbers and symbols, and then enter the password again to verify it.
Setting a pattern:
1. On the Applications screen, tap Settings.
2. Select Lock screen.
3. Then choose Screen lock.
4. Tap Pattern.
Draw a pattern by connecting four dots or more, and then draw the pattern again to verify it. Set a backup unlock PIN to unlock the screen when you forget the pattern.
Setting a PIN:
1. On the Applications screen, tap Settings.
2. Select Lock screen.
3. Then choose Screen lock.
4. Tap PIN.
Enter at least four numbers, and then enter the password again to verify it.
Setting a password:
1. On the Applications screen, tap Settings.
2. Select Lock screen.
3. Then choose Screen lock.
4. Tap Password.
Enter at least four characters including numbers and symbols, and then enter the password again to verify it.
How to Upgrade With the Latest Software on Samsung Galaxy Young
Keeping your device updated with the latest software fixes bugs on your handset thus contributing to its efficiency and life span. Samsung allows you to install those updates in two ways- through Samsung Kies or Over-the-Air. Well heres how you can install those latest software firmware using this two methods.
Upgrading with Samsung Kies
1. First launch Samsung Kies.
2. Then connect your phone to the computer using the USB cable that came with it.
3. Now Samsung Kies will automatically recognizes your device and a dialogue box
appears showing the available updates, if any.
4. Click the update button in the dialogue box to start upgrad ting to te latest software.
While youre upgrading the device, you shouldnt turn off the computer or disconnect
te USB cable and dont connect other media devices to the computer as it may interfere
the upgrading process.
Upgrading over-the-air
1. Go the Applications screen and then tap Settings.
2. Then go to About device.
3. Select Software Update then hit on Update.
How to Make Your Samsung Galaxy Young a Portable Wi-Fi Hotspot
Smartphones these days can now share its mobile data connection and act as a portable Wi-Fi hotspot. And like those high-end gadgets, Samsung Galaxy Young is sure to let you experience the benefits of making it as a portable Wi-Fi hotspot. Heres how you can make your Samsung phone the next Wi-Fi hotspot.
1. On your device, go to Settings screen first.
2. Then tap Wi-Fi and tap
for more options.3. Select Advanced options to customize your Wi-Fi settings.
4. Go to Tethering and portable hotspot.
5. And choose Portable Wi-Fi hotspot to share the devices mobile network connection.
And you now have a portable Wi-Fi hotspot using your Samsung Galaxy Young.
Apps developers are remarkably making good money out of every apps they build. No wonder online stores are mostly visited by smartphone users just to check on the hottest new apps online. If youve found the perfect app for your Samsung Galaxy Grand, then follow these steps in installing and perhaps uninstalling those unwanted apps.
Installing apps:
1. First tap on Play Store on the applications screen to view available apps online.
2. You can browse available apps by category or simply tap
to search with a keyword.
3. Then select an application to view. To download it on your phone, tap Install. Make sure to double check the app info like its price and ratings before hitting the install button.
4. If theres a charge for that app,tap the price and follow the onscreen instructions to purchase it.
5. To install apps that are from other sources, just go to Applications > Settings > Security > Unknown sources.
Uninstalling apps:
1. In uinstalling the apps purchased from the Play Store, tap
2. Then go to My Apps.
3. And select an application you want to delete, then tap Uninstall.
Installing apps:
1. First tap on Play Store on the applications screen to view available apps online.
2. You can browse available apps by category or simply tap
to search with a keyword.3. Then select an application to view. To download it on your phone, tap Install. Make sure to double check the app info like its price and ratings before hitting the install button.
4. If theres a charge for that app,tap the price and follow the onscreen instructions to purchase it.
5. To install apps that are from other sources, just go to Applications > Settings > Security > Unknown sources.
Uninstalling apps:
1. In uinstalling the apps purchased from the Play Store, tap

2. Then go to My Apps.
3. And select an application you want to delete, then tap Uninstall.
Friday, September 5, 2014
Rooting Samsung Galaxy Note 8 0 N5110 on Android 4 1 2 Jelly Bean with CF Auto Root
Samsung Galaxy Note 8.0 N5110 can now be rooted using Chainfire’s CF Auto-Root tool. Read this entire post and make sure that you won’t skip any steps so that you will manage to successfully flash the all the required files.
Rooting your tablet will allow you to flash new custom ROMs and other files that can be used to improve its overall appearance and performance. If you root your device and you don’t like Samsung’s Nature UX TouchWiz interface, then you will be able to flash new custom ROMs that are based on Android 4.1 / 4.2 AOSP such as CyanogenMod, AOKP and other similar releases.
In order to successfully root your device, you will first need to read the guidelines below. Here’s what you need know:
If ODIN says that the root process was ‘Passed’ but the Galaxy Note 8.0 N5110 doesn’t go past the Samsung boot animation screen, then you will have to power off the device and unplug it from PC. You will have to boot into Recovery Mode and apply factory reset. After that, the tablet will boot into normal mode correctly. If you have any other questions, then you should ask for extra help in comments.
Since this root won’t install any custom Recovery images, then you can choose to visit Google Play Store and use the Goo Manager or ROM Manager app to flash TWRP / CWM Recovery. A custom Recovery will help you install new custom ROMs and other customization files for your tablet.
Read More..
Rooting your tablet will allow you to flash new custom ROMs and other files that can be used to improve its overall appearance and performance. If you root your device and you don’t like Samsung’s Nature UX TouchWiz interface, then you will be able to flash new custom ROMs that are based on Android 4.1 / 4.2 AOSP such as CyanogenMod, AOKP and other similar releases.
In order to successfully root your device, you will first need to read the guidelines below. Here’s what you need know:
- use this tutorial only with the Samsung Galaxy Note 8.0 model number N5110. Don’t try to use this tutorial with any other Android device.
- root your device only if it’s running on Android 4.1.2 Jelly Bean stock firmware.
- rooting the tablet will void the warranty.
- CF Auto Root file will install SuperSU and install a stock Recovery.
- make sure that you have the Samsung USB Drivers installed on your PC. If you don’t have them, then you can download from here.
- disable all the antivirus apps from running on your computer.
- if Samsung KIES software is installed on your PC, then you should make sure to disable it when moving to the tutorial. This program will interfere with Odin and block the rooting process of your tablet.
- make sure that you won’t skip any steps that I have listed in the tutorial.
- enable the USB Debugging setting from the Developer Options menu. If this menu isn’t showing up in Settings, then you should open ‘About device’ and then scroll down and tap 7 times on the Build Number section. It will enable Developer Option in the Settings menu.
- make sure that your tablet’s battery has enough power left in its battery so that it won’t switch off in the middle of the rooting process.
- this guide is for advanced Android users, don’t blame us in case you brick the tablet or you lose any important data in the process.
- in case you cannot complete the root, then you should ask for extra help in comments.
- backup all the important data that you have currently stored on your tablet.
How to root Samsung Galaxy Note 8.0 N5110 on Android 4.1.2 Jelly Bean using CF Auto-Root:
- Download the CF Auto-Root tool for Galaxy Note 8.0 N5110 from HERE.
> save the file on your PC and extract its contents to a single folder. - Download Odin3 v3.07 from HERE.
> when the download is complete, extract the files comprised within and save them in a single folder. - Power off your tablet completely.
- Boot it into Download Mode.
> do it by pressing Volume Down, Home and then Power buttons at the at the same time. Confirm Download Mode boot by pressing Volume Up. - Launch Odin executable on your PC.
- Connect the tablet with your computer using the USB Data cable.
> wait for Odin to add and recognize the device. When done, you can continue to the next part of this post.
> if the tablet is not recognized by your computer, then you will be forced to plug the device into another USB port or reinstall the Samsung USB Drivers. The download link is listed in the preparation guide. - Next, click the ‘PDA’ button in ODIN.
- Browse your PC for the ‘CF-Auto-Root-konawifi-konawifixx-gtn5110.tar.md5′ file and load it into Odin.
> don’t change any default settings of ODIN.
> make sure that the Re-Partition option is not enabled. Disable it if otherwise. - Click the START button when you’re ready for the installation process.
- When all files are flashed and the root is complete, ODIN will say ‘PASS’ and the device will reboot.
- When the Samsung boot animation appears, unplug the phone from PC and wait for it to boot into normal mode.
- Check the App Drawer for the SuperSU app icon to confirm that the root has been applied successfully.
- Install any new apps that require root or start looking for custom ROMs and other customization files that you can use to improve the overall performance of your tablet.
If ODIN says that the root process was ‘Passed’ but the Galaxy Note 8.0 N5110 doesn’t go past the Samsung boot animation screen, then you will have to power off the device and unplug it from PC. You will have to boot into Recovery Mode and apply factory reset. After that, the tablet will boot into normal mode correctly. If you have any other questions, then you should ask for extra help in comments.
Since this root won’t install any custom Recovery images, then you can choose to visit Google Play Store and use the Goo Manager or ROM Manager app to flash TWRP / CWM Recovery. A custom Recovery will help you install new custom ROMs and other customization files for your tablet.
Thursday, September 4, 2014
Samsung S5830 Cellular Phone Display Light Not Working fix problem
Samsung S5830 Cellular Phone Light Not Working How to Fix problem,Samsung S5830 Cellular Phone Display Light Not Working How to Fix problem,Samsung S5830 Cellular Phone Lcd Light Not Working How to Fix problem,Samsung S5830 Cellular Phone Light Not Show Working How to Fix problem,Samsung S5830 Cellular Phone Light Not Working Ways How to Fix problem,Samsung S5830 Cellular Phone Light Not Working Repair How to Fix problem,If You Filling your Samsung S5830 Cellular Phone Fm Not Working Now See Our Previous How to Fix problem ,Samsung S5830 Cellular Phone Light Not Working Ways Damage How to Fix problem,Samsung S5830 Cellular Phone Light Not Working Line Jumper How to Fix problem,Samsung S5830 Cellular Phone Light Not Working Tricks How to Fix problem,Samsung S5830 Cellular Phone Light Not Working Line Missing How to Fix problem,Samsung S5830 Cellular Phone Light Not Working Guide Red Marked Ic Just Replace It-Share This Post If You Tested & Dont Forget To Visit Again Online Cellular Mobile repairing Store.
Wednesday, September 3, 2014
Samsung Galaxy Grand Duos I9082 with Android 4 2 2 XXUBNB2 Jelly Bean Official Firmware How to Update Using Odin Guide
Samsung Galaxy Grand Duos (GT-I9082) users in India has received a new Android 4.2.2 Jelly Bean update with firmware build number I9082XXUBNB2. The new official firmware is now available as an Over-The-Air (OTA) update as well as through Samsung KIES.
Firmware details
PDA: I9082XXUBNB2
CSC: I9082ODDBNB1
MODEM: I9082DDUBNB1
Version: Android 4.2.2
Build date: Feb 06, 2014
Regions: India, Bangladesh, Nepal, Sri Lanka
Samsung Galaxy Grand Duos I9082 users who missed the OTA update notification or unable to access the update over Samsung KIES, can now download and install the same manually using our step-by-step guide.
Pre-requisites
1. Install USB Drivers for Samsung Galaxy Grand Duos on the computer.
2. Enable USB Debugging Mode on the phone by navigating to Settings >> Developer Options.
3. Make a backup of all your important data before following the guide.
4. The Galaxy Grand Duos should be factory unlocked and not locked to any particular carrier.
5. Ensure the battery of the phone is charged more than 80 percent.
6. The Android 4.2.2 XXUBNB2 Jelly Bean firmware is compatible only with the Galaxy Grand Duos (GT-I9082). Applying this to any incorrect variant might brick the device. Verify the model number of the Galaxy Grand Duos by navigating to Settings >> About Phone.
Files Required
1. Android 4.2.2 XXUBNB2 Jelly Bean Firmware (Mirror Link) for Galaxy Grand Duos I9082
2. Odin 3.07
Steps to Update Galaxy Grand Duos I9082 with Android 4.2.2 XXUBNB2 Jelly Bean Firmware
Step 1: Extract Firmware zip file using WinRAR/7-Zip/WinZip or any other extracting tool, you will get a .tar.md5 file and some other files (optional).
Step 2: Extract Odin zip file and you will get Odin3 v3.07.exe along with few other files.
Step 3: Switch off the Galaxy Grand Duos.
Step 4: Boot the device into Download Mode by pressing and holding Volume Down, Home and Power buttons together until a construction Android robot icon with a warning triangle appears on screen. Now press the Volume Up button to enter Download Mode.
Step 5: Run Odin on the computer as an Administrator.
Step 6: Connect the Galaxy Grand Duos to the computer using USB cable while it is in the Download Mode. Wait until Odin detects the device. When the device is connected successfully, the ID: COM box will turn to light blue with the COM port number. Additionally, the successful connected will be indicated by a message saying Added.
Note: If the Added message does not appear, then try re-install USB drivers or changing the port on the computer.
Step 7: Select the following files in Odin from extracted I9082XXUBNB2 firmware folder:
Firmware details
PDA: I9082XXUBNB2
CSC: I9082ODDBNB1
MODEM: I9082DDUBNB1
Version: Android 4.2.2
Build date: Feb 06, 2014
Regions: India, Bangladesh, Nepal, Sri Lanka
Samsung Galaxy Grand Duos I9082 users who missed the OTA update notification or unable to access the update over Samsung KIES, can now download and install the same manually using our step-by-step guide.
Pre-requisites
1. Install USB Drivers for Samsung Galaxy Grand Duos on the computer.
2. Enable USB Debugging Mode on the phone by navigating to Settings >> Developer Options.
3. Make a backup of all your important data before following the guide.
4. The Galaxy Grand Duos should be factory unlocked and not locked to any particular carrier.
5. Ensure the battery of the phone is charged more than 80 percent.
6. The Android 4.2.2 XXUBNB2 Jelly Bean firmware is compatible only with the Galaxy Grand Duos (GT-I9082). Applying this to any incorrect variant might brick the device. Verify the model number of the Galaxy Grand Duos by navigating to Settings >> About Phone.
Files Required
1. Android 4.2.2 XXUBNB2 Jelly Bean Firmware (Mirror Link) for Galaxy Grand Duos I9082
2. Odin 3.07
Steps to Update Galaxy Grand Duos I9082 with Android 4.2.2 XXUBNB2 Jelly Bean Firmware
Step 1: Extract Firmware zip file using WinRAR/7-Zip/WinZip or any other extracting tool, you will get a .tar.md5 file and some other files (optional).
Step 2: Extract Odin zip file and you will get Odin3 v3.07.exe along with few other files.
Step 3: Switch off the Galaxy Grand Duos.
Step 4: Boot the device into Download Mode by pressing and holding Volume Down, Home and Power buttons together until a construction Android robot icon with a warning triangle appears on screen. Now press the Volume Up button to enter Download Mode.
Step 5: Run Odin on the computer as an Administrator.
Step 6: Connect the Galaxy Grand Duos to the computer using USB cable while it is in the Download Mode. Wait until Odin detects the device. When the device is connected successfully, the ID: COM box will turn to light blue with the COM port number. Additionally, the successful connected will be indicated by a message saying Added.
Note: If the Added message does not appear, then try re-install USB drivers or changing the port on the computer.
Step 7: Select the following files in Odin from extracted I9082XXUBNB2 firmware folder:
- Click the PDA button and select the .tar.md5 file.
- Click the Phone button and select file with MODEM in its name. Ignore if there is no such file.
- Click the CSC button and select file with CSC in its name. Ignore if there is no such file.
- Click the PIT button and select the .pit file. Ignore if there is no such file.
Step 8: In Odin, enable Auto Reboot and F. Reset Time checkboxes. Also, ensure the Re-Partition checkbox is chosen only if a .pit file was chosen in the previous step.
Step 9: Verify everything suggested in Step 7 and Step 8 is done correctly. Then hit the Start button to begin the installation process.
Step 10: Once the installation process completes, your phone will restart and soon you will see a PASS message with green background in the left-most box at the very top of the Odin. You can now unplug the USB cable to disconnect your device from the computer.
Samsung Galaxy Grand Duos I9082 should be now updated with Android 4.2.2 XXUBNB2 Jelly Bean official firmware. Head over to Settings >> About Phone to verify the software version running on the device.
Note: If Galaxy Grand Duos I9082 stuck at booting animation after Step 10 then go to recovery mode (press and hold the Volume Up, Home and Power buttons together) and perform Wipe data/Factory Reset and Wipe Cache Partition task before selecting reboot system now function. In recovery mode use Volume keys to navigate between options and Power key to select the option. Please note, performing wiping task will erase your device internal memory data and not external SD card data.
Click here to know How to Root Galaxy Grand Duos I9082 running on Android 4.2.2 Jelly Bean firmware.
Step 9: Verify everything suggested in Step 7 and Step 8 is done correctly. Then hit the Start button to begin the installation process.
Step 10: Once the installation process completes, your phone will restart and soon you will see a PASS message with green background in the left-most box at the very top of the Odin. You can now unplug the USB cable to disconnect your device from the computer.
Samsung Galaxy Grand Duos I9082 should be now updated with Android 4.2.2 XXUBNB2 Jelly Bean official firmware. Head over to Settings >> About Phone to verify the software version running on the device.
Note: If Galaxy Grand Duos I9082 stuck at booting animation after Step 10 then go to recovery mode (press and hold the Volume Up, Home and Power buttons together) and perform Wipe data/Factory Reset and Wipe Cache Partition task before selecting reboot system now function. In recovery mode use Volume keys to navigate between options and Power key to select the option. Please note, performing wiping task will erase your device internal memory data and not external SD card data.
Click here to know How to Root Galaxy Grand Duos I9082 running on Android 4.2.2 Jelly Bean firmware.
Tuesday, September 2, 2014
New Release Official 4 3 Update Samsung Galaxy S3 GT I9300 How To Guide
I9300XXUGMK6 an official Android 4.3 update on Samsung Galaxy S3 (GT-I9300)

Here comes another Android 4.3 software update for Samsung Galaxy S3 (GT-I9300) with firmware build numbers I9300XXUGMK6, that has recently released by Samsung. This is the continuation of the previously released 4.3 update I9300XXUGMJ9 that has been postponed due to some several issues. According to its official changelog, this update will bring more improvements to the Galaxy S3 I9300 devices. Some features are already found from the earlier released, including Galaxy Gear support and the new KNOX security apps.
Here’s what appears on Kies about the I9300XXUGMK6 4.3 Update.
- OS upgrade (android 4.3)
- Added new feature
- Compatibility with Galaxy gear
- Improved performance (Graphics, Multimedia, Bluetooth, etc.)
- Improved the User Interface and Usability
- User Interface adjustment (Icon change, widgets, etc.)
- Security enhancements
- *You cannot downgrade back to the old software after this new software upgrade due to security reason.
- Related Reading:Samsung Galaxy Note 2 LTE N7105T Android 4.3 JB Firmware How To Guide
Important Note:
According to the last part of the changelog that once you took the 4.3 update, it forbids you from downgrading back to the old software update due to security reason. So this means that it’s a one way straight ahead taking the 4.3 update and no returning back again to any old firmware like the 4.1.1 or 4.1.2 versions.
The UGMK6 update is now only available in select European countries but only British Galaxy S3 users are lucky enough to get this update on their unbranded or SIM free Galaxy S3 I9300 others are those with branded devices. All other Galaxy S3 I9300 users around the world who may have not seen this update yet, might still need to wait for a while since the rolled-out is in stages. This update is available through Samsung Kies and over-the-air (OTA software update). But for those advanced users who wants to update now, you might also like to grab the original I9300XXUGMK6 firmware below and update your device in no time without waiting this update from Kies to appear.
Install I9300XXUGMK6 4.3 Update on Galaxy S3 GT-I9300
Disclaimer: This guide is for advance users only, this is risky for beginners. We shall not be held responsible if anything happens to your device while using this guide. Proceed at your own risk!
Stock Firmware I9300XXUGMK6: (Unbranded, Unlocked or SIM Free)
United Kingdom – I9300XXUGMK6_I9300OXAGMK6_BTU.zip Download – [link]
Austria – [link]
Baltic – [link]
Czech Republic – [link]
Denmark – [link]
France – [link]
Finland – [link]
Germany – [link]
Greece – [link]
Hungary – [link]
Italy – [link]
Israel – [link]
Luxembourg – [link]
Norway – [link]
Netherlands – [link]
Poland – [link]
Russia – [link]
Southeast Europe – [link]
Slovakia– [link]
Spain – [link]
Sweden – [link]
Switzerland - I9300XXUGML2_I9300AUTGML1_AUT.zip download
Turkey – [link]
United Kingdom – I9300XXUGMK6_I9300OXAGMK6_BTU.zip Download – [link]
Austria – [link]
Baltic – [link]
Czech Republic – [link]
Denmark – [link]
France – [link]
Finland – [link]
Germany – [link]
Greece – [link]
Hungary – [link]
Italy – [link]
Israel – [link]
Luxembourg – [link]
Norway – [link]
Netherlands – [link]
Poland – [link]
Russia – [link]
Southeast Europe – [link]
Slovakia– [link]
Spain – [link]
Sweden – [link]
Switzerland - I9300XXUGML2_I9300AUTGML1_AUT.zip download
Turkey – [link]
Carrier Branded: (Vodafone)
Czech Republic– [link]
Hungary – [link]
Italy – [link]
Ireland – [link]
Germany – [link]
Greece – [link]
Netherlands – [link]
Portugal – [link]
Romania – [link]
Spain – [link]
United Kingdom – [link]
Czech Republic– [link]
Hungary – [link]
Italy – [link]
Ireland – [link]
Germany – [link]
Greece – [link]
Netherlands – [link]
Portugal – [link]
Romania – [link]
Spain – [link]
United Kingdom – [link]
More Carriers: (Others are on I9300XXUGML2 4.3 firmware builds)
Austria (a1)– [link]
Austria (t-mobile) – [link]
Croatia (vipnet) – [link]
Croatia (o2) – [link]
Croatia (t-mobile) – [link]
Czech Republic (t-mobile) – [link]
Denmark (3) – [link]
France (sfr) – [link]
France (orange) – [link]
Germany (O2) – [link]
Germany (t-mobile) – [link]
Hungary (t-mobile) – [link]
Italy (3) – [link]
Macedonia (t-mobile) – [link]
The Netherlands (t-mobile) – [link]
Norway (telenor) – [link]
Portugal (optimus) – [link]
Poland (plus) – [link]
Poland (play) – [link]
Poland (t-mobile) – [link]
Romania (cosmote) – [link]
Slovenia (si.mobil) – [link]
Slovenia (mobitel) – [link]
Sweden (3) – [link]
Switzerland (swisscom) – [link
Ukraine (kyivstar) – [link]
Austria (a1)– [link]
Austria (t-mobile) – [link]
Croatia (vipnet) – [link]
Croatia (o2) – [link]
Croatia (t-mobile) – [link]
Czech Republic (t-mobile) – [link]
Denmark (3) – [link]
France (sfr) – [link]
France (orange) – [link]
Germany (O2) – [link]
Germany (t-mobile) – [link]
Hungary (t-mobile) – [link]
Italy (3) – [link]
Macedonia (t-mobile) – [link]
The Netherlands (t-mobile) – [link]
Norway (telenor) – [link]
Portugal (optimus) – [link]
Poland (plus) – [link]
Poland (play) – [link]
Poland (t-mobile) – [link]
Romania (cosmote) – [link]
Slovenia (si.mobil) – [link]
Slovenia (mobitel) – [link]
Sweden (3) – [link]
Switzerland (swisscom) – [link
Ukraine (kyivstar) – [link]
Preparations:
- Make a back-up copy of all important files from the device. You may use any apps for quick back-up.
- Make sure the battery is fully charge.
1) Extract or unzip the downloaded firmware or stock ROM so that you’ll get the Odin flashable tar file which is looks likely the same as the image below.
2) Run Odin Downloader v3.07 flasher program.
3) Load the binary file. Click on the PDA button then browse to the folder where you extracted the stock ROM. Like for example I used UK firmware so it goes like this “I9300XXUGMK6_I9300OXAGMK6_I9300XXUGMK6_HOME.tar.m d5″
4. Do Not check the Re-Partition checkbox. Mark check these checkboxes Auto Reboot and F-Reset Time.
5. Reboot the phone in download mode: To reboot the Galaxy S3 into download mode , you need to turn the power off. After it completely shut down, just press and hold the Volume Down key, Home button and the Power ON/OFF button simultaneously.
2) Run Odin Downloader v3.07 flasher program.
3) Load the binary file. Click on the PDA button then browse to the folder where you extracted the stock ROM. Like for example I used UK firmware so it goes like this “I9300XXUGMK6_I9300OXAGMK6_I9300XXUGMK6_HOME.tar.m d5″
4. Do Not check the Re-Partition checkbox. Mark check these checkboxes Auto Reboot and F-Reset Time.
5. Reboot the phone in download mode: To reboot the Galaxy S3 into download mode , you need to turn the power off. After it completely shut down, just press and hold the Volume Down key, Home button and the Power ON/OFF button simultaneously.
You should then prompted into a warning screen and asking you to press volume up if you want to continue or volume down to cancel, just simply press volume up to get into download mode. The download mode then displays an Android robot and say’s “Downloading.. Do not turn off target!!”
6. Connect the phone to PC when it’s in the Download Mode screen.
7. Hit the “START’ button.
10. Wait until a word “PASS’ appears.
11. Remove the phone from PC once completely reboots.
Optional: Perform factory reset to gain a fresher firmware installation, this is very useful to get rid of unwanted reboots and lag issues.
You may then confirm the newly installed Jelly Bean from your device:
Settings–>About Phone–>Software info or type *#1234# and see if it’s already I9300XXUGMK6 or I9300XXUGML2 4.3 Jelly Bean build
6. Connect the phone to PC when it’s in the Download Mode screen.
7. Hit the “START’ button.
10. Wait until a word “PASS’ appears.
11. Remove the phone from PC once completely reboots.
Optional: Perform factory reset to gain a fresher firmware installation, this is very useful to get rid of unwanted reboots and lag issues.
You may then confirm the newly installed Jelly Bean from your device:
Settings–>About Phone–>Software info or type *#1234# and see if it’s already I9300XXUGMK6 or I9300XXUGML2 4.3 Jelly Bean build
Saturday, August 30, 2014
Samsung Galaxy S4 ACTIVE shv e470s Android 4 2 2 Jelly Bean Firmware Using How To Rooting Guide
Use this tutorial only with the Samsung Galaxy S4 ACTIVE shv-e470s smartphone.
CAUTION:THIS ROOTING METHOD IS ONLY FOR THE KOREAN VERSION SHV-E470S!!!
It was tested successfully on Samsung Galaxy S4 Active SHV-E470S Android version 4.2.2
Firmware version:E470SKSUANA1
Abstract:
Do not attempt to root any other smartphones with the files that you wil find in this articles.
This tutorial is destined to be used by advanced Android users.
I won’t be blamed in case you brick the phone or lose any data in the process!!!
Rooting the Galaxy S4 ACTIVE SHV-E470S will revoke its warranty. If you want to restore your phones warranty then you will need to flash an official Samsung Android ROM OS.
Pre-requisites :
1. Copy the "UPDATE-SuperSU-v1.93.zip" into your phone internal or external memory
2. Extract the contents of the Odin zip file and place them on your computer’s desktop screen.
3. Power off the Galaxy S4 active shv-e470s now.
4. After that you have to boot the device in Android Download Mode (press and hold: volume down,home and power buttons}
5. Launch Odin on your PC as administrator
6. Connect the phone with your computer via USB cable.(make sure antivirus+firewall is now disabled!!)
7. Wait for ODIN to detect your device,(you should see the "added" message) then continue to the next step.
8. If the phone is not recognized by your PC, then you should re-install the Samsung USB Drivers.
9. Go to ODIN’s main window, click on PDA and then find the "unofficial_philz_touch_6.12.8-e470s.tar" Load it in ODIN.
10. Do not change any other Odin default settings
11. Make sure that the Re-Partition option is not enabled
12. When ready, hit the START button for the process to begin.
13. Don’t press any buttons until the process is complete
14. When ODIN completes the process it will show the PASS alert, then the phone will reboot in normal mode. You can unplug the device from PC when the Samsung Galaxy S4 active shv-e470s boot animation screen loads.
15. Now power off your phone again and boot in recovery mode (press and hold: volume up,home and power buttons)
16. Once in recovery mode,find and install the "UPDATE-SuperSU-v1.93.zip" .To do this,in the recovery menu choose the "install zip" option and then find the directory u have saved the zip file and choose it for installing.
17. Wait for the process to finish and then ur phone will reboot.once reboot u can download "root checker" from play store and verify that u have root access.
18. Have fun and enjoy your rooted SHV-E470S Credit Link.
Read More..
CAUTION:THIS ROOTING METHOD IS ONLY FOR THE KOREAN VERSION SHV-E470S!!!
It was tested successfully on Samsung Galaxy S4 Active SHV-E470S Android version 4.2.2
Firmware version:E470SKSUANA1

Abstract:
Do not attempt to root any other smartphones with the files that you wil find in this articles.
This tutorial is destined to be used by advanced Android users.
I won’t be blamed in case you brick the phone or lose any data in the process!!!
Rooting the Galaxy S4 ACTIVE SHV-E470S will revoke its warranty. If you want to restore your phones warranty then you will need to flash an official Samsung Android ROM OS.
Pre-requisites :
- Download and install the Samsung USB Drivers on your computer
- Disable Samsung KIES program if you have it installed on your computer
- Disable any antivirus applications from running on your computer
- Enable USB Debugging from Developer Options.
- If Developer Options doesn’t appear in Settings, then you need to enable it.
- go to Settings, then More, open About Device.
- tap seven times on the Build Number.
- you will now be enabling Developer Option, go back to main Settings section, scroll down and enable USB Debugging
- Check your phone’s battery and make sure that there is at least 50% left before the device switches off
- Read the entire post, don’t skip any steps and the guide should be completed in under ten minutes with success.
- In case you have trouble completing the guide, then you are free to ask for extra help in comments
- Download required files (see attachments)
1. Copy the "UPDATE-SuperSU-v1.93.zip" into your phone internal or external memory
2. Extract the contents of the Odin zip file and place them on your computer’s desktop screen.
3. Power off the Galaxy S4 active shv-e470s now.
4. After that you have to boot the device in Android Download Mode (press and hold: volume down,home and power buttons}
5. Launch Odin on your PC as administrator
6. Connect the phone with your computer via USB cable.(make sure antivirus+firewall is now disabled!!)
7. Wait for ODIN to detect your device,(you should see the "added" message) then continue to the next step.
8. If the phone is not recognized by your PC, then you should re-install the Samsung USB Drivers.
9. Go to ODIN’s main window, click on PDA and then find the "unofficial_philz_touch_6.12.8-e470s.tar" Load it in ODIN.
10. Do not change any other Odin default settings
11. Make sure that the Re-Partition option is not enabled
12. When ready, hit the START button for the process to begin.
13. Don’t press any buttons until the process is complete
14. When ODIN completes the process it will show the PASS alert, then the phone will reboot in normal mode. You can unplug the device from PC when the Samsung Galaxy S4 active shv-e470s boot animation screen loads.
15. Now power off your phone again and boot in recovery mode (press and hold: volume up,home and power buttons)
16. Once in recovery mode,find and install the "UPDATE-SuperSU-v1.93.zip" .To do this,in the recovery menu choose the "install zip" option and then find the directory u have saved the zip file and choose it for installing.
17. Wait for the process to finish and then ur phone will reboot.once reboot u can download "root checker" from play store and verify that u have root access.
18. Have fun and enjoy your rooted SHV-E470S Credit Link.
Subscribe to:
Posts (Atom)