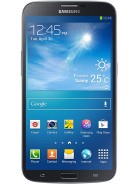
Announced in April 2013, Samsung Galaxy Mega 6.3 is now available for purchase in several countries in the world. The Samsung Galaxy Mega 6.3 - as in a 6.3" Lcd, comes with 3G (GT-I9200) and LTE (GT-I9205) version that runs on Android 4.2.2 Jelly Bean.
Followed by the market rollout, XDA-Developers member VCore has released root method for both I9200 and I9205 version of Galaxy Mega 6.3.
Samsung Galaxy Mega 6.3 users who wish to root their devices, may follow our step-by-step guide.
Disclaimer: Rooting voids the warranty of your device. We and the developer of this rooting procedures shall not be held responsible if any undesirable outcomes may happen to your device. use of this root guide is solely at your own risk!
Pre-requisites
1. Install USB Driver for Samsung Galaxy Mega 6.3 on the computer.
2. Enable USB Debugging Mode on the phone by navigating to Settings >> Developer Options.
3. Make a backup of all your important data before following the guide.
4. The Galaxy Mega 6.3 should be factory unlocked and not locked to any particular carrier.
5. Ensure the battery of the phone is charged more than 80 per cent.
6. The Root Package file works only on Samsung Galaxy Mega 6.3. Applying these to any incorrect variant might brick the device. Verify the model number of the Galaxy Mega 6.3 by navigating to Settings >> About Phone.
Files Required
1. Root Package for Galaxy Mega 6.3 (vcoreroot-v2.tar)
2. Odin 3.07 (Mirror Link)
Steps to Root Galaxy Mega 6.3 Running on Android 4.2.2 Jelly Bean Firmware
Step 1: Extract Odin 3.07 file using WinRAR/7-Zip/WinZip or any other extracting tool.
Step 2: Switch off the Galaxy Mega 6.3. Then boot the device into Download Mode by pressing and holding Volume Down, Home and Power buttons together until a construction Android robot icon with a warning triangle appears on Lcd. Now press the Volume Up button to enter Download Mode.
Step 3: Launch Odin on the computer as an Administrator.
Step 4: Connect the Galaxy Mega 6.3 to the computer using USB cable while it is in the Download Mode. Wait until Odin detects the device. When the device is connected successfully, the ID: COM box will turn blue with the COM port number. Additionally, the successful connected will be indicated by a message saying Added.
Note: If the Added message does not appear, then try re-install USB drivers or changing the port on the computer.
Step 5: In Odin, click the PDA button and select the vcoreroot-v2.tar file.
Step 6: Verify that Auto Reboot and F.Reset Time checkboxes are selected in Odin. Also, ensure the Re-Partition option in Odin is not selected.
Step 7: Double-check and click Start in Odin. The installation process will now begin.
Step 8: Once the installation process is completed, your phone will restart and soon you will see a PASS message with green background in the left-most box at the very top of the Odin. You can now unplug the USB cable to disconnect your device from computer.
Samsung Galaxy Mega 6.3 running on Android 4.2.2 Jelly Bean firmware is now rooted successfully. You can now install any app that requires root permission. Verify the root status of the device by downloading Root Checker app from Google Play Store.
Thanks to all fellas at XDA who first tried out this rooting technique. This method was originally posted via XDA-Developers original thread.
Showing posts with label using. Show all posts
Wednesday, November 12, 2014
Lumia 710 Hard Reset Using Hardware Keys
You Can Apply Hard Reset In Many Cases We Will Tell You Some Example
* Forgotten Phone Lock* Forgotten User Code
* If Your Phone Seems Frozen Due To Any Cases
Take Care These Factors Before You Reset Your Phone
* Please Backup Your Data Using any Backup Software
* Please Maintain 50% Battery Charge
How To Hard Reset Your Nokia Lumia 710 (Remove Phone Lock)
* Switch Off Your Mobile
* Press And Hold Power Key + Volume Down Key + Camera Key At The Same Time
* Release The Power Key Until The Vibration And Keep Pressing Other Keys
* Now Your Phone Will Restarted. After Completing The Hard Reset Prosses
* Done ! Monday, September 22, 2014
How to Share Contacts Music Files Photos or Videos and Web Address Using NFC on Sony Xperia Z2
1. On your Home Lcd, tap the
> Settings.
2. Then go to More.
3. Mark the NFC checkbox.
To share a contact with another device using NFC
1. Make sure that both devices have the NFC function turned on, and that both Lcds are active.
2. To view contacts, go to your Home Lcd, tap
, then tap Person icon.
3. Tap the contact that you want to share.
4. Hold your device and the receiving device back to back so that the NFC detection areas of each device touch each other. When the devices connect, a thumbnail of the contact appears.
5. Tap the thumbnail to start the transfer.
6. When the transfer is done, the contact information is displayed on the Lcd of the receiving device and is also saved on the receiving device.
To share a music file with another device using NFC
1. Make sure that both your device and the receiving device have the NFC function turned on, and that both Lcds are active.
2. To open the "WALKMAN™" application, tap
, then find and tap Walkman icon.
3. Select a music category and browse to the track you want to share.
4. Tap the track to play it. You can then tap Pause icon to pause the track. The transfer works whether the track is playing or paused.
5. Hold your device and the receiving device back to back so that the NFC detection areas of each device touch each other. When the devices connect, a thumbnail of the track appears.
6. Tap the thumbnail to start the transfer.
7. When the transfer is done, the music file plays immediately on the receiving device. At the same time, the file is saved on the receiving device.
To share a photo or video with another device using NFC
1. Make sure that both devices have the NFC function turned on, and that both Lcds are active.
2. To view photos and videos in your device, go to your Home Lcd, tap
, then find and tap Album.
3. Tap the photo or video that you want to share.
4. Hold your device and the receiving device back to back so that the NFC detection areas of each device touch each other. When the devices connect, a thumbnail of the track appears.
5. Tap the thumbnail to start the transfer.
6. When the transfer is done, the photo or video is displayed on the Lcd of the receiving device. At the same time, the item is saved on the receiving device.
To share a web address with another device using NFC
1. Make sure that both devices have the NFC function turned on, and that both Lcds are active.
2. From your Home Lcd, tap
.
3. To open the web browser, find and tap Chrome browser icon.
4. Load the web page that you want to share.
5. Hold your device and the receiving device back to back so that the NFC detection areas of each device touch each other. When the devices connect, a thumbnail of the track appears.
6. Tap the thumbnail to start the transfer.
7. When the transfer is done, the web page is displayed on the Lcd of the receiving device.
Read More..
2. Then go to More.
3. Mark the NFC checkbox.
To share a contact with another device using NFC
1. Make sure that both devices have the NFC function turned on, and that both Lcds are active.
2. To view contacts, go to your Home Lcd, tap
3. Tap the contact that you want to share.
4. Hold your device and the receiving device back to back so that the NFC detection areas of each device touch each other. When the devices connect, a thumbnail of the contact appears.
5. Tap the thumbnail to start the transfer.
6. When the transfer is done, the contact information is displayed on the Lcd of the receiving device and is also saved on the receiving device.
To share a music file with another device using NFC
1. Make sure that both your device and the receiving device have the NFC function turned on, and that both Lcds are active.
2. To open the "WALKMAN™" application, tap
3. Select a music category and browse to the track you want to share.
4. Tap the track to play it. You can then tap Pause icon to pause the track. The transfer works whether the track is playing or paused.
5. Hold your device and the receiving device back to back so that the NFC detection areas of each device touch each other. When the devices connect, a thumbnail of the track appears.
6. Tap the thumbnail to start the transfer.
7. When the transfer is done, the music file plays immediately on the receiving device. At the same time, the file is saved on the receiving device.
To share a photo or video with another device using NFC
1. Make sure that both devices have the NFC function turned on, and that both Lcds are active.
2. To view photos and videos in your device, go to your Home Lcd, tap
3. Tap the photo or video that you want to share.
4. Hold your device and the receiving device back to back so that the NFC detection areas of each device touch each other. When the devices connect, a thumbnail of the track appears.
5. Tap the thumbnail to start the transfer.
6. When the transfer is done, the photo or video is displayed on the Lcd of the receiving device. At the same time, the item is saved on the receiving device.
To share a web address with another device using NFC
1. Make sure that both devices have the NFC function turned on, and that both Lcds are active.
2. From your Home Lcd, tap
3. To open the web browser, find and tap Chrome browser icon.
4. Load the web page that you want to share.
5. Hold your device and the receiving device back to back so that the NFC detection areas of each device touch each other. When the devices connect, a thumbnail of the track appears.
6. Tap the thumbnail to start the transfer.
7. When the transfer is done, the web page is displayed on the Lcd of the receiving device.
Sunday, September 21, 2014
Wednesday, September 10, 2014
Samsung Galaxy Mega 5 8 I9152 with Android 4 2 2 XXUANA1 Jelly Bean Official Firmware Install Easily Using Odin Guide
Firmware details
PDA: I9152XXUANA1
CSC: I9152OXEANA1
MODEM: I9152XXUANA1
Version: Android 4.2.2
Build date: Jan 28, 2014
Regions: Russia, Kazakhstan, Ukraine, Uzbekistan
Samsung Galaxy Mega 5.8 I9152 users who missed the OTA update notification or unable to access the update over Samsung KIES, may follow our step-by-step guide to install the update manually.
Pre-requisites
1. Install USB Drivers for Samsung Galaxy Mega 5.8 on the computer.
2. Enable USB Debugging Mode on the phone by navigating to Settings >> Developer Options.
3. Make a backup of all your important data before following the guide.
4. The Galaxy Mega 5.8 should be factory unlocked and not locked to any particular carrier.
5. Ensure the battery of the phone is charged more than 80 percent.
6. The Android 4.2.2 XXUANA1 Jelly Bean firmware is compatible only with the Samsung Galaxy Mega 5.8 (GT-I9152). Applying this to any incorrect variant might brick the device. Verify the model number of the Galaxy Mega 5.8 by navigating to Settings >> About Phone.
Files Required
1. Android 4.2.2 XXUANA1 Jelly Bean Firmware (Mirror Link) for Galaxy Mega 5.8 I9152
2. Odin 3.07
Steps to Update Galaxy Mega 5.8 I9152 with Android 4.2.2 XXUANA1 Jelly Bean Firmware
Related Article:Samsung Galaxy Mega 5.8 I9152 with Android 4.2.2 XWUANA6 Jelly Bean Official Firmware & How to Update Using Odin Guide
Samsung Galaxy Mega 5.8 I9152 with Android 4.2.2 XWUANA5 Jelly Bean Official Firmware & Install Odin Guide
Step 1: Extract Firmware zip file using WinRAR/7-Zip/WinZip or any other extracting tool, you will get a .tar.md5 file and some other files (optional).
Step 2: Extract Odin zip file and you will get Odin3 v3.07.exe along with few other files.
Step 3: Switch off the Galaxy Mega 5.8.
Step 4: Boot the device into Download Mode by pressing and holding Volume Down, Home and Power buttons together until a construction Android robot icon with a warning triangle appears on Lcd. Now press the Volume Up button to enter Download Mode.
Step 5: Run Odin on the computer as an Administrator.
Step 6: Connect the Galaxy Mega 5.8 to the computer using USB cable while it is in the Download Mode. Wait until Odin detects the device. When the device is connected successfully, the ID: COM box will turn to light blue with the COM port number. Additionally, the successful connected will be indicated by a message saying Added.
Note: If the Added message does not appear, then try re-install USB drivers or changing the port on the computer.
Step 7: Select the following files in Odin from extracted I9152XXUANA1 firmware folder:
- Click the PDA button and select the .tar.md5 file.
- Click the Phone button and select file with MODEM in its name. Ignore if there is no such file.
- Click the CSC button and select file with CSC in its name. Ignore if there is no such file.
- Click the PIT button and select the .pit file. Ignore if there is no such file.
Step 8: In Odin, enable Auto Reboot and F. Reset Time checkboxes. Also, ensure the Re-Partition checkbox is chosen only if a .pit file was chosen in the previous step.
Step 9: Verify everything suggested in Step 7 and Step 8 is done correctly. Then hit the Start button to begin the installation process.
Step 10: Once the installation process completes, your phone will restart and soon you will see a PASS message with green background in the left-most box at the very top of the Odin. You can now unplug the USB cable to disconnect your device from the computer.
Samsung Galaxy Mega 5.8 I9152 should be now updated with Android 4.2.2 XXUANA1 Jelly Bean official firmware. Head over to Settings >> About Phone to verify the software version running on the device.
Note: If Galaxy Mega 5.8 I9152 stuck at booting animation after Step 10 then go to recovery mode (press and hold the Volume Up, Home and Power buttons together) and perform Wipe data/Factory Reset and Wipe Cache Partition task before selecting reboot system now function. In recovery mode use Volume keys to navigate between options and Power key to select the option. Please note, performing wiping task will erase your device internal memory data and not external SD card data.
Click here to know How to Root Galaxy Mega 5.8 I9152 running on Android 4.2.2 Jelly Bean firmware.
Step 9: Verify everything suggested in Step 7 and Step 8 is done correctly. Then hit the Start button to begin the installation process.
Step 10: Once the installation process completes, your phone will restart and soon you will see a PASS message with green background in the left-most box at the very top of the Odin. You can now unplug the USB cable to disconnect your device from the computer.
Samsung Galaxy Mega 5.8 I9152 should be now updated with Android 4.2.2 XXUANA1 Jelly Bean official firmware. Head over to Settings >> About Phone to verify the software version running on the device.
Note: If Galaxy Mega 5.8 I9152 stuck at booting animation after Step 10 then go to recovery mode (press and hold the Volume Up, Home and Power buttons together) and perform Wipe data/Factory Reset and Wipe Cache Partition task before selecting reboot system now function. In recovery mode use Volume keys to navigate between options and Power key to select the option. Please note, performing wiping task will erase your device internal memory data and not external SD card data.
Click here to know How to Root Galaxy Mega 5.8 I9152 running on Android 4.2.2 Jelly Bean firmware.
Monday, September 8, 2014
How to Share Contacts Music Files Photos or Videos and Web Address Using NFC on Sony Xperia Z1s
1. On your Home Lcd, tap the
> Settings.
2. Then go to More.
3. Mark the NFC checkbox.
To share a contact with another device using NFC
1. Make sure that both devices have the NFC function turned on, and that both Lcds are active.
2. To view contacts, go to your Home Lcd, tap
, then tap Person icon.
3. Tap the contact that you want to share.
4. Hold your device and the receiving device back to back so that the NFC detection areas of each device touch each other. When the devices connect, a thumbnail of the contact appears.
5. Tap the thumbnail to start the transfer.
6. When the transfer is done, the contact information is displayed on the Lcd of the receiving device and is also saved on the receiving device.
To share a music file with another device using NFC
1. Make sure that both your device and the receiving device have the NFC function turned on, and that both Lcds are active.
2. To open the "WALKMAN™" application, tap
, then find and tap Walkman icon.
3. Select a music category and browse to the track you want to share.
4. Tap the track to play it. You can then tap Pause icon to pause the track. The transfer works whether the track is playing or paused.
5. Hold your device and the receiving device back to back so that the NFC detection areas of each device touch each other. When the devices connect, a thumbnail of the track appears.
6. Tap the thumbnail to start the transfer.
7. When the transfer is done, the music file plays immediately on the receiving device. At the same time, the file is saved on the receiving device.
To share a photo or video with another device using NFC
1. Make sure that both devices have the NFC function turned on, and that both Lcds are active.
2. To view photos and videos in your device, go to your Home Lcd, tap
, then find and tap Album.
3. Tap the photo or video that you want to share.
4. Hold your device and the receiving device back to back so that the NFC detection areas of each device touch each other. When the devices connect, a thumbnail of the track appears.
5. Tap the thumbnail to start the transfer.
6. When the transfer is done, the photo or video is displayed on the Lcd of the receiving device. At the same time, the item is saved on the receiving device.
To share a web address with another device using NFC
1. Make sure that both devices have the NFC function turned on, and that both Lcds are active.
2. From your Home Lcd, tap
.
3. To open the web browser, find and tap Chrome browser icon.
4. Load the web page that you want to share.
5. Hold your device and the receiving device back to back so that the NFC detection areas of each device touch each other. When the devices connect, a thumbnail of the track appears.
6. Tap the thumbnail to start the transfer.
7. When the transfer is done, the web page is displayed on the Lcd of the receiving device.
Read More..
2. Then go to More.
3. Mark the NFC checkbox.
To share a contact with another device using NFC
1. Make sure that both devices have the NFC function turned on, and that both Lcds are active.
2. To view contacts, go to your Home Lcd, tap
3. Tap the contact that you want to share.
4. Hold your device and the receiving device back to back so that the NFC detection areas of each device touch each other. When the devices connect, a thumbnail of the contact appears.
5. Tap the thumbnail to start the transfer.
6. When the transfer is done, the contact information is displayed on the Lcd of the receiving device and is also saved on the receiving device.
To share a music file with another device using NFC
1. Make sure that both your device and the receiving device have the NFC function turned on, and that both Lcds are active.
2. To open the "WALKMAN™" application, tap
3. Select a music category and browse to the track you want to share.
4. Tap the track to play it. You can then tap Pause icon to pause the track. The transfer works whether the track is playing or paused.
5. Hold your device and the receiving device back to back so that the NFC detection areas of each device touch each other. When the devices connect, a thumbnail of the track appears.
6. Tap the thumbnail to start the transfer.
7. When the transfer is done, the music file plays immediately on the receiving device. At the same time, the file is saved on the receiving device.
To share a photo or video with another device using NFC
1. Make sure that both devices have the NFC function turned on, and that both Lcds are active.
2. To view photos and videos in your device, go to your Home Lcd, tap
3. Tap the photo or video that you want to share.
4. Hold your device and the receiving device back to back so that the NFC detection areas of each device touch each other. When the devices connect, a thumbnail of the track appears.
5. Tap the thumbnail to start the transfer.
6. When the transfer is done, the photo or video is displayed on the Lcd of the receiving device. At the same time, the item is saved on the receiving device.
To share a web address with another device using NFC
1. Make sure that both devices have the NFC function turned on, and that both Lcds are active.
2. From your Home Lcd, tap
3. To open the web browser, find and tap Chrome browser icon.
4. Load the web page that you want to share.
5. Hold your device and the receiving device back to back so that the NFC detection areas of each device touch each other. When the devices connect, a thumbnail of the track appears.
6. Tap the thumbnail to start the transfer.
7. When the transfer is done, the web page is displayed on the Lcd of the receiving device.
Thursday, September 4, 2014
How to Share Contacts Using NFC on Sony Xperia Z
NFC feature is a must-have for any smartphones these days. Near-field communication or NFC works similarly like bluetooth. By touching your NFC-enabled phones against each other, you can then share contacts, music and photos. Well, heres how you can easily share contacts on Sony Xperia Z uisng NFC feature.
1. On your device, enable content sharing in Settings.
2. Then go to Wireless and Networks.
3 And choose on More menu.
When the phone vibrates, tap the onscreen message that says "touch to beam".
Read More..
1. On your device, enable content sharing in Settings.
2. Then go to Wireless and Networks.
3 And choose on More menu.
When the phone vibrates, tap the onscreen message that says "touch to beam".
Wednesday, September 3, 2014
Samsung Galaxy Grand Duos I9082 with Android 4 2 2 XXUBNB2 Jelly Bean Official Firmware How to Update Using Odin Guide
Samsung Galaxy Grand Duos (GT-I9082) users in India has received a new Android 4.2.2 Jelly Bean update with firmware build number I9082XXUBNB2. The new official firmware is now available as an Over-The-Air (OTA) update as well as through Samsung KIES.
Firmware details
PDA: I9082XXUBNB2
CSC: I9082ODDBNB1
MODEM: I9082DDUBNB1
Version: Android 4.2.2
Build date: Feb 06, 2014
Regions: India, Bangladesh, Nepal, Sri Lanka
Samsung Galaxy Grand Duos I9082 users who missed the OTA update notification or unable to access the update over Samsung KIES, can now download and install the same manually using our step-by-step guide.
Pre-requisites
1. Install USB Drivers for Samsung Galaxy Grand Duos on the computer.
2. Enable USB Debugging Mode on the phone by navigating to Settings >> Developer Options.
3. Make a backup of all your important data before following the guide.
4. The Galaxy Grand Duos should be factory unlocked and not locked to any particular carrier.
5. Ensure the battery of the phone is charged more than 80 percent.
6. The Android 4.2.2 XXUBNB2 Jelly Bean firmware is compatible only with the Galaxy Grand Duos (GT-I9082). Applying this to any incorrect variant might brick the device. Verify the model number of the Galaxy Grand Duos by navigating to Settings >> About Phone.
Files Required
1. Android 4.2.2 XXUBNB2 Jelly Bean Firmware (Mirror Link) for Galaxy Grand Duos I9082
2. Odin 3.07
Steps to Update Galaxy Grand Duos I9082 with Android 4.2.2 XXUBNB2 Jelly Bean Firmware
Step 1: Extract Firmware zip file using WinRAR/7-Zip/WinZip or any other extracting tool, you will get a .tar.md5 file and some other files (optional).
Step 2: Extract Odin zip file and you will get Odin3 v3.07.exe along with few other files.
Step 3: Switch off the Galaxy Grand Duos.
Step 4: Boot the device into Download Mode by pressing and holding Volume Down, Home and Power buttons together until a construction Android robot icon with a warning triangle appears on screen. Now press the Volume Up button to enter Download Mode.
Step 5: Run Odin on the computer as an Administrator.
Step 6: Connect the Galaxy Grand Duos to the computer using USB cable while it is in the Download Mode. Wait until Odin detects the device. When the device is connected successfully, the ID: COM box will turn to light blue with the COM port number. Additionally, the successful connected will be indicated by a message saying Added.
Note: If the Added message does not appear, then try re-install USB drivers or changing the port on the computer.
Step 7: Select the following files in Odin from extracted I9082XXUBNB2 firmware folder:
Firmware details
PDA: I9082XXUBNB2
CSC: I9082ODDBNB1
MODEM: I9082DDUBNB1
Version: Android 4.2.2
Build date: Feb 06, 2014
Regions: India, Bangladesh, Nepal, Sri Lanka
Samsung Galaxy Grand Duos I9082 users who missed the OTA update notification or unable to access the update over Samsung KIES, can now download and install the same manually using our step-by-step guide.
Pre-requisites
1. Install USB Drivers for Samsung Galaxy Grand Duos on the computer.
2. Enable USB Debugging Mode on the phone by navigating to Settings >> Developer Options.
3. Make a backup of all your important data before following the guide.
4. The Galaxy Grand Duos should be factory unlocked and not locked to any particular carrier.
5. Ensure the battery of the phone is charged more than 80 percent.
6. The Android 4.2.2 XXUBNB2 Jelly Bean firmware is compatible only with the Galaxy Grand Duos (GT-I9082). Applying this to any incorrect variant might brick the device. Verify the model number of the Galaxy Grand Duos by navigating to Settings >> About Phone.
Files Required
1. Android 4.2.2 XXUBNB2 Jelly Bean Firmware (Mirror Link) for Galaxy Grand Duos I9082
2. Odin 3.07
Steps to Update Galaxy Grand Duos I9082 with Android 4.2.2 XXUBNB2 Jelly Bean Firmware
Step 1: Extract Firmware zip file using WinRAR/7-Zip/WinZip or any other extracting tool, you will get a .tar.md5 file and some other files (optional).
Step 2: Extract Odin zip file and you will get Odin3 v3.07.exe along with few other files.
Step 3: Switch off the Galaxy Grand Duos.
Step 4: Boot the device into Download Mode by pressing and holding Volume Down, Home and Power buttons together until a construction Android robot icon with a warning triangle appears on screen. Now press the Volume Up button to enter Download Mode.
Step 5: Run Odin on the computer as an Administrator.
Step 6: Connect the Galaxy Grand Duos to the computer using USB cable while it is in the Download Mode. Wait until Odin detects the device. When the device is connected successfully, the ID: COM box will turn to light blue with the COM port number. Additionally, the successful connected will be indicated by a message saying Added.
Note: If the Added message does not appear, then try re-install USB drivers or changing the port on the computer.
Step 7: Select the following files in Odin from extracted I9082XXUBNB2 firmware folder:
- Click the PDA button and select the .tar.md5 file.
- Click the Phone button and select file with MODEM in its name. Ignore if there is no such file.
- Click the CSC button and select file with CSC in its name. Ignore if there is no such file.
- Click the PIT button and select the .pit file. Ignore if there is no such file.
Step 8: In Odin, enable Auto Reboot and F. Reset Time checkboxes. Also, ensure the Re-Partition checkbox is chosen only if a .pit file was chosen in the previous step.
Step 9: Verify everything suggested in Step 7 and Step 8 is done correctly. Then hit the Start button to begin the installation process.
Step 10: Once the installation process completes, your phone will restart and soon you will see a PASS message with green background in the left-most box at the very top of the Odin. You can now unplug the USB cable to disconnect your device from the computer.
Samsung Galaxy Grand Duos I9082 should be now updated with Android 4.2.2 XXUBNB2 Jelly Bean official firmware. Head over to Settings >> About Phone to verify the software version running on the device.
Note: If Galaxy Grand Duos I9082 stuck at booting animation after Step 10 then go to recovery mode (press and hold the Volume Up, Home and Power buttons together) and perform Wipe data/Factory Reset and Wipe Cache Partition task before selecting reboot system now function. In recovery mode use Volume keys to navigate between options and Power key to select the option. Please note, performing wiping task will erase your device internal memory data and not external SD card data.
Click here to know How to Root Galaxy Grand Duos I9082 running on Android 4.2.2 Jelly Bean firmware.
Step 9: Verify everything suggested in Step 7 and Step 8 is done correctly. Then hit the Start button to begin the installation process.
Step 10: Once the installation process completes, your phone will restart and soon you will see a PASS message with green background in the left-most box at the very top of the Odin. You can now unplug the USB cable to disconnect your device from the computer.
Samsung Galaxy Grand Duos I9082 should be now updated with Android 4.2.2 XXUBNB2 Jelly Bean official firmware. Head over to Settings >> About Phone to verify the software version running on the device.
Note: If Galaxy Grand Duos I9082 stuck at booting animation after Step 10 then go to recovery mode (press and hold the Volume Up, Home and Power buttons together) and perform Wipe data/Factory Reset and Wipe Cache Partition task before selecting reboot system now function. In recovery mode use Volume keys to navigate between options and Power key to select the option. Please note, performing wiping task will erase your device internal memory data and not external SD card data.
Click here to know How to Root Galaxy Grand Duos I9082 running on Android 4.2.2 Jelly Bean firmware.
Saturday, August 30, 2014
Samsung Galaxy S4 ACTIVE shv e470s Android 4 2 2 Jelly Bean Firmware Using How To Rooting Guide
Use this tutorial only with the Samsung Galaxy S4 ACTIVE shv-e470s smartphone.
CAUTION:THIS ROOTING METHOD IS ONLY FOR THE KOREAN VERSION SHV-E470S!!!
It was tested successfully on Samsung Galaxy S4 Active SHV-E470S Android version 4.2.2
Firmware version:E470SKSUANA1
Abstract:
Do not attempt to root any other smartphones with the files that you wil find in this articles.
This tutorial is destined to be used by advanced Android users.
I won’t be blamed in case you brick the phone or lose any data in the process!!!
Rooting the Galaxy S4 ACTIVE SHV-E470S will revoke its warranty. If you want to restore your phones warranty then you will need to flash an official Samsung Android ROM OS.
Pre-requisites :
1. Copy the "UPDATE-SuperSU-v1.93.zip" into your phone internal or external memory
2. Extract the contents of the Odin zip file and place them on your computer’s desktop screen.
3. Power off the Galaxy S4 active shv-e470s now.
4. After that you have to boot the device in Android Download Mode (press and hold: volume down,home and power buttons}
5. Launch Odin on your PC as administrator
6. Connect the phone with your computer via USB cable.(make sure antivirus+firewall is now disabled!!)
7. Wait for ODIN to detect your device,(you should see the "added" message) then continue to the next step.
8. If the phone is not recognized by your PC, then you should re-install the Samsung USB Drivers.
9. Go to ODIN’s main window, click on PDA and then find the "unofficial_philz_touch_6.12.8-e470s.tar" Load it in ODIN.
10. Do not change any other Odin default settings
11. Make sure that the Re-Partition option is not enabled
12. When ready, hit the START button for the process to begin.
13. Don’t press any buttons until the process is complete
14. When ODIN completes the process it will show the PASS alert, then the phone will reboot in normal mode. You can unplug the device from PC when the Samsung Galaxy S4 active shv-e470s boot animation screen loads.
15. Now power off your phone again and boot in recovery mode (press and hold: volume up,home and power buttons)
16. Once in recovery mode,find and install the "UPDATE-SuperSU-v1.93.zip" .To do this,in the recovery menu choose the "install zip" option and then find the directory u have saved the zip file and choose it for installing.
17. Wait for the process to finish and then ur phone will reboot.once reboot u can download "root checker" from play store and verify that u have root access.
18. Have fun and enjoy your rooted SHV-E470S Credit Link.
Read More..
CAUTION:THIS ROOTING METHOD IS ONLY FOR THE KOREAN VERSION SHV-E470S!!!
It was tested successfully on Samsung Galaxy S4 Active SHV-E470S Android version 4.2.2
Firmware version:E470SKSUANA1

Abstract:
Do not attempt to root any other smartphones with the files that you wil find in this articles.
This tutorial is destined to be used by advanced Android users.
I won’t be blamed in case you brick the phone or lose any data in the process!!!
Rooting the Galaxy S4 ACTIVE SHV-E470S will revoke its warranty. If you want to restore your phones warranty then you will need to flash an official Samsung Android ROM OS.
Pre-requisites :
- Download and install the Samsung USB Drivers on your computer
- Disable Samsung KIES program if you have it installed on your computer
- Disable any antivirus applications from running on your computer
- Enable USB Debugging from Developer Options.
- If Developer Options doesn’t appear in Settings, then you need to enable it.
- go to Settings, then More, open About Device.
- tap seven times on the Build Number.
- you will now be enabling Developer Option, go back to main Settings section, scroll down and enable USB Debugging
- Check your phone’s battery and make sure that there is at least 50% left before the device switches off
- Read the entire post, don’t skip any steps and the guide should be completed in under ten minutes with success.
- In case you have trouble completing the guide, then you are free to ask for extra help in comments
- Download required files (see attachments)
1. Copy the "UPDATE-SuperSU-v1.93.zip" into your phone internal or external memory
2. Extract the contents of the Odin zip file and place them on your computer’s desktop screen.
3. Power off the Galaxy S4 active shv-e470s now.
4. After that you have to boot the device in Android Download Mode (press and hold: volume down,home and power buttons}
5. Launch Odin on your PC as administrator
6. Connect the phone with your computer via USB cable.(make sure antivirus+firewall is now disabled!!)
7. Wait for ODIN to detect your device,(you should see the "added" message) then continue to the next step.
8. If the phone is not recognized by your PC, then you should re-install the Samsung USB Drivers.
9. Go to ODIN’s main window, click on PDA and then find the "unofficial_philz_touch_6.12.8-e470s.tar" Load it in ODIN.
10. Do not change any other Odin default settings
11. Make sure that the Re-Partition option is not enabled
12. When ready, hit the START button for the process to begin.
13. Don’t press any buttons until the process is complete
14. When ODIN completes the process it will show the PASS alert, then the phone will reboot in normal mode. You can unplug the device from PC when the Samsung Galaxy S4 active shv-e470s boot animation screen loads.
15. Now power off your phone again and boot in recovery mode (press and hold: volume up,home and power buttons)
16. Once in recovery mode,find and install the "UPDATE-SuperSU-v1.93.zip" .To do this,in the recovery menu choose the "install zip" option and then find the directory u have saved the zip file and choose it for installing.
17. Wait for the process to finish and then ur phone will reboot.once reboot u can download "root checker" from play store and verify that u have root access.
18. Have fun and enjoy your rooted SHV-E470S Credit Link.
Sunday, August 24, 2014
How to Update Samsung Galaxy Fame S6810L with Android 4 1 2 UBANA1 Jelly Bean Official Firmware Using Odin Guide
The Latin America version of Samsung Galaxy Fame with model number GT-S6810L has already received the latest Android 4.1.2 Jelly Bean Over-The-Air (OTA) update with firmware build number S6810LUBANA1. The new official firmware is currently available for users in Argentina.
Firmware details
PDA: S6810LUBANA1
CSC: S6810LPSPANA2
MODEM: S6810LUBAML1
Version: Android 4.1.2
Build date: Jan 02, 2014
Regions: Argentina
Samsung Galaxy Fame S6810L users who missed the OTA update notification or unable to access the update over Samsung KIES, can now download and install the same manually using our step-by-step guide.
Pre-requisites
1. Install USB Drivers for Samsung Galaxy Fame on the computer.
2. Enable USB Debugging Mode on the phone by navigating to Settings >> Developer Options.
3. Make a backup of all your important data before following the guide.
4. The Galaxy Fame should be factory unlocked and not locked to any particular carrier.
5. Ensure the battery of the phone is charged more than 80 percent.
6. The Android 4.1.2 UBANA1 Jelly Bean firmware is compatible only with Samsung Galaxy Fame (GT-S6810L). Applying this to any incorrect variant might brick the device. Verify the model number of the Galaxy Fame by navigating to Settings >> About Phone.
Files Required
1. Android 4.1.2 UBANA1 Jelly Bean Firmware for Galaxy Fame S6810L
2. Odin 3.07
Related Article:How to Update Galaxy Fame S6810 with Android 4.1.2 XXAMJ1 Jelly Bean Official Firmware Steps to Update Galaxy Fame S6810L with Android 4.1.2 UBANA1 Jelly Bean Firmware
Step 1: Extract Firmware zip file using WinRAR/7-Zip/WinZip or any other extracting tool, you will get a .tar.md5 file and some other files (optional).
Step 2: Extract Odin zip file and you will get Odin3 v3.07.exe along with few other files.
Step 3: Switch off the Galaxy Fame.
Step 4: Boot the device into Download Mode by pressing and holding Volume Down, Home and Power buttons together until a construction Android robot icon with a warning triangle appears on screen. Now press the Volume Up button to enter Download Mode.
Step 5: Run Odin on the computer as an Administrator.
Step 6: Connect the Galaxy Fame to the computer using USB cable while it is in the Download Mode. Wait until Odin detects the device. When the device is connected successfully, the ID: COM box will turn to light blue with the COM port number. Additionally, the successful connected will be indicated by a message saying Added.
Note: If the Added message does not appear, then try re-install USB drivers or changing the port on the computer.
Step 7: Select the following files in Odin from extracted S6810LUBANA1 firmware folder:
Firmware details
PDA: S6810LUBANA1
CSC: S6810LPSPANA2
MODEM: S6810LUBAML1
Version: Android 4.1.2
Build date: Jan 02, 2014
Regions: Argentina
Samsung Galaxy Fame S6810L users who missed the OTA update notification or unable to access the update over Samsung KIES, can now download and install the same manually using our step-by-step guide.
Pre-requisites
1. Install USB Drivers for Samsung Galaxy Fame on the computer.
2. Enable USB Debugging Mode on the phone by navigating to Settings >> Developer Options.
3. Make a backup of all your important data before following the guide.
4. The Galaxy Fame should be factory unlocked and not locked to any particular carrier.
5. Ensure the battery of the phone is charged more than 80 percent.
6. The Android 4.1.2 UBANA1 Jelly Bean firmware is compatible only with Samsung Galaxy Fame (GT-S6810L). Applying this to any incorrect variant might brick the device. Verify the model number of the Galaxy Fame by navigating to Settings >> About Phone.
Files Required
1. Android 4.1.2 UBANA1 Jelly Bean Firmware for Galaxy Fame S6810L
2. Odin 3.07
Related Article:How to Update Galaxy Fame S6810 with Android 4.1.2 XXAMJ1 Jelly Bean Official Firmware Steps to Update Galaxy Fame S6810L with Android 4.1.2 UBANA1 Jelly Bean Firmware
Step 1: Extract Firmware zip file using WinRAR/7-Zip/WinZip or any other extracting tool, you will get a .tar.md5 file and some other files (optional).
Step 2: Extract Odin zip file and you will get Odin3 v3.07.exe along with few other files.
Step 3: Switch off the Galaxy Fame.
Step 4: Boot the device into Download Mode by pressing and holding Volume Down, Home and Power buttons together until a construction Android robot icon with a warning triangle appears on screen. Now press the Volume Up button to enter Download Mode.
Step 5: Run Odin on the computer as an Administrator.
Step 6: Connect the Galaxy Fame to the computer using USB cable while it is in the Download Mode. Wait until Odin detects the device. When the device is connected successfully, the ID: COM box will turn to light blue with the COM port number. Additionally, the successful connected will be indicated by a message saying Added.
Note: If the Added message does not appear, then try re-install USB drivers or changing the port on the computer.
Step 7: Select the following files in Odin from extracted S6810LUBANA1 firmware folder:
- Click the PDA button and select the .tar.md5 file.
- Click the Phone button and select file with MODEM in its name. Ignore if there is no such file.
- Click the CSC button and select file with CSC in its name. Ignore if there is no such file.
- Click the PIT button and select the .pit file. Ignore if there is no such file.
Step 8: In Odin, enable Auto Reboot and F. Reset Time checkboxes. Also, ensure the Re-Partition checkbox is chosen only if a .pit file was chosen in the previous step.
Step 9: Verify everything suggested in Step 7 and Step 8 is done correctly. Then hit the Start button to begin the installation process.
Step 10: Once the installation process completes, your phone will restart and soon you will see a PASS message with green background in the left-most box at the very top of the Odin. You can now unplug the USB cable to disconnect it from the computer.
Samsung Galaxy Fame S6810L should be now updated with Android 4.1.2 UBANA1 Jelly Bean official firmware. Head over to Settings >> About Phone to verify the software version running on the device.
Note: If Galaxy Fame S6810L stuck at booting animation after Step 10 then go to recovery mode (press and hold the Volume Up, Home and Power buttons together) and perform Wipe data/Factory Reset and Wipe Cache Partition task before selecting reboot system now function. In recovery mode use Volume keys to navigate between options and Power key to select the option. Please note, performing wiping task will erase your device internal memory data and not external SD card data.
Click here to know How to Root Galaxy Fame S6810 running on Android 4.1.2 Jelly Bean firmware.
Step 9: Verify everything suggested in Step 7 and Step 8 is done correctly. Then hit the Start button to begin the installation process.
Step 10: Once the installation process completes, your phone will restart and soon you will see a PASS message with green background in the left-most box at the very top of the Odin. You can now unplug the USB cable to disconnect it from the computer.
Samsung Galaxy Fame S6810L should be now updated with Android 4.1.2 UBANA1 Jelly Bean official firmware. Head over to Settings >> About Phone to verify the software version running on the device.
Note: If Galaxy Fame S6810L stuck at booting animation after Step 10 then go to recovery mode (press and hold the Volume Up, Home and Power buttons together) and perform Wipe data/Factory Reset and Wipe Cache Partition task before selecting reboot system now function. In recovery mode use Volume keys to navigate between options and Power key to select the option. Please note, performing wiping task will erase your device internal memory data and not external SD card data.
Click here to know How to Root Galaxy Fame S6810 running on Android 4.1.2 Jelly Bean firmware.
Subscribe to:
Posts (Atom)