Showing posts with label tips. Show all posts
Showing posts with label tips. Show all posts
Tuesday, November 4, 2014
Samsung Galaxy Note 2 tips and tricks
The Samsung Galaxy Note 2 is the second in Samsungs series of giant-screened mobiles. It improves the stylus, gets a sleeker look and nabs all the best bits from the Samsung Galaxy S3. Weve spent a lot of close and personal time with the phone. Here are the secrets, tips and tricks weve uncovered.
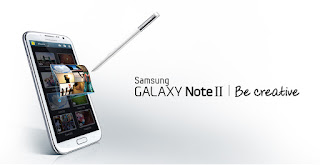
OLED-based screens like the Samsung Galaxy Note 2s tend to bring oversaturated colours that make skin tones look unnatural. They pop, but they pop a little too much. Theres a solution, though. In the settings menu is a Display Setting submenu that lets you choose how vivid the colours are. We recommend the "natural" or "movie" settings.
The Samsung Galaxy Note 2 has an excellent inbuilt media player, but there are some files it cant handle. We found that high-quality 1080p MKVs were too much for it. Snag a third-party media player like MX Player from the Google Play app store, though, and youll be flying. These can use software encoding to fill gaps in natuve video support.
One of the neatest additional features of the Samsung Galaxy S3 and Galaxy Note 2 is that you can overlay a video playback screen on top of any part of the phone. Just press a button in the nav bar of the media player and a little window will pop-up on the homescreen, playing the vid. Watch an episode of Peep Show while browsing the web? Dont mind if I do.
One of the best ways to show off the Sasmung Galaxy Note 2s screen is with a fancy 3D game. Top free picks to try include Dead Trigger.
The standard setting of the Samsung Galaxy Note 2 uses automatic brightness, which judges the intensity of screen brightness using an ambient light sensor on the front. If its still not bright enough at the max slider point, switch off the auto mode for real searing intensity. But it will affect battery life.
The Samsung Galaxy Note 2s microUSB port is more special than you might guess. It has MHL capabilities when used with a special Samsung cable, letting it output HD video and surround audio. The Samsung adapter, which is essentially an MHL-to-HDMI converter costs around £25. The Samsung Galaxy Note 2 does not come bundled with one, though.
If you want to output surround sound, make sure you tick the Surround box within the Settings menu. This isnt within the Audio bit, which you might expect, but is actually in the Accessory submenu.
The Samsung Galaxy Note 2 has a massive 3100mAh battery. Stamina is good at the worst of times, but theres also an auto power management mode to make the most of the phones juice. Its called Power Saving and has its own section within the main Settings menu. It can throttle the CPU, change the background of the web browser to conserve power (it turns the white background blue), and turns off haptic feedback. These are compromises, but they do work.
The best way to conserve power in any phone is to switch off features - most importantly 3G mobile internet. You can do this manually in the Samsung Galaxy Note 2, directly from the pull-down notifications menu, and apps such as MySettings let you do the same thing.
Another dead simple trick is to reduce the screen timeout time. This is in the Display submenu within settings, and lets you choose between 15 sec and 10 minutes of time the screen stays lit after a screen press. Its hardly a secret, but it is something not enough people consider.
In a time of non-removable batteries - the HTC One X and iPhone 5 to name but two - we love that the Samsung Galaxy Note 2 has a removable battery. You can swap it out within about 15 seconds. Spare batteries are available from eBay for well under £10. We recommend shopping around for a reliable brand though as some third-party batteries are as dodgy as Del Boys VCRs.
The S Pen digitser sucks away at the Note 2s battery life a little, so its a good idea to switch off the detection feature entirely if youre unlikely to use it for an extended period. Youll find it within the S Pen sub-menu in Settings.
An S Pen feature thats easy to miss is Quick Commands. This lets you launch any app on the phone with a quick flick of the S Pen. Just press the stylus button and swipe up the screen, and the Quick commands box will pop-up. Draw your pre-determined character or symbol and key-presto, the right app will launch.
The Samsung Galaxy Note 2 features excellent OCR, optical character recognition, and its built into the Samsung keyboard. Whip out the S Pen and the keyboard area will turn into a little box for you to write in, whether youre writing an email, text or searching the web. Its remarkably clever at working out your scribbles too although we havent tested it on a doctor yet.
We love the S Pen, but the thing is terribly easy to lose. Samsung has devised a way to make sure you dont leave home without it. Its called S Pen keeper. Using the accelerometer and the digitiser sensor of the Note 2, the phone can tell when youre walking away without the stylus in its little hole in the bottom of the device. Walk far enough and it bleats out an alarm tone.
The stylus of the Samsung Galaxy Note 2 makes it an obvious choice for creative types, business types and a host of other busy folk. But itll keep the kids entertained too. S Note has a feature called Idea Sketch, which lets you write the name of an object, only for it to appear in your sketch. Its a perfect educational tool, and a fun one too.
The Samsung Galaxy Note 2 comes setup for right-handers as standard, but theres also a mode for lefties in the Settings menu. This offsets the digitiser sensor, to compensate for the way those strange left-handed types hold pens. A creepy bunch, arent they?
Heres one feature we were a little surprised to see in a device thats such a geeks dreamphone. The Samsung Galaxy Note 2 has a mode called Easy home screen, which simplifies the layout of the phones home screens in a way that even your technophobe grandma might be able to get along with.
The music player of the Samsung Galaxy Note 2 features a fun little extra called Music square. This scans through your music library, arranging the tracks by mood - passionate, calm, exciting, joyful or a little in-between. Tap a block in the 5x5 square grid and youll be greeted with a tune to match your mood.
If youre out to spend as little as possible (and the Note 2 doesnt come cheap as it is), your best bet is to buy the cheapest 16GB model, and supplement any other storage needs with a microSD card. Top retailers for bargain basement-price memory cards include 7DayShop and Ebuyer. A 32GB microSD card these days will set you back less than £15 if you shop hard enough.
Cloud storage is the future - you may not like it, but you may as well embrace it. Samsung Galaxy Note 2 owners get to benefit from 50GB of free cloud storage from one of the best providers out there - Dropbox. There are Dropbox apps for mobiles, tablets and computers, and it honestly works like a dream. If this wont convert you, nothing will. You only normally get 2GB of free from Dropbox, making it a pretty sweet deal.
Samsung Galaxy Note 2 Contacts
Nab contacts from Facebook and Twitter
When we first got our Samsung Galaxy Note 2 in, it didnt have any of the usual social apps installed. Even if youre not a massive mobile Facebook-er, its worth giving the app a download because it lets you harvest contacts from the network, making populating your contacts book a good deal easier.
Do you have a bug-a-boo stalking you? Is there a creep who keeps calling? The Samsung Galaxy Note 2 lets you keep them away with the blocking mode. It restricts notifications and calls from all but your approved contacts - and that can be at all times, or just during the hours you choose.
Samsung Galaxy Note 2 Camera and Video
Use HDR mode in mixed lighting - or all the time
The 8-megapixel sensor of the Samsung Galaxy Note 2 is pretty good on its own, but the neat camera app ups its skills significantly. One of our favourite bonus bits is the HDR mode. This effectively combines multiple exposure in a single shot to bring out extra detail in shadows. Both the HDR and normal shots are saved, meaning theres very little downside - other than that taking shots is a little bit slower.
Nestled within the menus of the video camera app are fast and slow motion modes, capturing either more or fewer frames per second than normal. Its not quite the 120fps mode you get in some dedicated cameras, but will come in handy if youre trying to video a sports event, for example.
The Samsung Galaxy Note 2 doesnt have the fun face-distorting video effects you get with a vanilla Jelly Bean phone, but it does have a range of funky filters. There are colour pop modes, extracting all but certain shades from your videos, and the cartoon filter is perfect for some arty rotoscope-style vids.
Each time you take a photo, a shutter sound plays in the Samsung Galaxy Note 2. However, we found that occasionally the phone needs a little bit longer to attain a solid focus. Hold still for an extra half-second for good measure.
Using Air View, if you hold the pen over the transport bar of a movie clip in the media player, youll be given a preview of whats going on in the film at that point. It makes finding the right part of a film or TV ep a doddle.
Samsung Galaxy Note 2 Connectivity
Dont go over you allowance, with Data Usage
A staple Android feature is the Data Usage counter. This can be found within the Settings menu, and it monitors your data usage, showing it as a colourful graph. You can use it to cut off your mobile data connection once you reach a certain limit, to ensure you wont get charged by your carrier.
Weve already endorsed drag n drop file transfers over Kies syncing, but if youre a Kies fan, dont forget that you can also sync wirelessly. To set this feature up, scroll to the bottom of the More Settings sub-menu, where youll find the Kies via Wi-Fi option.
S Beam
A feature introduced with the Samsung Galaxy S3, S Beam uses a mixture of NFC and Wi-Fi Direct to let you transfer files between compatible Samsung phones. You just need to tap the phones together to get them playing. S Beam needs to be switched on, though, from within the Wireless and Networks menu.
NFC lets you buy coffee
The NFC connectivity of the Samsung Galaxy Note 2 also let you buy small items such as cups of coffee, sandwiches and the like. Several big high street chains have taken the NFC plunge, including Starbucks and EAT, using apps to let you dump credit onto your phone.
Share screens with AllShare Cast
AllShare used to be just about sending a video file from, say, your phone to your Blu-ray player. But now it does a lot more. AllShare Cast lets you send your Galaxy Note 2s screen contents to another display, a bit like AirPlay Mirroring.
Forget Bluetooth, Wi-Fi Direct is better
Wi-Fi Direct is tied into the S Beam transfer feature, but you can also use it easily on its own. This is a version of Wi-Fi that doesnt need an internet connection, as it can hook-up directly with another compatible device. It some ways its a successor to Bluetooth, letting you transfer files, and at a much greater speed than old Bluetooth could handle.
Watch your 4G
If you want to get a 4G-capable Note 2, be aware that the LTE edition is separate from the standard one. EE says itll stock the LTE Galaxy Note 2 from October 15.
Read More..
Samsung Galaxy Note 2 Screen and video
Get AMOLED colours in check
OLED-based screens like the Samsung Galaxy Note 2s tend to bring oversaturated colours that make skin tones look unnatural. They pop, but they pop a little too much. Theres a solution, though. In the settings menu is a Display Setting submenu that lets you choose how vivid the colours are. We recommend the "natural" or "movie" settings.
Fill video codec gaps with third-party players
The Samsung Galaxy Note 2 has an excellent inbuilt media player, but there are some files it cant handle. We found that high-quality 1080p MKVs were too much for it. Snag a third-party media player like MX Player from the Google Play app store, though, and youll be flying. These can use software encoding to fill gaps in natuve video support.
Video multi-tasking is in
One of the neatest additional features of the Samsung Galaxy S3 and Galaxy Note 2 is that you can overlay a video playback screen on top of any part of the phone. Just press a button in the nav bar of the media player and a little window will pop-up on the homescreen, playing the vid. Watch an episode of Peep Show while browsing the web? Dont mind if I do.
Free games to show off the screen
One of the best ways to show off the Sasmung Galaxy Note 2s screen is with a fancy 3D game. Top free picks to try include Dead Trigger.
Not bright enough? Turn off auto
The standard setting of the Samsung Galaxy Note 2 uses automatic brightness, which judges the intensity of screen brightness using an ambient light sensor on the front. If its still not bright enough at the max slider point, switch off the auto mode for real searing intensity. But it will affect battery life.
The microUSB port can output video
The Samsung Galaxy Note 2s microUSB port is more special than you might guess. It has MHL capabilities when used with a special Samsung cable, letting it output HD video and surround audio. The Samsung adapter, which is essentially an MHL-to-HDMI converter costs around £25. The Samsung Galaxy Note 2 does not come bundled with one, though.
Mini home cinema? Tick the surround box
If you want to output surround sound, make sure you tick the Surround box within the Settings menu. This isnt within the Audio bit, which you might expect, but is actually in the Accessory submenu.
Samsung Galaxy Note 2 Battery life
Keep battery life riding high with auto management
The Samsung Galaxy Note 2 has a massive 3100mAh battery. Stamina is good at the worst of times, but theres also an auto power management mode to make the most of the phones juice. Its called Power Saving and has its own section within the main Settings menu. It can throttle the CPU, change the background of the web browser to conserve power (it turns the white background blue), and turns off haptic feedback. These are compromises, but they do work.
Switch off features for extra battery life
The best way to conserve power in any phone is to switch off features - most importantly 3G mobile internet. You can do this manually in the Samsung Galaxy Note 2, directly from the pull-down notifications menu, and apps such as MySettings let you do the same thing.
Reduce screen timeout time
Another dead simple trick is to reduce the screen timeout time. This is in the Display submenu within settings, and lets you choose between 15 sec and 10 minutes of time the screen stays lit after a screen press. Its hardly a secret, but it is something not enough people consider.
Grab a spare battery, live forever
In a time of non-removable batteries - the HTC One X and iPhone 5 to name but two - we love that the Samsung Galaxy Note 2 has a removable battery. You can swap it out within about 15 seconds. Spare batteries are available from eBay for well under £10. We recommend shopping around for a reliable brand though as some third-party batteries are as dodgy as Del Boys VCRs.
Turn off S Pen
The S Pen digitser sucks away at the Note 2s battery life a little, so its a good idea to switch off the detection feature entirely if youre unlikely to use it for an extended period. Youll find it within the S Pen sub-menu in Settings.
Samsung Galaxy Note 2 S Pen
Quick commands let you launch… anything
An S Pen feature thats easy to miss is Quick Commands. This lets you launch any app on the phone with a quick flick of the S Pen. Just press the stylus button and swipe up the screen, and the Quick commands box will pop-up. Draw your pre-determined character or symbol and key-presto, the right app will launch.
OCR means you can forget the virtual keyboard
The Samsung Galaxy Note 2 features excellent OCR, optical character recognition, and its built into the Samsung keyboard. Whip out the S Pen and the keyboard area will turn into a little box for you to write in, whether youre writing an email, text or searching the web. Its remarkably clever at working out your scribbles too although we havent tested it on a doctor yet.
S Pen keeper - its a keeper
We love the S Pen, but the thing is terribly easy to lose. Samsung has devised a way to make sure you dont leave home without it. Its called S Pen keeper. Using the accelerometer and the digitiser sensor of the Note 2, the phone can tell when youre walking away without the stylus in its little hole in the bottom of the device. Walk far enough and it bleats out an alarm tone.
Keep the kids happy with S Note
The stylus of the Samsung Galaxy Note 2 makes it an obvious choice for creative types, business types and a host of other busy folk. But itll keep the kids entertained too. S Note has a feature called Idea Sketch, which lets you write the name of an object, only for it to appear in your sketch. Its a perfect educational tool, and a fun one too.
Air View - hover pen fun
Somethingthat makes the Samsung Galaxy Note 2 S Pen so much more than a standard stylus is that it can be sensed without even touching the screen. Samsung makes great use of this with Air View. Its used throughout Samsungs apps, and makes info pop-up when the S Pen hovers over items. For example, you can read the first lines of emails, see previews of pictures and take a closer look at calendar events. Its fantastic.You can scribble - on anything
The Samsung Galaxy Note 2 S Pen also let you scribble notes on anything. Just hold the button on the stylus down, press the nib down on the screen and hold it there until you see a flash around the screen edges. This is the phone taking a screenshot of whats on-screen, which you can then write notes on. This is further integrated into apps like S Planner, which have dedicated handwriting modes.Other apps use S Pen pressure sensitivity
Now that the Note series is fairly established, a bunch of excellent apps already make use of the pressure sensitive S Pen stylus. Top picks include Sketchbook Pro and Infinite Painter. Its not just S Note that shows the S Pen off these days.The S Pen takes screengrabs
Heres a really neat S Pen tool to show off to your "non stylus" friends. Press down the button on the Galaxy Note 2 stylus, draw a shape on the screen and whatevers on-screen within the shape will be saved as a screengrab.For full S Pen compatibility, check out Samsung Apps
Samsung says that if you want full S Pen certified apps, youll need to go to the Samsung Apps store. This comes built into the Note 2, and theres even an S Pen apps section. At present, youre still best off using the Play Store as well, though, as the Samsung Apps store isnt exactly rammed full of Note 2 apps yet.Left handers need a tweak
The Samsung Galaxy Note 2 comes setup for right-handers as standard, but theres also a mode for lefties in the Settings menu. This offsets the digitiser sensor, to compensate for the way those strange left-handed types hold pens. A creepy bunch, arent they?
Samsung Galaxy Note 2 Interface
One for your grandma? Easy home screen modeHeres one feature we were a little surprised to see in a device thats such a geeks dreamphone. The Samsung Galaxy Note 2 has a mode called Easy home screen, which simplifies the layout of the phones home screens in a way that even your technophobe grandma might be able to get along with.
Full screengrabs are easy
Like the Samsung Galaxy S3, the Note 2 makes it pretty easy to take screengrabs of whatevers on the phones display. Just hold down the home button and the power button at the same time, wait or a white flash and a screengrab will be taken and whisked over to the Gallery app.Use one-handed operation mode for on-the-go use
The big screen is one of the main selling points of the Samsung Galaxy Note 2, but it doesnt half make it hard to use one-handed. Knowing this, Samsung as included a one-handed mode, which organises things like the keypad, virtual keyboard and the unlock pattern screen so that you can operate them with one mitt. Youll find it in the Settings menu.Dont forget side-loading of apps
The Samsung Galaxy Note 2 is an Android device, with all the benefits that brings. You dont have to rely on the official Google Play app store for one, with APK installation files available for all sorts of other apps online. Be careful, though, as Android viruses are a real issue.Customise your phone with non-Samsung widgets
Samsung supplied a nice handful of widgets with which you can customise your home screens, but far too few people try a new look with third-party widgets from Google Play. And there are loads out them out there. Some of our old faves include those of the Beautiful Widgets package.Samsung Galaxy Note 2 Gadgets and Gimmicks
Motion control Heres one were not big fans of, but some of you may like it. The Samsung Galaxy Note 2 lets you control things like the photo gallery and the navigation of you home screens using the accelerometer - by tilting your phone, basically. You can turn it off, though, and its set to "off" as standard. Phew.Face unlock
A bit Minority Report, this one. The Samsung Galaxy Note 2 can scan your face to unlock your phone. It takes a picture of your mug, remembers the basic geometry of it and then scans your face whenever you try and unlock the phone. It works pretty well, but as a security measure is about as flimsy as the padlock on a filofax.Smart Stay
The last user-facing camera gimmick is one that sounds kinda neat in principle. It scans for your eyes to check if youre reading, and if it spots them, Smart Stay stops the backlight from turning off. Its designed to make reading on the Samsung Galaxy Note 2 a good deal less frustrating. Its a feature youll find in the Settings menu.Jelly Bean easter egg
The Jelly Bean easter egg has made it in the Samsung Galaxy Note 2. Go to Settings menu > About device and tap on the Android version number entry. Youll be transported to a screen with a picture of a giant jelly bean on it. Hold your finger down on said jelly bean and the screen will fill up with dozens of the blighters, which you can flick around. Pure joy.Arrange your music by moods
The music player of the Samsung Galaxy Note 2 features a fun little extra called Music square. This scans through your music library, arranging the tracks by mood - passionate, calm, exciting, joyful or a little in-between. Tap a block in the 5x5 square grid and youll be greeted with a tune to match your mood.
Samsung Galaxy Note 2 Storage
Expandable storage - where to get it cheap
If youre out to spend as little as possible (and the Note 2 doesnt come cheap as it is), your best bet is to buy the cheapest 16GB model, and supplement any other storage needs with a microSD card. Top retailers for bargain basement-price memory cards include 7DayShop and Ebuyer. A 32GB microSD card these days will set you back less than £15 if you shop hard enough.
Flush the cache for extra memory
If you find yourself running low on memory, you can easily delete the cache and temporary files of any apps you have installed. To do this, go to the Applications Manager section within settings and tap on an app to see how much memory its leeching. There will be buttons to wipe the cache and data for the app here.Comes with 50GB of dropbox storage
Cloud storage is the future - you may not like it, but you may as well embrace it. Samsung Galaxy Note 2 owners get to benefit from 50GB of free cloud storage from one of the best providers out there - Dropbox. There are Dropbox apps for mobiles, tablets and computers, and it honestly works like a dream. If this wont convert you, nothing will. You only normally get 2GB of free from Dropbox, making it a pretty sweet deal.
Dont sync, drag n drop
If you chose to go Android rather than opting for an iPhone, theres a good chance that the open-ness of the platform had something to do with it. Samsung is keen on trying to make its users adopt the Kies desktop software, but its actually completely unnecessary. Plug the Samsung Galaxy Note 2 into a computer with a microUSB cable and itll show up as a media player drive, which you can drag and drop all kinds of files onto. Transfer speeds are impressively fast too.Samsung Galaxy Note 2 Contacts
Nab contacts from Facebook and Twitter When we first got our Samsung Galaxy Note 2 in, it didnt have any of the usual social apps installed. Even if youre not a massive mobile Facebook-er, its worth giving the app a download because it lets you harvest contacts from the network, making populating your contacts book a good deal easier.
Blocking Mode
Do you have a bug-a-boo stalking you? Is there a creep who keeps calling? The Samsung Galaxy Note 2 lets you keep them away with the blocking mode. It restricts notifications and calls from all but your approved contacts - and that can be at all times, or just during the hours you choose.
Samsung Galaxy Note 2 Camera and Video
Use HDR mode in mixed lighting - or all the time The 8-megapixel sensor of the Samsung Galaxy Note 2 is pretty good on its own, but the neat camera app ups its skills significantly. One of our favourite bonus bits is the HDR mode. This effectively combines multiple exposure in a single shot to bring out extra detail in shadows. Both the HDR and normal shots are saved, meaning theres very little downside - other than that taking shots is a little bit slower.
Check out slow and fast motion modes
Nestled within the menus of the video camera app are fast and slow motion modes, capturing either more or fewer frames per second than normal. Its not quite the 120fps mode you get in some dedicated cameras, but will come in handy if youre trying to video a sports event, for example.
Dont forget video effects
The Samsung Galaxy Note 2 doesnt have the fun face-distorting video effects you get with a vanilla Jelly Bean phone, but it does have a range of funky filters. There are colour pop modes, extracting all but certain shades from your videos, and the cartoon filter is perfect for some arty rotoscope-style vids.
Give the exposure longer time than the sound effect suggests
Each time you take a photo, a shutter sound plays in the Samsung Galaxy Note 2. However, we found that occasionally the phone needs a little bit longer to attain a solid focus. Hold still for an extra half-second for good measure.
Get vid previews with Air View
Using Air View, if you hold the pen over the transport bar of a movie clip in the media player, youll be given a preview of whats going on in the film at that point. It makes finding the right part of a film or TV ep a doddle.
Samsung Galaxy Note 2 Connectivity
Dont go over you allowance, with Data Usage A staple Android feature is the Data Usage counter. This can be found within the Settings menu, and it monitors your data usage, showing it as a colourful graph. You can use it to cut off your mobile data connection once you reach a certain limit, to ensure you wont get charged by your carrier.
Wi-Fi sync with Kies
Weve already endorsed drag n drop file transfers over Kies syncing, but if youre a Kies fan, dont forget that you can also sync wirelessly. To set this feature up, scroll to the bottom of the More Settings sub-menu, where youll find the Kies via Wi-Fi option.
S Beam
A feature introduced with the Samsung Galaxy S3, S Beam uses a mixture of NFC and Wi-Fi Direct to let you transfer files between compatible Samsung phones. You just need to tap the phones together to get them playing. S Beam needs to be switched on, though, from within the Wireless and Networks menu.NFC lets you buy coffee
The NFC connectivity of the Samsung Galaxy Note 2 also let you buy small items such as cups of coffee, sandwiches and the like. Several big high street chains have taken the NFC plunge, including Starbucks and EAT, using apps to let you dump credit onto your phone.Share screens with AllShare Cast
AllShare used to be just about sending a video file from, say, your phone to your Blu-ray player. But now it does a lot more. AllShare Cast lets you send your Galaxy Note 2s screen contents to another display, a bit like AirPlay Mirroring. Forget Bluetooth, Wi-Fi Direct is better
Wi-Fi Direct is tied into the S Beam transfer feature, but you can also use it easily on its own. This is a version of Wi-Fi that doesnt need an internet connection, as it can hook-up directly with another compatible device. It some ways its a successor to Bluetooth, letting you transfer files, and at a much greater speed than old Bluetooth could handle. Watch your 4G
If you want to get a 4G-capable Note 2, be aware that the LTE edition is separate from the standard one. EE says itll stock the LTE Galaxy Note 2 from October 15.
Tuesday, September 16, 2014
Sony Xperia SP Tips and Tricks
How to Factory Reset Sony Xperia SP
Resetting your Sony Xperia SP will restore the default settings of your device. It will also delete all your files on your phone, so it is recommended to backup all your important files on your computer.
Follow these steps on how to reset the Sony Xperia SP:
How to Start a Conference Call on Sony Xperia SP
With conference call you can talk to two or more parties simultaneously right thru your phone. Adding multiple participants even if your on a call is just few taps away with Sony Xperia SP. Heres how to create a conference call.
1. If youre on an ongoing call, tap .
.
2. Then dial the number of the second participant and tap .
.
3. When the second participant answers the call, the first call is put on hold.
4. Tap on to start the conference call. Repeat the same steps to add more participants to the conference call.
To have a private conversation with one of the participants
1. Tap {0} participants during the ongoing conference call.
2. Then tap on the name of the participant you wish to talk privately.
3. To end the conversation and return to the conference call, tap.
To release a participant during the ongoing conference call
1. Tap the button showing the number of participants during the ongoing conference call.
2. Then tap next to the participant you want to release from the call.
To end the conference call
1. During the conference call, just tap End conference call.
How to Set Up Your Facebook Account on Sony Xperia SP
We simply cant get enough of Facebook. And this social networking giant made sure that they still exist even on your smartphones. Now you can set up a Facebook Account right on your Xperia SP phone which will give you easy navigation on Facebook. Heres how you can set up your Facebook account to work on your Xperia SP device.
1. On your devices homeLcd tap on
2. Then tap on Settings and go to Accounts & sync.
3. The Active auto-sync checkbox should be marked to make sure that applications can synchronise data automatically.
4. Tap on Add Account and then Xperia with Facebook.
5. Just follow the registration wizard to create an account or you can sign in if you already have one.
6. Once youre done, select a synchronisation option for your account and tap on Finish.
Your Facebook account is now set up to work on your phone.
How to Save Battery Life on Sony Xperia SP
How to Turn on Mobile Bravia Engine on Sony Xperia SP
Read More..
Resetting your Sony Xperia SP will restore the default settings of your device. It will also delete all your files on your phone, so it is recommended to backup all your important files on your computer.
Follow these steps on how to reset the Sony Xperia SP:
- From your Home Lcd, tap the Menu icon.
- Tap Settings, then select Backup and Reset.
- Tap Factory data reset. (If you want to delete your internal files, just check Erase Internal Storage checkbox.)
- Tap Reset phone.
- Then you need to confirm by tapping Erase everything.
With conference call you can talk to two or more parties simultaneously right thru your phone. Adding multiple participants even if your on a call is just few taps away with Sony Xperia SP. Heres how to create a conference call.
1. If youre on an ongoing call, tap
.2. Then dial the number of the second participant and tap
.3. When the second participant answers the call, the first call is put on hold.
4. Tap on
to start the conference call. Repeat the same steps to add more participants to the conference call.To have a private conversation with one of the participants
1. Tap {0} participants during the ongoing conference call.
2. Then tap on the name of the participant you wish to talk privately.
.To release a participant during the ongoing conference call
1. Tap the button showing the number of participants during the ongoing conference call.
next to the participant you want to release from the call.To end the conference call
1. During the conference call, just tap End conference call.
How to Set Up Your Facebook Account on Sony Xperia SP
We simply cant get enough of Facebook. And this social networking giant made sure that they still exist even on your smartphones. Now you can set up a Facebook Account right on your Xperia SP phone which will give you easy navigation on Facebook. Heres how you can set up your Facebook account to work on your Xperia SP device.
1. On your devices homeLcd tap on
2. Then tap on Settings and go to Accounts & sync.
3. The Active auto-sync checkbox should be marked to make sure that applications can synchronise data automatically.
4. Tap on Add Account and then Xperia with Facebook.
5. Just follow the registration wizard to create an account or you can sign in if you already have one.
6. Once youre done, select a synchronisation option for your account and tap on Finish.
Your Facebook account is now set up to work on your phone.
Battery Life depends on how you use your device. For Sony Xperia SP device, if you want to save your battery to last longer hours, you may need to adjust your settings. Follow these suggestions:
• Turn on the power-saving option on the device. Then lessen the Lcd brightness and theLcd lock timeout. On the HomeLcd, tap on Menu icon. Select Settings > Power management.
- Use the Stamina mode and Low battery mode features.
- To activate the STAMINA mode: While you are in the Power management, tap on Point icon next to STAMINA mode, then tap Activate.
• Turn down your device volume with the volume keys.
• Close any apps or features when you are done using it so they will not continuously running in the background.
• Turn off the network connection if you are out of range so that your device will stop searching for a network signal.
• You should use the latest version of the software update. Software updates improves some features and fixes some bugs on the previous software version.
How to Import Contacts From Old Phone to New Phone (on Sony, iPhone, Samsung, HTC and Nokia)
• Turn on the power-saving option on the device. Then lessen the Lcd brightness and theLcd lock timeout. On the HomeLcd, tap on Menu icon. Select Settings > Power management.
- Use the Stamina mode and Low battery mode features.
- To activate the STAMINA mode: While you are in the Power management, tap on Point icon next to STAMINA mode, then tap Activate.
• Turn down your device volume with the volume keys.
• Close any apps or features when you are done using it so they will not continuously running in the background.
• Turn off the network connection if you are out of range so that your device will stop searching for a network signal.
• You should use the latest version of the software update. Software updates improves some features and fixes some bugs on the previous software version.
How to Import Contacts From Old Phone to New Phone (on Sony, iPhone, Samsung, HTC and Nokia)
Contacts is very important for everyone of us. We cant connect to our friends without a contact number. If you have a new phone, saving contacts on the phone one by one is so hassle. But now, theres an easy way how to transfer or import your contacts from your old phone to your new phone.
Use your PC to transfer contacts to your new phone. This process is applicable in several phone brands, including iPhone, Samsung, HTC and Nokia.
You just need an Internet Connection on your PC, your old and new phone and their own USB cable.
If you are not prompted with a pop-up window to install the PC Companion, you can also download the PC Companion here.
How to Make Your Sony Xperia SP a Wi-Fi Hotspot
Ever imagine how you can make your own Sony Xperia SP a WiFi hotspot? Well, sure you can. This feature allows for your other devices to pick up your mobile hotspot settings on your Sony Xperia SP. This is more preferable when you’re in public trying to locate a WiFi connection. You can connect up to eight devices on your Sony Xperia SP. Check out these steps for easy, convenient and a money-saver internet experience.
1. On your devices homeLcd tap on.
2. Then tap on Settings and go to select More...
3. Choose Tethering & portable hotspot.
4. Tap Portable Wi-Fi hotspot settings, then Configure Wi-Fi hotspot.
5. Enter the Network SSID for the network, and tap the Security field to select a
security type. (Enter a password if required).
6. Tap Save.
7. Mark the Portable Wi-Fi hotspot checkbox. Your device starts broadcasting its
Wi-Fi network name (SSID).
8. Unmark the Portable Wi-Fi hotspot checkbox when you want to stop sharing
your data connection via Wi-Fi.
How to Set Up Voicemail Service on Sony Xperia SP
Voicemail services depends on your subscription plan with your service provider. This feature allows caller to leave voice messages on your phone whenever you cant pick up. Your voicemail number may be found on your sim card or you can get it directly from your service provider. Here are the steps to set up voicemail service on Sony Xperia SP.
To set up your voicemail number:
1. On your devices homeLcd, tap on Menu icon to enter your voicemail number.
2. Go to Settings menu.
3. Select Call Settings > Select SIM card,
4. Select a SIM that you want to use, then tap Voicemail Settings.
4. Choose Voicemail Number so you can enter your designated voicemail service number.
5. And lastly tap on OK.
To call your voicemail service number:
1. On your homeLcd, tap on the Menu icon.
2. Look for Phone and tap it.
3. And touch and hold for seconds the number 1.
How to Add a Shortcut on Sony Xperia SP HomeLcd
Use your PC to transfer contacts to your new phone. This process is applicable in several phone brands, including iPhone, Samsung, HTC and Nokia.
You just need an Internet Connection on your PC, your old and new phone and their own USB cable.
Then you need to install the PC Companion program. This is a free application and the installation files are already saved on your new phone. This program can also be used in updating your phone software.
Please note that if you are using the Microsoft Windows 7 operating system on your PC, make sure that the AutoPlay setting is enabled.
To check your settings:
Click Start > Control Panel, then type "autoplay" on the search box. Click the AutoPlay, and mark the check box Use AutoPlay for all media and devices.
Installing the PC Companion:
Installing the PC Companion:
- Turn on your new Phone and connect it to your PC.
- On your new Phone, tap "Install" to install PC Companion on the PC.
- On your computer, if a pop-up window that appears notifies you about available PC Software, select Run Startme.exe.
- Then click Install to start the installation and then follow the instructions to complete the installation.
If you are not prompted with a pop-up window to install the PC Companion, you can also download the PC Companion here.
Transferring your contacts to your new phone:
- Make sure that PC Companion is installed on your PC.
- Open the PC Companion application on your PC.
- Then click Contacts Setup and follow the instructions to transfer your contacts.
How to Make Your Sony Xperia SP a Wi-Fi Hotspot
Ever imagine how you can make your own Sony Xperia SP a WiFi hotspot? Well, sure you can. This feature allows for your other devices to pick up your mobile hotspot settings on your Sony Xperia SP. This is more preferable when you’re in public trying to locate a WiFi connection. You can connect up to eight devices on your Sony Xperia SP. Check out these steps for easy, convenient and a money-saver internet experience.
1. On your devices homeLcd tap on
.2. Then tap on Settings and go to select More...
3. Choose Tethering & portable hotspot.
4. Tap Portable Wi-Fi hotspot settings, then Configure Wi-Fi hotspot.
5. Enter the Network SSID for the network, and tap the Security field to select a
security type. (Enter a password if required).
6. Tap Save.
7. Mark the Portable Wi-Fi hotspot checkbox. Your device starts broadcasting its
Wi-Fi network name (SSID).
8. Unmark the Portable Wi-Fi hotspot checkbox when you want to stop sharing
your data connection via Wi-Fi.
Voicemail services depends on your subscription plan with your service provider. This feature allows caller to leave voice messages on your phone whenever you cant pick up. Your voicemail number may be found on your sim card or you can get it directly from your service provider. Here are the steps to set up voicemail service on Sony Xperia SP.
To set up your voicemail number:
1. On your devices homeLcd, tap on Menu icon
to enter your voicemail number.2. Go to Settings menu.
3. Select Call Settings > Select SIM card,
4. Select a SIM that you want to use, then tap Voicemail Settings.
4. Choose Voicemail Number so you can enter your designated voicemail service number.
5. And lastly tap on OK.
To call your voicemail service number:
1. On your homeLcd, tap on the Menu icon
.2. Look for Phone and tap it.
3. And touch and hold for seconds the number 1.
Just like a desktop, it also works best on any smartphones to add a shortcut on a homeLcd. This r somehow makes navigation, especially to important files/apps, more accessible. Its less hassle and less tapping. Sony Xperia SP definitely allows you to make your device experience stress-free by adding a shortcut to important apps on your homeLcd. Heres how to do it.
1. On your devices homeLcd, touch and hold and empty area until the device vibrates.
2. After doing so, tap on Apps.
3. Then go to Shortcuts and select a shortcut.
4. Or another option, just go directly to the Application Lcd and touch and hold the application.
How to Add and Resize Widgets on Sony Xperia SP
Adding Widgets on your HomeLcd will help you improve your productivity in using your Sony Xperia SP. If you dont know what widgets means, Widgets are small applications that you can directly use on your HomeLcd. These will serve as your shortcut icon so will no longer need to access your Menu.
Follow these steps on how to add widgets on your HomeLcd.
How to resize a Widget:
1. On your devices homeLcd, touch and hold and empty area until the device vibrates.
2. After doing so, tap on Apps.
3. Then go to Shortcuts and select a shortcut.
4. Or another option, just go directly to the Application Lcd and touch and hold the application.
How to Add and Resize Widgets on Sony Xperia SP
Adding Widgets on your HomeLcd will help you improve your productivity in using your Sony Xperia SP. If you dont know what widgets means, Widgets are small applications that you can directly use on your HomeLcd. These will serve as your shortcut icon so will no longer need to access your Menu.
Follow these steps on how to add widgets on your HomeLcd.
- On your devices homeLcd, press the Four Horizontal Line icon.
- After doing so, tap on Add.
- Then go to Widgets and select a widget.
How to resize a Widget:
- Tap and hold the widget you want to resize until it magnifies and the device vibrates. You can tell if the widget is resizeable if the highlighted frame and resizing dots appear.
- You just need to Drag the dots for your preferred size.
- Then tap anywhere on the HomeLcd to confirm the new size of the widget.
Mobile Bravia Engine is a pre-installed technology on Sony Xperia Z which allows you to view photos and videos in a clearer, sharper and more natural way. This technology might consume more battery but its worth it when you use it to view images in a nicer way. Heres how you can turn on Mobile Bravia Engine on Sony Xperia Z.
1. On your devices homeLcd, tap .
.
2. Then find and tap Settings.
3. Go to Display.
4. And mark the Mobile BRAVIA Engine 2 checkbox if its not marked.
Now youre ready to view those captured moments in a clearer, sharper and more natural way.
1. On your devices homeLcd, tap
.2. Then find and tap Settings.
3. Go to Display.
4. And mark the Mobile BRAVIA Engine 2 checkbox if its not marked.
Now youre ready to view those captured moments in a clearer, sharper and more natural way.
How to Screen Mirror Sony Xperia SP to Show the Screen on a TV
The Screen Mirroring will allow you to show the Lcd of your device on a TV or other large display without using a cable connections. It uses the Wi-Fi Direct technology that create a wireless connection between two devices. You can also use this feature to listen to music from your phone via the TVs speakers.
How to mirror the Lcd of your Sony Xperia SP on a TV:
1. First you need to turn on the Lcd mirroring function on your TV. Just follow the instructions in the User Guide of your TV.
2. From your Home Lcd, tap on the Menu icon
3. Select on Settings, and tap Xperia™.
4. Choose Screen mirroring.
5. Tap to turn on the Screen mirroring and select a device.
Warnings:
When using Lcd mirroring, the image quality may sometimes negatively impacted if there is a Wi-Fi interference.
When using Lcd mirroring, do not cover the Wi-Fi antenna area of your device.
How to mirror the Lcd of your Sony Xperia SP on a TV:
1. First you need to turn on the Lcd mirroring function on your TV. Just follow the instructions in the User Guide of your TV.
2. From your Home Lcd, tap on the Menu icon
3. Select on Settings, and tap Xperia™.
4. Choose Screen mirroring.
5. Tap to turn on the Screen mirroring and select a device.
Warnings:
When using Lcd mirroring, the image quality may sometimes negatively impacted if there is a Wi-Fi interference.
When using Lcd mirroring, do not cover the Wi-Fi antenna area of your device.
Thursday, September 11, 2014
HTC Desire 501 Tips and Tricks
How to Factory Reset (Hard Reset) HTC Desire 501
Resetting your HTC Desire 501 will restore the default settings of your device. It will also delete all your files on your phone, so it is recommended to have a backup of your important files on your computer. There are two ways on how to reset your HTC Desire 501. It can be done through the settings or through the hardware buttons.
Resetting HTC Desire 501 on Settings:
Resetting HTC Desire 501 by Hardware Buttons:
These steps is also helpful when your HTC Desire 501 is unresponsive or frozen and theres no way to access the settings.
How to Import Contacts From Old Phone to New Phone (on iPhone, Samsung, HTC and Nokia)
Contacts is very important for everyone of us. We cant connect to our friends without a contact number. If you have a new phone, saving contacts on the phone one by one is so hassle. But now, theres an easy way how to transfer or import your contacts from your old phone to your new phone.
Use your PC to transfer contacts to your new phone. This process is applicable in several phone brands, including iPhone, Samsung, HTC and Nokia.
You just need an Internet Connection on your PC, your old and new phone and their own USB cable.
If you are not prompted with a pop-up window to install the PC Companion, you can also download the PC Companion here.
Resetting your HTC Desire 501 will restore the default settings of your device. It will also delete all your files on your phone, so it is recommended to have a backup of your important files on your computer. There are two ways on how to reset your HTC Desire 501. It can be done through the settings or through the hardware buttons.
Resetting HTC Desire 501 on Settings:
- Slide the Notifications panel open, and then tap the Gear Icon or Settings.
- Select Backup & reset.
- Tap Reset phone.
- If you want to delete all your files, then tap Erase all data.
- Then tap OK to confirm.
These steps is also helpful when your HTC Desire 501 is unresponsive or frozen and theres no way to access the settings.
- First, press and hold the Volume Down button, and then do the same way on the Power button.
- Hold the two buttons until the three Android images appear on the Lcd.
- Release the button when the three Android images appear and press Volume Down.
- Tap on Factory Reset, and then press the Power Button to confirm.
Contacts is very important for everyone of us. We cant connect to our friends without a contact number. If you have a new phone, saving contacts on the phone one by one is so hassle. But now, theres an easy way how to transfer or import your contacts from your old phone to your new phone.
Use your PC to transfer contacts to your new phone. This process is applicable in several phone brands, including iPhone, Samsung, HTC and Nokia.
You just need an Internet Connection on your PC, your old and new phone and their own USB cable.
Then you need to install the PC Companion program. This is a free application and the installation files are already saved on your new phone. This program can also be used in updating your phone software.
Please note that if you are using the Microsoft Windows 7 operating system on your PC, make sure that the AutoPlay setting is enabled.
To check your settings:
Click Start > Control Panel, then type "autoplay" on the search box. Click the AutoPlay, and mark the check box Use AutoPlay for all media and devices.
Installing the PC Companion:
Installing the PC Companion:
- Turn on your new Phone and connect it to your PC.
- On your new Phone, tap "Install" to install PC Companion on the PC.
- On your computer, if a pop-up window that appears notifies you about available PC Software, select Run Startme.exe.
- Then click Install to start the installation and then follow the instructions to complete the installation.
If you are not prompted with a pop-up window to install the PC Companion, you can also download the PC Companion here.
Transferring your contacts to your new phone:
- Make sure that PC Companion is installed on your PC.
- Open the PC Companion application on your PC.
- Then click Contacts Setup and follow the instructions to transfer your contacts.
How to Send a Multimedia Message and Create a Slideshow on HTC Desire 501
Text messaging has grown its popularity over the years especially to younger generations. People, especially teens, prefer to communicate with friends and relatives thru texting instead of the traditional call. But whether your reaching out to friends thru text or a call, what matters most is the effort for still trying to keep in touch despite distance and even on busy schedules. We should be more grateful these days as it only takes minutes, even seconds, for a quick response unlike the old school snail mail. Now, everyone is just a text away. And more to that, you can even send multimedia messages (MMS) especially on special occasions to add more touch to a simple text-filled Lcd. Heres how you can send a MMS on HTC Desire 501.
1. On your devices homeLcd, tap on
 and go to Messages.
2. Then tap on

3. On the To Field, key in a contact name, mobile number or email address. You can also send it to a group of friends by tapping on

4. To add a subject line, tap on
 and go to Add Subject.
5. Tap on the box that says Add text and there you can type in your special message.
6. Choose an attachment for your message by tapping on

7. After you browse and select an attachment, tap on Send or press
 to save it as a draft. You can also tap on
 to see options like replacing, viewing and removing your attachment.
Now if you wish your Mutimedia Message to reach an extra mile, you can have it on a slideshow format. Heres how you can create one:
once again and select Slide.2. Then choose where you want to insert the next slide.
3. When youre done adding the next slide, you can either do the following:
- tap onand choose to add a video or a photo
- tap onand then audio if you want to add a voice recording or a music to the slide
- tap on Add Text to add a caption
- tap onto view options like replacing, viewing or removing your attachment.
select Preview. If you dont see Preview, scroll down the menu. To view the playback controls, tap once the preview Lcd.5. When its all set and done, press on or tap on Send to save message as a draft.
or tap on Send to save message as a draft.Now you can make someones day a very special one with this creative and personalize MMS.
How to Set HTC Desire 501 into Sleep Mode
How to Set HTC Desire 501 into Sleep Mode
Like any other device, setting HTC Desire 501 into sleep mode will somehow save its battery life. Sleep mode puts your device into a lower power state while the display is off. It also prevents accidental button presses when its in your pocket or bag. Heres how you can set HTC Desire 501 into sleep mode.
1. Briefly press on your devices Power button to turn off the display. Then switch to Sleep Mode.
2. To change the time before your device sleeps, just go to Display & buttons settings.
3. To wake it up, manually press the Power button and unlock your Lcd.
4. Your device will also automatically wakes up when you have an incoming call.
How to Extend Battery Life of HTC Desire 501
1. Briefly press on your devices Power button to turn off the display. Then switch to Sleep Mode.
2. To change the time before your device sleeps, just go to Display & buttons settings.
3. To wake it up, manually press the Power button and unlock your Lcd.
4. Your device will also automatically wakes up when you have an incoming call.
How to Extend Battery Life of HTC Desire 501
Battery Life depends on how you use your device. For HTC Desire 501 device, if you want to save your battery to last longer hours, you may need to adjust your settings. Follow these suggestions:
• Turn on the power-saving option on the device. Then lessen the Lcd brightness and the Lcd lock timeout.
1. Slide the Notifications panel open.
- You can also choose which phone features to conserve the power. Just tap the Power saver notification first before you turn power saver mode on.
2. To turn the power saver mode on or off, tap the check button next to the Power saver notification.
• Turn down your device volume with the volume keys.
• Close any apps or features when you are done using it so they will not continuously running in the background.
• Turn off the network connection if you are out of range so that your device will stop searching for a network signal.
• You should use the latest version of the software update. Software updates improves some features and fixes some bugs on the previous software version.
• Turn off the camera flash.
• The camera viewfinder can be a power drain, so after youve finished taking photos.
How to Take Continuous Camera Shots on HTC Desire 501
Want to take photos continuously on your HTC Desire 501? You just need to set the settings and you can now capture the moment of the action. Every movement of the action counts, so take the photo continuously.
Follow these steps:
1. First, make sure that youre in Normal scene to use this feature.
2. On the Viewfinder Lcd, just press and hold on .
.
.- It should take 20 consecutive shots since it is the default settings.
- If you want to capture more than 20 shots, just tap on the Gear Icon or Settings, then Continuous shooting. After that, clear the Limit to 20 frames option.
3. You can also select the photo that you like most by tapping Best shot. If you dont want the other photos, then you can delete it.
How to Check Battery Usage and History on HTC Desire 501
Keeping our phones at top shape at all times is a serious task. As much as possible, we try to save as much power as we can for our phones to last longer especially if were hitting the road. If youve noticed, here in Zakyri, we always make posts on our blog on ways to save a phones battery life. I might as well share these steps for all HTC Desire 501 users out there on how you can check battery usage on your phone. In this way you can see a ranking list of apps that are consuming up your battery life and even how long youve been using up your phone since the last charge. This is a pretty good information when you badly need to save up your battery life.
To check on each apps battery consumption:
1. On your homeLcd, slide the Notifications panel open.
2. Then tap
3. Choose and tap on Power and go to Usage.
4. And tap an app to check how its using up your phones battery and other use details.
If you see a button while viewing an apps battery use details, you can tap that button to adjust its settings that affect your battery usage, you can stop the app and more.
To check on your battery history
1. On your homeLcd, slide the Notifications panel open.
2. Then tap.
.3. Choose and tap on Power and go to History.
4. Now swipe left or right ( or spread or pinch your fingers) to scale the graph that details your battery usage over the time.
How to Clear Call History on HTC Desire 501
Either your call logs are just piling up or you simply want to achieve a clean call history list, then you can do the steps below. Heres how to delete or clear call history on your HTC Desire 501 device.
To delete one name or number
1. On your devices Call History tab, press and hold the name or number you wish
to delete.
2. And tap Delete from call history.
To delete the entire call history list
1. On Call History tab, tapthen go to Remove call history.
then go to Remove call history.2. On the Delete from call history Lcd, tap
3. Choose Select all and then tap Delete.
How to Hide Missed Calls and Messages on HTC Desire 501 LockLcd
Some mobile users want to check if theres any missed calls or messages right when they pick up their phone even if its locked. But if youre like me who prefers a clean lockLcd, free from missed calls and messages notification, then you might as well follow these steps to keep them hidden. Heres how you can hide those info on a HTC Desire 501 lockLcd.
1. First, slide the Notifications panel open.
2. Then tap .
.
.3. Now go to Security.
4. And clear the Phone notification preview and Message notification preview options to hide missed calls and messages on the lockLcd.
Now you can appreciate more how your phone looks like when its locked. Looking clean and free.
A launch bar is a one stop hub on your homeLcd for commonly used apps. By personalizing your launch bar you can now have a one-touch access to apps that you often use. These apps and shortcuts on your launch bar are also what you see on the lockLcd. Heres how you can personalize your HTC Desire 501 launch bar.
1. On your devices homeLcd, tapto go to the All apps view.
to go to the All apps view.2. Now press and hold the app you want to be replaced and then drag it out
of the launch bar.
3. Then press and hold an app you frequently use and drag it to the empty slot
on your launch bar.
If you have couple of apps to place on your launch bar, you can group them into a folder and place them in the launch bar. Heres how you can group apps into a folder.
1. On the All apps view of your device, press and hold an app and drag it over
to another app to automatically create a new folder for these apps.
2. To add more apps, press and hold an app and drag it to the folder.
3. Now drag the folder from the All apps view to the launch bar.
4. If you want to remove an app from a folder on the launch bar, you need to
switch first to the All apps view and then drag the app out of the folder.
Congratulations! You have just personalized your HTC Desire 501 launch bar with your favorite apps.
How to Set up Speed Dialing on HTC Desire 501
Speed dialing is definitely a must-have feature on any phones. Whether youre in a hurry or in an emergency, this feature lets you call important contacts right away by just dialing a number key on your phone. For all HTC Desire 501 users, heres how you can set up speed dialing on your device.
1. First, open the phone app on your device.
2. Then tapand go to Speed Dial.
and go to Speed Dial.3. Now tapand select a contact from the list.
and select a contact from the list.4. On the Speed dial Lcd, choose the phone number of the contact to use
and a speed dial key to assign for that contact.
5. Once your done, tap Save.
Take note that the number 1 key is generally used and reserved for calling voicemail and retrieving voicemail messages.
How to Make Your HTC Desire 501 a Wireless Router
Smartphones these days can now share its mobile data connection and act as a portable Wi-Fi hotspot. And like those high-end gadgets, HTC Desire 501 is sure to let you experience the benefits of making it as a portable Wi-Fi hotspot. Heres how you can make your HTC Desire 501 phone the next Wi-Fi hotspot.
- Slide the Notifications panel open, and then tap the Gear Icon or Settings.
- Under Wireless & Network, tap More.
- Select Mobile network sharing > Portable Wi-Fi hotspot settings.
- Enter your preferred router name, or you can also use the default name.
- Choose the type of security and set a password for your wireless router. (If you selected none, then you dont have to enter a password.)
- Select the Portable Wi-Fi Hotspot option to turn on the wireless router.
When you see the router wireless icon, then your HTC Desire 501 is ready to be used as a router.
Copying Files to or from HTC Desire 501
You can copy your music, photos, and other files to HTC Desire 501.
1. Connect HTC Desire 501 to the computer using the supplied USB cable. Youll see options for viewing or importing files on the computer Lcd.
2. Choose to view files.
3. Copy the files from your computer to HTC Desire 501, or vice versa.
4. After copying the files, disconnect HTC Desire 501 from the computer.
Copying Files to or from HTC Desire 501
You can copy your music, photos, and other files to HTC Desire 501.
1. Connect HTC Desire 501 to the computer using the supplied USB cable. Youll see options for viewing or importing files on the computer Lcd.
2. Choose to view files.
3. Copy the files from your computer to HTC Desire 501, or vice versa.
4. After copying the files, disconnect HTC Desire 501 from the computer.
Saturday, September 6, 2014
Samsung Galaxy Young Tips and Tricks
How to Factory Reset (Hard Reset) Samsung Galaxy Young
We have our own reasons why we factory reset our device. Maybe we want to delete all the files and restore the device to its original state. It could also be the device may be malfunctioning or so slow and it needs to be reset.
Restoring the default settings or factory reset your Samsung Galaxy Young will delete all your existing files. It is recommended to backup your important files on your computer before attempting to reset your device.
The steps below are the instructions on how to factory reset your Samsung Galaxy Young:
Step 1. On your Homescreen, tap on MENU icon.
Step 2. Select "Settings", then scroll down and tap "Backup and reset" option.
Step 3. Then tap on “Factory Data Reset”.
Step 4. Read warning carefully before tapping the “Reset Device”.
Step 5. If you want to proceed in resetting your device, tap on “Erase everything” to confirm the Reset.
Now, you just need to wait while your device is resetting. It should reboot itself and you will have a new start on your Samsung Galaxy S3.
You may also use the shortcut method using the code: Enter *2767*3855# on your device.
Hard Reset:
1. Turn off your device.
How to Reduce the Battery Consumption on Samsung Galaxy Young
Battery Life depends on how you use your device. For Samsung Galaxy Young device, if you want to save your battery to last longer hours, you may need to adjust your settings.
All of us want to have a longer battery life on our phones. Follow these suggestions to reduce the battery consumption:
How to Reformat Memory Card on Samsung Galaxy Young
Formatting the memory card on your Samsung Galaxy Young will delete all the files that is stored on the memory card. It is recommended to backup your important files on your computer before attempting to format your memory card.
You may not be able to reformat your memory card on your computer. So try it through your device:
1. On your Home screen, tap Apps.
2. Select Settings.
3. Go to Storage.
4. Then tap Format SD card > Format SD card.
5. Tap Erase everything to confirm the action.
How to Import Contacts From Old Phone to New Phone (on Sony, iPhone, Samsung, HTC and Nokia)
Contacts is very important for everyone of us. We cant connect to our friends without a contact number. If you have a new phone, saving contacts on the phone one by one is so hassle. But now, theres an easy way how to transfer or import your contacts from your old phone to your new phone.
Use your PC to transfer contacts to your new phone. This process is applicable in several phone brands, including iPhone, Samsung, HTC and Nokia.
You just need an Internet Connection on your PC, your old and new phone and their own USB cable.
If you are not prompted with a pop-up window to install the PC Companion, you can also download the PC Companion here.
How to Secure Your Samsung Galaxy Young (Pattern, PIN and Password)
How to Upgrade With the Latest Software on Samsung Galaxy Young
Keeping your device updated with the latest software fixes bugs on your handset thus contributing to its efficiency and life span. Samsung allows you to install those updates in two ways- through Samsung Kies or Over-the-Air. Well heres how you can install those latest software firmware using this two methods.
Upgrading with Samsung Kies
1. First launch Samsung Kies.
2. Then connect your phone to the computer using the USB cable that came with it.
3. Now Samsung Kies will automatically recognizes your device and a dialogue box
appears showing the available updates, if any.
4. Click the update button in the dialogue box to start upgrad ting to te latest software.
While youre upgrading the device, you shouldnt turn off the computer or disconnect
te USB cable and dont connect other media devices to the computer as it may interfere
the upgrading process.
Upgrading over-the-air
1. Go the Applications screen and then tap Settings.
2. Then go to About device.
3. Select Software Update then hit on Update.
How to Make Your Samsung Galaxy Young a Portable Wi-Fi Hotspot
Smartphones these days can now share its mobile data connection and act as a portable Wi-Fi hotspot. And like those high-end gadgets, Samsung Galaxy Young is sure to let you experience the benefits of making it as a portable Wi-Fi hotspot. Heres how you can make your Samsung phone the next Wi-Fi hotspot.
1. On your device, go to Settings screen first.
2. Then tap Wi-Fi and tap for more options.
3. Select Advanced options to customize your Wi-Fi settings.
4. Go to Tethering and portable hotspot.
5. And choose Portable Wi-Fi hotspot to share the devices mobile network connection.
And you now have a portable Wi-Fi hotspot using your Samsung Galaxy Young.
How to Install and Uninstall Apps on Samsung Galaxy Young
Read More..
Restoring the default settings or factory reset your Samsung Galaxy Young will delete all your existing files. It is recommended to backup your important files on your computer before attempting to reset your device.
The steps below are the instructions on how to factory reset your Samsung Galaxy Young:
Step 1. On your Homescreen, tap on MENU icon.
Step 2. Select "Settings", then scroll down and tap "Backup and reset" option.
Step 3. Then tap on “Factory Data Reset”.
Step 4. Read warning carefully before tapping the “Reset Device”.
Step 5. If you want to proceed in resetting your device, tap on “Erase everything” to confirm the Reset.
Now, you just need to wait while your device is resetting. It should reboot itself and you will have a new start on your Samsung Galaxy S3.
You may also use the shortcut method using the code: Enter *2767*3855# on your device.
Hard Reset:
1. Turn off your device.
2. Then press and hold Volume Down + Home Button + Power On.
3. Wait for a few seconds until the Factory reset menu appears.
4. Select "wipe data/factory reset" by using the Volume Down button.
How to Reduce the Battery Consumption on Samsung Galaxy Young
Battery Life depends on how you use your device. For Samsung Galaxy Young device, if you want to save your battery to last longer hours, you may need to adjust your settings.
All of us want to have a longer battery life on our phones. Follow these suggestions to reduce the battery consumption:
- Switch to Sleep mode by pressing the Power key when you are not using your device.
- Close any apps or features when you are done using it so they will not continuously running in the background.
- Turn off the network connection if you are out of range so that your device will stop searching for a network signal. (deactivate the Bluetooth feature, turn off the Wi-Fi feature when not in use, etc).
- Deactivate auto-syncing of applications.
- Decrease the backlight time.
- Lessen the screen brightness and the screen lock timeout.
How to Reformat Memory Card on Samsung Galaxy Young
Formatting the memory card on your Samsung Galaxy Young will delete all the files that is stored on the memory card. It is recommended to backup your important files on your computer before attempting to format your memory card.
You may not be able to reformat your memory card on your computer. So try it through your device:
1. On your Home screen, tap Apps.
2. Select Settings.
3. Go to Storage.
4. Then tap Format SD card > Format SD card.
5. Tap Erase everything to confirm the action.
How to Import Contacts From Old Phone to New Phone (on Sony, iPhone, Samsung, HTC and Nokia)
Contacts is very important for everyone of us. We cant connect to our friends without a contact number. If you have a new phone, saving contacts on the phone one by one is so hassle. But now, theres an easy way how to transfer or import your contacts from your old phone to your new phone.
Use your PC to transfer contacts to your new phone. This process is applicable in several phone brands, including iPhone, Samsung, HTC and Nokia.
You just need an Internet Connection on your PC, your old and new phone and their own USB cable.
Then you need to install the PC Companion program. This is a free application and the installation files are already saved on your new phone. This program can also be used in updating your phone software.
Please note that if you are using the Microsoft Windows 7 operating system on your PC, make sure that the AutoPlay setting is enabled.
To check your settings:
Click Start > Control Panel, then type "autoplay" on the search box. Click the AutoPlay, and mark the check box Use AutoPlay for all media and devices.
Installing the PC Companion:
Installing the PC Companion:
- Turn on your new Phone and connect it to your PC.
- On your new Phone, tap "Install" to install PC Companion on the PC.
- On your computer, if a pop-up window that appears notifies you about available PC Software, select Run Startme.exe.
- Then click Install to start the installation and then follow the instructions to complete the installation.
If you are not prompted with a pop-up window to install the PC Companion, you can also download the PC Companion here.
Transferring your contacts to your new phone:
- Make sure that PC Companion is installed on your PC.
- Open the PC Companion application on your PC.
- Then click Contacts Setup and follow the instructions to transfer your contacts.
Securing your Samsung Galaxy Young is also important, specially if you have a private files that you dont want others to access it. So to prevent others from using your or accessing your personal data without your permission, then you may need to activate the security features. The device requires an unlock code whenever unlocking it.
Setting a pattern:
1. On the Applications screen, tap Settings.
2. Select Lock screen.
3. Then choose Screen lock.
4. Tap Pattern.
Draw a pattern by connecting four dots or more, and then draw the pattern again to verify it. Set a backup unlock PIN to unlock the screen when you forget the pattern.
Setting a PIN:
1. On the Applications screen, tap Settings.
2. Select Lock screen.
3. Then choose Screen lock.
4. Tap PIN.
Enter at least four numbers, and then enter the password again to verify it.
Setting a password:
1. On the Applications screen, tap Settings.
2. Select Lock screen.
3. Then choose Screen lock.
4. Tap Password.
Enter at least four characters including numbers and symbols, and then enter the password again to verify it.
Setting a pattern:
1. On the Applications screen, tap Settings.
2. Select Lock screen.
3. Then choose Screen lock.
4. Tap Pattern.
Draw a pattern by connecting four dots or more, and then draw the pattern again to verify it. Set a backup unlock PIN to unlock the screen when you forget the pattern.
Setting a PIN:
1. On the Applications screen, tap Settings.
2. Select Lock screen.
3. Then choose Screen lock.
4. Tap PIN.
Enter at least four numbers, and then enter the password again to verify it.
Setting a password:
1. On the Applications screen, tap Settings.
2. Select Lock screen.
3. Then choose Screen lock.
4. Tap Password.
Enter at least four characters including numbers and symbols, and then enter the password again to verify it.
How to Upgrade With the Latest Software on Samsung Galaxy Young
Keeping your device updated with the latest software fixes bugs on your handset thus contributing to its efficiency and life span. Samsung allows you to install those updates in two ways- through Samsung Kies or Over-the-Air. Well heres how you can install those latest software firmware using this two methods.
Upgrading with Samsung Kies
1. First launch Samsung Kies.
2. Then connect your phone to the computer using the USB cable that came with it.
3. Now Samsung Kies will automatically recognizes your device and a dialogue box
appears showing the available updates, if any.
4. Click the update button in the dialogue box to start upgrad ting to te latest software.
While youre upgrading the device, you shouldnt turn off the computer or disconnect
te USB cable and dont connect other media devices to the computer as it may interfere
the upgrading process.
Upgrading over-the-air
1. Go the Applications screen and then tap Settings.
2. Then go to About device.
3. Select Software Update then hit on Update.
How to Make Your Samsung Galaxy Young a Portable Wi-Fi Hotspot
Smartphones these days can now share its mobile data connection and act as a portable Wi-Fi hotspot. And like those high-end gadgets, Samsung Galaxy Young is sure to let you experience the benefits of making it as a portable Wi-Fi hotspot. Heres how you can make your Samsung phone the next Wi-Fi hotspot.
1. On your device, go to Settings screen first.
2. Then tap Wi-Fi and tap
for more options.3. Select Advanced options to customize your Wi-Fi settings.
4. Go to Tethering and portable hotspot.
5. And choose Portable Wi-Fi hotspot to share the devices mobile network connection.
And you now have a portable Wi-Fi hotspot using your Samsung Galaxy Young.
Apps developers are remarkably making good money out of every apps they build. No wonder online stores are mostly visited by smartphone users just to check on the hottest new apps online. If youve found the perfect app for your Samsung Galaxy Grand, then follow these steps in installing and perhaps uninstalling those unwanted apps.
Installing apps:
1. First tap on Play Store on the applications screen to view available apps online.
2. You can browse available apps by category or simply tap to search with a keyword.
3. Then select an application to view. To download it on your phone, tap Install. Make sure to double check the app info like its price and ratings before hitting the install button.
4. If theres a charge for that app,tap the price and follow the onscreen instructions to purchase it.
5. To install apps that are from other sources, just go to Applications > Settings > Security > Unknown sources.
Uninstalling apps:
1. In uinstalling the apps purchased from the Play Store, tap
2. Then go to My Apps.
3. And select an application you want to delete, then tap Uninstall.
Installing apps:
1. First tap on Play Store on the applications screen to view available apps online.
2. You can browse available apps by category or simply tap
to search with a keyword.3. Then select an application to view. To download it on your phone, tap Install. Make sure to double check the app info like its price and ratings before hitting the install button.
4. If theres a charge for that app,tap the price and follow the onscreen instructions to purchase it.
5. To install apps that are from other sources, just go to Applications > Settings > Security > Unknown sources.
Uninstalling apps:
1. In uinstalling the apps purchased from the Play Store, tap
2. Then go to My Apps.
3. And select an application you want to delete, then tap Uninstall.
Sunday, August 31, 2014
HTC Butterfly Tips and Tricks
How to Factory Reset (Hard Reset) HTC Butterfly
Resetting your HTC Butterfly will restore the default settings of your device. It will also delete all your files on your phone, so it is recommended to have a backup of your important files on your computer. There are two ways on how to reset your HTC Butterfly. It can be done through the settings or through the hardware buttons.
Resetting HTC Butterfly on Settings:
Resetting HTC Butterfly by Hardware Buttons:
These steps is also helpful when your HTC Butterfly is unresponsive or frozen and theres no way to access the settings.
How to Import Contacts From Old Phone to New Phone (on iPhone, Samsung, HTC and Nokia)
Contacts is very important for everyone of us. We cant connect to our friends without a contact number. If you have a new phone, saving contacts on the phone one by one is so hassle. But now, theres an easy way how to transfer or import your contacts from your old phone to your new phone.
Use your PC to transfer contacts to your new phone. This process is applicable in several phone brands, including iPhone, Samsung, HTC and Nokia.
You just need an Internet Connection on your PC, your old and new phone and their own USB cable.
If you are not prompted with a pop-up window to install the PC Companion, you can also download the PC Companion here.
How to Take Continuous Camera Shots on HTC Butterfly
Follow these steps:
1. First, make sure that youre in Normal scene to use this feature.
2. On the Viewfinder screen, just press and hold on.
- It should take 20 consecutive shots since it is the default settings.
- If you want to capture more than 20 shots, just tap on the Gear Icon or Settings, then Continuous shooting. After that, clear the Limit to 20 frames option.
3. You can also select the photo that you like most by tapping Best shot. If you dont want the other photos, then you can delete it.
How to Set HTC Butterfly into Sleep Mode
Like any other device, setting HTC Butterfly into sleep mode will somehow save its battery life. Sleep mode puts your device into a lower power state while the display is off. It also prevents accidental button presses when its in your pocket or bag. Heres how you can set HTC Butterfly into sleep mode.
1. Briefly press on your devices Power button to turn off the display. Then switch to Sleep Mode.
2. To change the time before your device sleeps, just go to Display, then gestures & buttons settings.
3. To wake it up, manually press the Power button and unlock your screen.
4. Your device will also automatically wakes up when you have an incoming call.
How to Extend Battery Life of HTC Butterfly
• Turn on the power-saving option on the device (if applicable).
• Lessen the screen brightness and the screen lock timeout.
• Turn down your device volume with the volume keys.
• Close any apps or features when you are done using it so they will not continuously running in the background.
• Turn off the network connection if you are out of range so that your device will stop searching for a network signal.
• You should use the latest version of the software update. Software updates improves some features and fixes some bugs on the previous software version.
• Turn off the camera flash.
• The camera viewfinder can be a power drain, so after youve finished taking photos.
How to Make Your HTC Butterfly a Wireless Router
Smartphones these days can now share its mobile data connection and act as a portable Wi-Fi hotspot. And like those high-end gadgets, HTC Butterfly is sure to let you experience the benefits of making it as a portable Wi-Fi hotspot. Heres how you can make your HTC Butterfly phone the next Wi-Fi hotspot.
Read More..
Resetting your HTC Butterfly will restore the default settings of your device. It will also delete all your files on your phone, so it is recommended to have a backup of your important files on your computer. There are two ways on how to reset your HTC Butterfly. It can be done through the settings or through the hardware buttons.
Resetting HTC Butterfly on Settings:
- Slide the Notifications panel open, and then tap the Gear Icon or Settings.
- Select Backup & reset.
- Tap Reset phone.
- Then tap Reset phone, on the Reset phone screen.
- If you want to delete the files on your HTC Butterfly, tap OK.
These steps is also helpful when your HTC Butterfly is unresponsive or frozen and theres no way to access the settings.
- First, press and hold the Volume Down button, and then do the same way on the Power button.
- Hold the two buttons until the three Android images appear on the screen.
- Release the button when the three Android images appear and press Volume Down.
- Tap on Factory Reset, and then press the Power Button to confirm.
How to Import Contacts From Old Phone to New Phone (on iPhone, Samsung, HTC and Nokia)
Contacts is very important for everyone of us. We cant connect to our friends without a contact number. If you have a new phone, saving contacts on the phone one by one is so hassle. But now, theres an easy way how to transfer or import your contacts from your old phone to your new phone.
Use your PC to transfer contacts to your new phone. This process is applicable in several phone brands, including iPhone, Samsung, HTC and Nokia.
You just need an Internet Connection on your PC, your old and new phone and their own USB cable.
Then you need to install the PC Companion program. This is a free application and the installation files are already saved on your new phone. This program can also be used in updating your phone software.
Please note that if you are using the Microsoft Windows 7 operating system on your PC, make sure that the AutoPlay setting is enabled.
To check your settings:
Click Start > Control Panel, then type "autoplay" on the search box. Click the AutoPlay, and mark the check box Use AutoPlay for all media and devices.
Installing the PC Companion:
Installing the PC Companion:
- Turn on your new Phone and connect it to your PC.
- On your new Phone, tap "Install" to install PC Companion on the PC.
- On your computer, if a pop-up window that appears notifies you about available PC Software, select Run Startme.exe.
- Then click Install to start the installation and then follow the instructions to complete the installation.
If you are not prompted with a pop-up window to install the PC Companion, you can also download the PC Companion here.
Transferring your contacts to your new phone:
- Make sure that PC Companion is installed on your PC.
- Open the PC Companion application on your PC.
- Then click Contacts Setup and follow the instructions to transfer your contacts.
Want to take photos continuously on your HTC Butterfly? You just need to set the settings and you can now capture the moment of the action. Every movement of the action counts, so take the photo continuously.
Follow these steps:
1. First, make sure that youre in Normal scene to use this feature.
2. On the Viewfinder screen, just press and hold on
.- It should take 20 consecutive shots since it is the default settings.
- If you want to capture more than 20 shots, just tap on the Gear Icon or Settings, then Continuous shooting. After that, clear the Limit to 20 frames option.
3. You can also select the photo that you like most by tapping Best shot. If you dont want the other photos, then you can delete it.
How to Set HTC Butterfly into Sleep Mode
Like any other device, setting HTC Butterfly into sleep mode will somehow save its battery life. Sleep mode puts your device into a lower power state while the display is off. It also prevents accidental button presses when its in your pocket or bag. Heres how you can set HTC Butterfly into sleep mode.
1. Briefly press on your devices Power button to turn off the display. Then switch to Sleep Mode.
2. To change the time before your device sleeps, just go to Display, then gestures & buttons settings.
3. To wake it up, manually press the Power button and unlock your screen.
4. Your device will also automatically wakes up when you have an incoming call.
How to Extend Battery Life of HTC Butterfly
Battery Life depends on how you use your device. For HTC Butterfly device, if you want to save your battery to last longer hours, you may need to adjust your settings. Follow these suggestions:
• Turn on the power-saving option on the device (if applicable).
• Lessen the screen brightness and the screen lock timeout.
• Turn down your device volume with the volume keys.
• Close any apps or features when you are done using it so they will not continuously running in the background.
• Turn off the network connection if you are out of range so that your device will stop searching for a network signal.
• You should use the latest version of the software update. Software updates improves some features and fixes some bugs on the previous software version.
• Turn off the camera flash.
• The camera viewfinder can be a power drain, so after youve finished taking photos.
How to Make Your HTC Butterfly a Wireless Router
Smartphones these days can now share its mobile data connection and act as a portable Wi-Fi hotspot. And like those high-end gadgets, HTC Butterfly is sure to let you experience the benefits of making it as a portable Wi-Fi hotspot. Heres how you can make your HTC Butterfly phone the next Wi-Fi hotspot.
- Slide the Notifications panel open, and then tap the Gear Icon or Settings.
- Under Wireless & Network, tap More.
- Select Mobile network sharing > Portable Wi-Fi hotspot settings.
- Enter your preferred router name, or you can also use the default name.
- Choose the type of security and set a password for your wireless router. (If you selected none, then you dont have to enter a password.)
- Select the Portable Wi-Fi Hotspot option to turn on the wireless router.
When you see the router wireless icon, then your HTC Butterfly is ready to be used as a router.
Friday, August 29, 2014
BlackBerry Q10 Tips and Tricks
How to Lock your BlackBerry Q10 With a Password
A simple way to secure your BlackBerry to prevent unauthorized person to access your phone is to set a password.
Read More..
A simple way to secure your BlackBerry to prevent unauthorized person to access your phone is to set a password.
1. If you dont have a password yet, on the home screen, swipe down from the top of the screen to access the option.
2. Tap  Settings > Security and Privacy > Device Password.
Settings > Security and Privacy > Device Password. 3. Switch On the Device Password and enter your preferred password.
Press and hold the Power/Lock key on the top of your device. Tap .
.
If you want to lock your screen with a certain amount of time, do this:
If you want to automatically lock your device when its in a BlackBerry case, do this:
To lock your device, do this:
Press and hold the Power/Lock key on the top of your device. Tap
.If you want to lock your screen with a certain amount of time, do this:
- On the home screen, swipe down from the top of the screen.
- Tap
If you want to automatically lock your device when its in a BlackBerry case, do this:
- On the home screen, swipe down from the top of the screen.
- Tap
After you set-up or finish the settings, to unlock your device, press the Power/Lock key on the top of your device. Swipe up from the bottom of the screen. When prompted, enter your device password.
How to Extend Battery Life on Blackberry Q10
Battery Life depends on how you use your device. For Blackberry Q10 device, if you want to save your battery to last longer hours, you may need to adjust your settings. Follow these suggestions:
• Turn on the power-saving option on the device. Then lessen the screen brightness and the screen lock timeout. On the Home Screen, swipe down from the top of the screen. Tap on the Gear Icon or Settings > Display.
• Turn down your device volume with the volume keys. You can also adjust the volume on Settings > System Volume or Notifications.
• Close any apps or features when you are done using it so they will not continuously running in the background.
• Turn off the network connection if you are out of range so that your device will stop searching for a network signal. To turn off the network go to Settings > Network Connections.
• You should use the latest version of the software update. Software updates improves some features and fixes some bugs on the previous software version.
• Save data to a media card instead of your device storage.
• Turn off the camera flash.
1. To set up your voice mail, open your Phone app and swiped down from the top of the screen.
2. Then tap on Settings option.
3. On the list, tap on Voice Mail and type your voice mail access number and password. Now your friends can leave a voice mail whenever you can’t pick up your phone.
4. Now to set up speed dial, go to your list of contacts
5. Touch and hold a phone number or contact for few seconds. Select Add to Speed Dial. You’ve just added a contact to your speed dial list.
Change your voice mail password
Depending on your wireless service provider, this feature might not be supported.
How to Start a Conference Call on Blackberry Q10
Blackberry is said to be the perfect phone for all those in the business world. Its new installment of smartphone, the Q10, even makes it easy to do a conference call. So just imagine discussing your business over the phone with your associates with just a few tap on its touchscreen. Here’s how you can start a conference call.
To answer a second call while already on a call:
1. Now if you answer a second call while you’re already on a call, tap Answer and you’re first call will be automatically put on hold.
2. To merge both calls and start a conference call, tap .
.
3. Just repeat steps 1 and 2 to add more people to the conference.
To make another call while you’re already on a call:
1. Tap on Add Call while you’re on a call. Take note that while you make another call, your first call is automatically put on hold.
2. Now you can dial a number by tapping ; call a contact by tapping
 ; tap a phone number, name or speed dial contact.
3. And merge both calls by tapping to start a conference call.
4. Repeat steps 1-3 to add more people to the conference call.
To remove people from the conference call:
1. View the conference call participants by tapping .
.
2. Remove a person from the call by doing one of the following:
• To remove a person from the conference call and hang up, tap
• To remove a person from the conference and keep them in a separate call, tap
How to Answer Calls Automatically on BlackBerry Q10
This feature of BlackBerry Q10 will let you answer call automatically when you have a headset connected or when you remove your device from a case or holster. This will be very helpful and less hassle — especially when you expect a lot of coming calls.
How to set your Blackberry Q10 to answer automatically or end a call using a case or holster:
1. Swipe down from the top of the screen in the Phone app.
2. Tap on Settings or the Gear Icon, then select Holster.
3. Do any of the following:
• Set the Answer a Call by Removing Device From Holster switch to On.
• Set the End Call by Putting Device Back in Holster switch to On.
This steps will let you automatically answer a call when a headset is connected:
1. Swipe down from the top of the screen in the Phone app.
2. Tap on Settings or the Gear Icon, then select Bluetooth.
3. Set the Automatically Answer a Call When Connected to a Headset switch to On.
Your calls will automatically be answered after 5 seconds when you turn on this feature and you have a headset connected to your BlackBerry Q10.
How to Print on BlackBerry Q10 Using the Print To Go Software
Now you can easily print on your BlackBerry Q10 using the Print To Go software. This feature will surely minimize your work since you dont have to transfer the file from your BlackBerry Q10 to your computer then print it. Save your time and less hassle with the Print To Go.
First, you need to download the Print To Go software.
1. On your computer go to this page this www.blackberry.com/PrintToGo.
2. Just follow the given instructions on the screen to complete the installation on your computer.
Once the installation process is complete, you can now print a file from your BlackBerry Q10. But you need to configure first your printer. Follow these steps:
1. On your computer, try to print an item/file and choose Print To Go as the printer.
2. You need to enter your BlackBerry ID and your password, then click Sign In.
3. If applicable, enter your pairing password, device PIN, and your device name, then click Next.
4. If you want to print multiple devices, click Add Another Device. Just make sure that it is associated with your BlackBerry ID.
5. Click Done.
6. Click on Remember Me if you want to save the settings you just entered.
7. Finally, click Print.
When printing is complete, open Print To Go on your BlackBerry device, then find your pairing password. Your pairing password helps to establish a more secure connection between your computer and your BlackBerry device.
1. Swipe down from the top of the screen.
2. Tap Settings or the Gear Icon.
To reset your pairing password, tap Reset.
If you want to delete a folder or printout from Print To Go:
1. Tap and hold a printout or folder in a few seconds.
2. Then tap the Trash Bin icon.
How to Share Your Internet Connection Using Mobile Hotspot Mode
By using the Mobile Hotspot Mode you can create a Wi-Fi network that other devices can connect with. They can surf through the Internet using the mobile network connection on your BlackBerry Q10. You can connect to the Internet anywhere as long as there is a mobile network connection. Connecting the mobile hotspot is more likely the same as connecting to any regular router.
Now, set up your mobile hotspot mode on your BlackBerry device:
Make sure that your BlackBerry devices connection to the mobile network is turned on.
1. On the home screen, swipe down from the top of the screen.
2. Tap Settings or Gear Icon, then Network Connection > Mobile Hotspot.
3. If this is your first time to set the Mobile Hotspot mode, just complete the instructions on the screen.
Note: Read the instructions carefully and remember your Mobile Hotspot password.
4. Then set the Mobile Hotspot switch to On.
5. You need to know the name of the mobile hotspot and the password you set during the setup process. If your friends want to connect to the mobile hotspot, it is same as connecting to a Wi-Fi network. Find the network then connect.
How to Change Facebook Notifications on BlackBerry Q10
Facebook is the most popular social networking site, and almost all of the devices nowadays have its own Facebook mobile app. In BackBerry Q10, once you sign in to the Facebook app, you will begin to receive notification on your Facebook account. It will automatically appear in the BlackBerry Hub.
If you dont want to receive these notifications on your BlackBerry Q10, you just need to change your settings:
1. On the Home Screen, swipe down from the top of the screen.
2. Tap on Settings or Gear Icon.
3. Select Accounts, then Facebook.
4. If you dont want to receive notifications, set the Enable Notifications to Off.
If you dont want to receive your Facebook messages, set the Sync Messages to Off.
Set the Sync Events to Off, to stop adding Facebook events to the Calendar app.
To change Facebook friends birthdays, tap the Birthday Reminder drop-down list.
5. Then tap Save to apply the changes.
Battery Life depends on how you use your device. For Blackberry Q10 device, if you want to save your battery to last longer hours, you may need to adjust your settings. Follow these suggestions:
• Turn on the power-saving option on the device. Then lessen the screen brightness and the screen lock timeout. On the Home Screen, swipe down from the top of the screen. Tap on the Gear Icon or Settings > Display.
• Turn down your device volume with the volume keys. You can also adjust the volume on Settings > System Volume or Notifications.
• Close any apps or features when you are done using it so they will not continuously running in the background.
• Turn off the network connection if you are out of range so that your device will stop searching for a network signal. To turn off the network go to Settings > Network Connections.
• You should use the latest version of the software update. Software updates improves some features and fixes some bugs on the previous software version.
• Save data to a media card instead of your device storage.
• Turn off the camera flash.
How to Set Up Voice Mail and Speed Dial on Blackberry Q10
Blackberry Q10 somehow received pretty good reviews on its specs and features. To get familiar with it, we had few steps below on how to set up voice mail and speed dial for Blackberry Q10.1. To set up your voice mail, open your Phone app and swiped down from the top of the screen.
2. Then tap on Settings option.
3. On the list, tap on Voice Mail and type your voice mail access number and password. Now your friends can leave a voice mail whenever you can’t pick up your phone.
4. Now to set up speed dial, go to your list of contacts
5. Touch and hold a phone number or contact for few seconds. Select Add to Speed Dial. You’ve just added a contact to your speed dial list.
Change your voice mail password
Depending on your wireless service provider, this feature might not be supported.
- In the Phone app, swipe down from the top of the screen > tap
.
- Tap Change Password.
How to Start a Conference Call on Blackberry Q10
Blackberry is said to be the perfect phone for all those in the business world. Its new installment of smartphone, the Q10, even makes it easy to do a conference call. So just imagine discussing your business over the phone with your associates with just a few tap on its touchscreen. Here’s how you can start a conference call.
To answer a second call while already on a call:
1. Now if you answer a second call while you’re already on a call, tap Answer and you’re first call will be automatically put on hold.
2. To merge both calls and start a conference call, tap
.3. Just repeat steps 1 and 2 to add more people to the conference.
To make another call while you’re already on a call:
1. Tap on Add Call while you’re on a call. Take note that while you make another call, your first call is automatically put on hold.
2. Now you can dial a number by tapping
; call a contact by tapping ; tap a phone number, name or speed dial contact.3. And merge both calls by tapping
to start a conference call.4. Repeat steps 1-3 to add more people to the conference call.
To remove people from the conference call:
1. View the conference call participants by tapping
.2. Remove a person from the call by doing one of the following:
• To remove a person from the conference call and hang up, tap
• To remove a person from the conference and keep them in a separate call, tap
How to Answer Calls Automatically on BlackBerry Q10
This feature of BlackBerry Q10 will let you answer call automatically when you have a headset connected or when you remove your device from a case or holster. This will be very helpful and less hassle — especially when you expect a lot of coming calls.
How to set your Blackberry Q10 to answer automatically or end a call using a case or holster:
1. Swipe down from the top of the screen in the Phone app.
2. Tap on Settings or the Gear Icon, then select Holster.
3. Do any of the following:
• Set the Answer a Call by Removing Device From Holster switch to On.
• Set the End Call by Putting Device Back in Holster switch to On.
This steps will let you automatically answer a call when a headset is connected:
1. Swipe down from the top of the screen in the Phone app.
2. Tap on Settings or the Gear Icon, then select Bluetooth.
3. Set the Automatically Answer a Call When Connected to a Headset switch to On.
Your calls will automatically be answered after 5 seconds when you turn on this feature and you have a headset connected to your BlackBerry Q10.
How to Print on BlackBerry Q10 Using the Print To Go Software
Now you can easily print on your BlackBerry Q10 using the Print To Go software. This feature will surely minimize your work since you dont have to transfer the file from your BlackBerry Q10 to your computer then print it. Save your time and less hassle with the Print To Go.
First, you need to download the Print To Go software.
1. On your computer go to this page this www.blackberry.com/PrintToGo.
2. Just follow the given instructions on the screen to complete the installation on your computer.
Once the installation process is complete, you can now print a file from your BlackBerry Q10. But you need to configure first your printer. Follow these steps:
1. On your computer, try to print an item/file and choose Print To Go as the printer.
2. You need to enter your BlackBerry ID and your password, then click Sign In.
3. If applicable, enter your pairing password, device PIN, and your device name, then click Next.
4. If you want to print multiple devices, click Add Another Device. Just make sure that it is associated with your BlackBerry ID.
5. Click Done.
6. Click on Remember Me if you want to save the settings you just entered.
7. Finally, click Print.
When printing is complete, open Print To Go on your BlackBerry device, then find your pairing password. Your pairing password helps to establish a more secure connection between your computer and your BlackBerry device.
1. Swipe down from the top of the screen.
2. Tap Settings or the Gear Icon.
To reset your pairing password, tap Reset.
If you want to delete a folder or printout from Print To Go:
1. Tap and hold a printout or folder in a few seconds.
2. Then tap the Trash Bin icon.
How to Share Your Internet Connection Using Mobile Hotspot Mode
By using the Mobile Hotspot Mode you can create a Wi-Fi network that other devices can connect with. They can surf through the Internet using the mobile network connection on your BlackBerry Q10. You can connect to the Internet anywhere as long as there is a mobile network connection. Connecting the mobile hotspot is more likely the same as connecting to any regular router.
Now, set up your mobile hotspot mode on your BlackBerry device:
Make sure that your BlackBerry devices connection to the mobile network is turned on.
1. On the home screen, swipe down from the top of the screen.
2. Tap Settings or Gear Icon, then Network Connection > Mobile Hotspot.
3. If this is your first time to set the Mobile Hotspot mode, just complete the instructions on the screen.
Note: Read the instructions carefully and remember your Mobile Hotspot password.
4. Then set the Mobile Hotspot switch to On.
5. You need to know the name of the mobile hotspot and the password you set during the setup process. If your friends want to connect to the mobile hotspot, it is same as connecting to a Wi-Fi network. Find the network then connect.
How to Change Facebook Notifications on BlackBerry Q10
Facebook is the most popular social networking site, and almost all of the devices nowadays have its own Facebook mobile app. In BackBerry Q10, once you sign in to the Facebook app, you will begin to receive notification on your Facebook account. It will automatically appear in the BlackBerry Hub.
If you dont want to receive these notifications on your BlackBerry Q10, you just need to change your settings:
1. On the Home Screen, swipe down from the top of the screen.
2. Tap on Settings or Gear Icon.
3. Select Accounts, then Facebook.
4. If you dont want to receive notifications, set the Enable Notifications to Off.
If you dont want to receive your Facebook messages, set the Sync Messages to Off.
Set the Sync Events to Off, to stop adding Facebook events to the Calendar app.
To change Facebook friends birthdays, tap the Birthday Reminder drop-down list.
5. Then tap Save to apply the changes.
How to Add, Change, or Delete a Password in Password Keeper on BlackBerry Q10
Password Keeper is an application in BlackBerry where you can saved all your passwords. This can also be used in generating a random passwords that contain numbers, letters, and symbols. This application is designed to encrypt your passwords to protect them. The Password Keeper also decrypts your passwords so you can see them when you type your password.
There will come a time that you want to change or delete the password that you made in Password Keeper on BlackBerry Q10. In this article you will know how to add, change or edit, and delete a password in the Password Keeper.
To add a new password, follow the steps below:
Step 1. In the Password Keeper application, tap the "Plus" sign.
Step 2. Type the title, website, and password information.
Step 3. Then tap the "Check" sign.
To change or edit a password in the Password Keeper application, follow the steps below:
Step 1. Select a password that you want to change.
Step 2. Tap the "Pencil" icon.
Step 3. Then type the new password information.
Step 4. Tap the "Check" sign to confirm the changes.
To delete a password in the Password Keeper application, complete the following step:
Step 1. Select a password.
Step 2. Tap "Three Vertical Line" icon, then tap "Trash Bin" icon.
You can also multi-select the passwords to delete.
Password Keeper is an application in BlackBerry where you can saved all your passwords. This can also be used in generating a random passwords that contain numbers, letters, and symbols. This application is designed to encrypt your passwords to protect them. The Password Keeper also decrypts your passwords so you can see them when you type your password.
There will come a time that you want to change or delete the password that you made in Password Keeper on BlackBerry Q10. In this article you will know how to add, change or edit, and delete a password in the Password Keeper.
To add a new password, follow the steps below:
Step 1. In the Password Keeper application, tap the "Plus" sign.
Step 2. Type the title, website, and password information.
Step 3. Then tap the "Check" sign.
To change or edit a password in the Password Keeper application, follow the steps below:
Step 1. Select a password that you want to change.
Step 2. Tap the "Pencil" icon.
Step 3. Then type the new password information.
Step 4. Tap the "Check" sign to confirm the changes.
To delete a password in the Password Keeper application, complete the following step:
Step 1. Select a password.
Step 2. Tap "Three Vertical Line" icon, then tap "Trash Bin" icon.
You can also multi-select the passwords to delete.
How to Send a File Using NFC on BlackBerry Z10
In case you dont know what is NFC (Near Field Communication), it is a short-range wireless technology that is designed for transferring files or data quickly on each devices. BlackBerry Q10 also has this kind of feature, were you can exchange many kinds of files, including music, pictures and etc. This is between your Blackberry device and other NFC enabled devices.
How to send a file using NFC:
1. Find and highlight or open a file that you want to send.
If you want to send multiple files, then find and highlight all the files.
2. Then tap the V icon .
.
3. Select NFC.
4. Now, align the back of your BlackBerry Q10 device with an NFC-enabled device.
5. If necessary, tap Send.
How to Factory Reset BlackBerry Q10
Restoring the default settings or factory reset your device will delete all your existing files. So, it is recommended to backup your important files on your computer before attempting to reset your device. Unfortunately, the hard reset function is not available on this phone.
To perform a master reset, follow these steps:
1. Back up all data on the internal memory.
2. From any Home screen, touch the Status bar and drag it down.
3. Tap Settings.
4. Tap Security and privacy.
5. Tap Security wipe.
Note: You must decrypt you media card before the security wipe. Otherwise, the card will become inaccessible.
6. Swipe up on the screen and enter blackberry into the text field and tap Delete Data.
7. Follow any additional prompts.
In case you dont know what is NFC (Near Field Communication), it is a short-range wireless technology that is designed for transferring files or data quickly on each devices. BlackBerry Q10 also has this kind of feature, were you can exchange many kinds of files, including music, pictures and etc. This is between your Blackberry device and other NFC enabled devices.
How to send a file using NFC:
1. Find and highlight or open a file that you want to send.
If you want to send multiple files, then find and highlight all the files.
2. Then tap the V icon
.4. Now, align the back of your BlackBerry Q10 device with an NFC-enabled device.
5. If necessary, tap Send.
How to Factory Reset BlackBerry Q10
Restoring the default settings or factory reset your device will delete all your existing files. So, it is recommended to backup your important files on your computer before attempting to reset your device. Unfortunately, the hard reset function is not available on this phone.
To perform a master reset, follow these steps:
1. Back up all data on the internal memory.
2. From any Home screen, touch the Status bar and drag it down.
3. Tap Settings.
4. Tap Security and privacy.
5. Tap Security wipe.
Note: You must decrypt you media card before the security wipe. Otherwise, the card will become inaccessible.
6. Swipe up on the screen and enter blackberry into the text field and tap Delete Data.
7. Follow any additional prompts.
Subscribe to:
Posts (Atom)