Showing posts with label 3. Show all posts

Thursday, September 25, 2014

Xperia Z Custom Rom ROM 12 07 XZ LOCKEDBL SonyericssonExcelsus Z v4 3 0 X Reality Engine ROM 12 07 XZ LOCKEDBL EXC


Features:
-Made For LOCKED BOOTLOADERS (You can try on unlocked bootloaders if you want)
-Android 4.2.2 Jelly Bean
-Based on latest firmware 10.3.A.0.423 Generic ES (C6603)
-Deodexed
-Zipaligned APKs
-Latest PureXAudio for EPIC AUDIO QUALITY
-init.d support
-De-Bloated
-build.prop Tweaks
-SQ lite support
-Better RAM management
-Latest Busybox installed
-data/apps support
-sysro/sysrw support
-TWRP and CWM Recovery Intergrated with XZDualRecovery
-Slimmed down ROM size
-ES File Explorer v3.0
-Very Stable
-Great Battery
-Custom adreno_config.txt
-MSAA 4x enabled in most new games which supports it (Thanks to MrTapa)
-Texture Tiling enabled
-Forced automatic Texture compression
-X-Reality for Mobile
-New Xperia i1 Honami apps
-New Xperia i1 Honami Home launcher
-New Xperia i1 Honami Hero Wallpapers


Quote:
DOWNLOADS:
V4.0.0 FULL ROM
V4.1.0 "Honami Edition" OTA Update
V4.2.0 OTA Update
V4.3.0 OTA Update (REUPLOADED!)
Read More..

Sunday, September 21, 2014

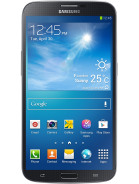
Samsung Galaxy Mega 6 3 I9200 I9205 Using Android 4 2 2 Jelly Bean Firmware How to Root Guide


Announced in April 2013, Samsung Galaxy Mega 6.3 is now available for purchase in several countries in the world. The Samsung Galaxy Mega 6.3 - as in a 6.3" Lcd, comes with 3G (GT-I9200) and LTE (GT-I9205) version that runs on Android 4.2.2 Jelly Bean.

Followed by the market rollout, XDA-Developers member VCore has released root method for both I9200 and I9205 version of Galaxy Mega 6.3.

Samsung Galaxy Mega 6.3 users who wish to root their devices, may follow our step-by-step guide.

Disclaimer: Rooting voids the warranty of your device. We and the developer of this rooting procedures shall not be held responsible if any undesirable outcomes may happen to your device. use of this root guide is solely at your own risk!
Pre-requisites
1. Install USB Driver for Samsung Galaxy Mega 6.3 on the computer.
2. Enable USB Debugging Mode on the phone by navigating to Settings >> Developer Options.
3. Make a backup of all your important data before following the guide.
4. The Galaxy Mega 6.3 should be factory unlocked and not locked to any particular carrier.
5. Ensure the battery of the phone is charged more than 80 per cent.
6. The Root Package file works only on Samsung Galaxy Mega 6.3. Applying these to any incorrect variant might brick the device. Verify the model number of the Galaxy Mega 6.3 by navigating to Settings >> About Phone.

Files Required
1. Root Package for Galaxy Mega 6.3 (vcoreroot-v2.tar)
2. Odin 3.07 (Mirror Link)
Steps to Root Galaxy Mega 6.3 Running on Android 4.2.2 Jelly Bean Firmware
Step 1: Extract Odin 3.07 file using WinRAR/7-Zip/WinZip or any other extracting tool.
Step 2: Switch off the Galaxy Mega 6.3. Then boot the device into Download Mode by pressing and holding Volume Down, Home and Power buttons together until a construction Android robot icon with a warning triangle appears on Lcd. Now press the Volume Up button to enter Download Mode.
Step 3: Launch Odin on the computer as an Administrator.
Step 4: Connect the Galaxy Mega 6.3 to the computer using USB cable while it is in the Download Mode. Wait until Odin detects the device. When the device is connected successfully, the ID: COM box will turn blue with the COM port number. Additionally, the successful connected will be indicated by a message saying Added.
Note: If the Added message does not appear, then try re-install USB drivers or changing the port on the computer.
Step 5: In Odin, click the PDA button and select the vcoreroot-v2.tar file.
Step 6: Verify that Auto Reboot and F.Reset Time checkboxes are selected in Odin. Also, ensure the Re-Partition option in Odin is not selected.
Step 7: Double-check and click Start in Odin. The installation process will now begin.
Step 8: Once the installation process is completed, your phone will restart and soon you will see a PASS message with green background in the left-most box at the very top of the Odin. You can now unplug the USB cable to disconnect your device from computer.

Samsung Galaxy Mega 6.3 running on Android 4.2.2 Jelly Bean firmware is now rooted successfully. You can now install any app that requires root permission. Verify the root status of the device by downloading Root Checker app from Google Play Store.

Thanks to all fellas at XDA who first tried out this rooting technique. This method was originally posted via XDA-Developers original thread.
Read More..

Sunday, September 14, 2014

Smart Mot 3 17 Full

Smart
Supported phone models
unlock for
* Axxx: A1000; A1200; A630; A830; A835; A845; A920; A925;
* Cxxx: C115; C116; C117; C118; C123; C139; C140; C155; C156; C157; C168; C168i; C236; C250; C257; C261; C266; C268; C330; C331; C332; C333; C334; C335; C336; C350; C350l; C350v; C353; C355v; C359v; C370; C380; C385; C390; C450; C450l; C550; C650; C651; C975; C980;
* Exxx: E1; E1000; E1070 (inc. fw ... F11P); E1075; E2; E365; E370; E375; E378i; E380;E396;E398; E550; E6; E770; E920;
* Fx: F3;
* Kx: K1; K1s; K3;
* Lx: L2; L6; L6 i-mode; L7; L7 i-mode; L71; L72; L7e; L9;
* Mxxx: M1000; M702iG; M702iS;* MPx: MPx200; MPx220;
* Txxx: T280; T280i; T720; T720i; T721; T722i; T725e;
* Ux: U3; U6;* Vxxxx: V1050; V1075; V1100; V1150;
* Vxxx: V150; V151; V170; V171; V175; V176; V177; V180; V186; V188; V190; V191; V195; V220; V226; V235; V300; V303; V330; V360; V360v; V365; V400; V500; V505; V525; V525m; V535; V545; V547; V550; V551; V555; V557; V560; V600; V620; V635; V690; V872; V878; V975; V980;
* Vxx: V60; V60i; V66; V66i; V70; V80;* Vx: V3; V3i; V3r; V3t; V3v; V3x; V3xx; V6; V8; V9; V3re (V3_06);
V3xx Cingular (North America);
* Wxxx: W156; W160; W161; W175; W177; W180; W181; W205; W206; W208; W209; W213; W215; W218; W220; W230; W270; W360; W375; W377; W388; W490; W510;* Wx: W5;
* Zx: Z3; Z6; Z8;
* Sendo S2xx/S3xx/P2xx/M5xx/S6xx:
D800; M550; P200; P230; S200; S230; S600;
* Sony Ericsson: J100; J110i; J120i; T250i; Z250i; Z320i;
Downloadhttp://rapidshare.com/files/169885067/Smart_Moto_3.17_Full_fixedgsm.blogspot.com.rar
Read More..

Thursday, September 11, 2014

Samsung Galaxy Ace 3 LTE S7275R with Android 4 2 2 XXUANA3 Jelly Bean Official Firmware How To Guide


Android
Samsung Galaxy Ace 3 with LTE connectivity has just received the latest Android 4.2.2 Jelly Bean update with firmware build number S7275RXXUANA3. The new official firmware is now available as an Over-The-Air (OTA) update as well as through Samsung KIES.
Firmware details
PDA: S7275RXXUANA3
CSC: S7275ROLBANA1
MODEM: S7275RXXUAML1
Version: Android 4.2.2
Build date: Jan 13, 2014
Regions: Singapore, Malaysia
Samsung Galaxy Ace 3 (LTE) S7275R users who missed the OTA update notification or unable to access the update over Samsung KIES, can now download and install the same manually using our step-by-step guide.
Pre-requisites
1. Install USB Drivers for Samsung Galaxy Ace 3 on the computer.
2. Enable USB Debugging Mode on the phone by navigating to Settings >> Developer Options.
3. Make a backup of all your important data before following the guide.
4. The Galaxy Ace 3 should be factory unlocked and not locked to any particular carrier.
5. Ensure the battery of the phone is charged more than 80 percent.
6. The Android 4.2.2 XXUANA3 Jelly Bean firmware is compatible only with the LTE version of Samsung Galaxy Ace 3 (GT-S7275R). Applying this to any incorrect variant might brick the device. Verify the model number of the Galaxy Ace 3 by navigating to Settings >> About Phone.

Files Required
1. Android 4.2.2 XXUANA3 Jelly Bean Firmware (Mirror Link) for Galaxy Ace 3 (LTE) S7275R
2. Odin 3.07 (Mirror Link)

Steps to Update Galaxy Ace 3 (LTE) S7275R with Android 4.2.2 XXUANA3 Jelly Bean Firmware
Step 1: Extract Firmware zip file using WinRAR/7-Zip/WinZip or any other extracting tool, you will get a .tar.md5 file and some other files (optional).
Step 2: Extract Odin zip file and you will get Odin3 v3.07.exe along with few other files.
Step 3: Switch off the Galaxy Ace 3.
Step 4: Boot the device into Download Mode by pressing and holding Volume Down, Home and Power buttons together until a construction Android robot icon with a warning triangle appears on Lcd. Now press the Volume Up button to enter Download Mode.
Step 5: Run Odin on the computer as an Administrator.
Step 6: Connect the Galaxy Ace 3 to the computer using USB cable while it is in the Download Mode. Wait until Odin detects the device. When the device is connected successfully, the ID: COM box will turn to light blue with the COM port number. Additionally, the successful connected will be indicated by a message saying Added.

Note: If the Added message does not appear, then try re-install USB drivers or changing the port on the computer.

Step 7: Select the following files in Odin from extracted S7275RXXUANA3 firmware folder:
  • Click the PDA button and select the .tar.md5 file.
  • Click the Phone button and select file with MODEM in its name. Ignore if there is no such file.
  • Click the CSC button and select file with CSC in its name. Ignore if there is no such file.
  • Click the PIT button and select the .pit file. Ignore if there is no such file.
Step 8: In Odin, enable Auto Reboot and F. Reset Time checkboxes. Also, ensure the Re-Partition checkbox is chosen only if a .pit file was chosen in the previous step.
Step 9: Verify everything suggested in Step 7 and Step 8 is done correctly. Then hit the Start button to begin the installation process.
Step 10: Once the installation process completes, your phone will restart and soon you will see a PASS message with green background in the left-most box at the very top of the Odin. You can now unplug the USB cable to disconnect your device from the computer.

Samsung Galaxy Ace 3 (LTE) S7275R should be now updated with Android 4.2.2 XXUANA3 Jelly Bean official firmware. Head over to Settings >> About Phone to verify the software version running on the device.

Note: If Galaxy Ace 3 (LTE) S7275R stuck at booting animation after Step 10 then go to recovery mode (press and hold the Volume Up, Home and Power buttons together) and perform Wipe data/Factory Reset and Wipe Cache Partition task before selecting reboot system now function. In recovery mode use Volume keys to navigate between options and Power key to select the option. Please note, performing wiping task will erase your device internal memory data and not external SD card data.
Read More..

Saturday, September 6, 2014

How to Root Galaxy S4 LTE I9505 on Android 4 3 JB Without Tripping the KNOX Warranty Void Counter


Samsung Galaxy S4 (LTE) I9505 users who have already updated their devices with Android 4.3 Jelly Bean, may root their devices using the tutorial below.

This tutorial uses the Root Exploit package released by Senior XDA-Developers, k1mu. The Root Exploit package allows Galaxy S4 users to root their devices easily without tripping the KNOX warranty void counter.

Disclaimer: We and the developer of this rooting procedures shall not be held responsible if any undesirable outcomes may happen to your device. use of this root guide is solely at your own risk!

Pre-requisites
1. Install USB Drivers for Samsung Galaxy S4 on the computer.
2. Enable USB Debugging Mode on the phone. Go to Settings >> About Phone. Tap on Build Number several times till the message shows "You are now a Developer". Then enable USB debugging by navigating to Settings >> Developer Options.
3. Make a backup of all your important data before following the guide.
4. Ensure the battery of the phone is charged more than 80 percent.
5. The Root Exploit package works only on the LTE version of the Galaxy S4 (GT-I9505). Applying this to any incorrect variant might brick the device. Verify the model number of the Galaxy S4 by navigating to Settings >> About Phone.


File Required

1. Root Exploit (saferoot.zip) - Mirror Link

Steps to Root Galaxy S4 (LTE) I9505 Running on Android 4.3 Jelly Bean
  • Extract the Root Exploit package to the computer using WinRAR/7-Zip/WinZip or any other extracting tool.
  • Connect the Galaxy S4 to the computer using USB cable.
  •  On the computer, navigate to the extracted directory and double click "install.bat" file. You will see command prompt window which will detect your device and automatically run the scripts.
  • Follow the on-screen instructions. Once the rooting procedure completes, your phone will reboot automatically.
Thats it! Samsung Galaxy S4 (LTE) I9505 running on Android 4.3 Jelly Bean is now rooted successfully. You can now install any app that requires root permission. Verify the root status of the device by downloading Root Checker app from Google Play Store.


Note: This exploit will NOT set the KNOX warranty void flag. It will set the "Custom" flag, but thats nothing to worry about.


Thanks to all fellas at XDA who first tried out this rooting technique. This method was originally posted via XDA-Developers original thread.
Read More..

Tuesday, September 2, 2014

New Release Official 4 3 Update Samsung Galaxy S3 GT I9300 How To Guide

I9300XXUGMK6 an official Android 4.3 update on Samsung Galaxy S3 (GT-I9300)
Here comes another Android 4.3 software update for Samsung Galaxy S3 (GT-I9300) with firmware build numbers I9300XXUGMK6, that has recently released by Samsung. This is the continuation of the previously released 4.3 update I9300XXUGMJ9 that has been postponed due to some several issues. According to its official changelog, this update will bring more improvements to the Galaxy S3 I9300 devices. Some features are already found from the earlier released, including Galaxy Gear support and the new KNOX security apps.
Here’s what appears on Kies about the I9300XXUGMK6 4.3 Update.
  • OS upgrade (android 4.3)
  • Added new feature
  • Compatibility with Galaxy gear
  • Improved performance (Graphics, Multimedia, Bluetooth, etc.)
  • Improved the User Interface and Usability
  • User Interface adjustment (Icon change, widgets, etc.)
  • Security enhancements
  • *You cannot downgrade back to the old software after this new software upgrade due to security reason.
  • Related Reading:Samsung Galaxy Note 2 LTE N7105T Android 4.3 JB Firmware How To Guide
Important Note:
According to the last part of the changelog that once you took the 4.3 update, it forbids you from downgrading back to the old software update due to security reason. So this means that it’s a one way straight ahead taking the 4.3 update and no returning back again to any old firmware like the 4.1.1 or 4.1.2 versions.
The UGMK6 update is now only available in select European countries but only British Galaxy S3 users are lucky enough to get this update on their unbranded or SIM free Galaxy S3 I9300 others are those with branded devices. All other Galaxy S3 I9300 users around the world who may have not seen this update yet, might still need to wait for a while since the rolled-out is in stages. This update is available through Samsung Kies and over-the-air (OTA software update). But for those advanced users who wants to update now, you might also like to grab the original I9300XXUGMK6 firmware below and update your device in no time without waiting this update from Kies to appear.
Install I9300XXUGMK6 4.3 Update on Galaxy S3 GT-I9300
Disclaimer: This guide is for advance users only, this is risky for beginners. We shall not be held responsible if anything happens to your device while using this guide. Proceed at your own risk!
Stock Firmware I9300XXUGMK6: (Unbranded, Unlocked or SIM Free)
United Kingdom – I9300XXUGMK6_I9300OXAGMK6_BTU.zip Download – [link]
Austria – [link]
Baltic – [link]
Czech Republic – [link]
Denmark – [link]
France – [link]
Finland – [link]
Germany – [link]
Greece – [link]
Hungary – [link]
Italy – [link]
Israel – [link]
Luxembourg – [link]
Norway – [link]
Netherlands – [link]
Poland – [link]
Russia – [link]
Southeast Europe – [link]
Slovakia– [link]
Spain – [link]
Sweden – [link]
Switzerland - I9300XXUGML2_I9300AUTGML1_AUT.zip download
Turkey – [link]
Carrier Branded: (Vodafone)
Czech Republic– [link]
Hungary – [link]
Italy – [link]
Ireland – [link]
Germany – [link]
Greece – [link]
Netherlands – [link]
Portugal – [link]
Romania – [link]
Spain – [link]
United Kingdom – [link]
More Carriers: (Others are on I9300XXUGML2 4.3 firmware builds)
Austria (a1)– [link]
Austria (t-mobile) – [link]
Croatia (vipnet) – [link]
Croatia (o2) – [link]
Croatia (t-mobile) – [link]
Czech Republic (t-mobile) – [link]
Denmark (3) – [link]
France (sfr) – [link]
France (orange) – [link]
Germany (O2) – [link]
Germany (t-mobile) – [link]
Hungary (t-mobile) – [link]
Italy (3) – [link]
Macedonia (t-mobile) – [link]
The Netherlands (t-mobile) – [link]
Norway (telenor) – [link]
Portugal (optimus) – [link]
Poland (plus) – [link]
Poland (play) – [link]
Poland (t-mobile) – [link]
Romania (cosmote) – [link]
Slovenia (si.mobil) – [link]
Slovenia (mobitel) – [link]
Sweden (3) – [link]
Switzerland (swisscom) – [link
Ukraine (kyivstar) – [link]
Tools:
Odin3_v3.09 Download
GT-I9300 USB Driver Download
Preparations:
  • Make a back-up copy of all important files from the device. You may use any apps for quick back-up.
  • Make sure the battery is fully charge.
1) Extract or unzip the downloaded firmware or stock ROM so that you’ll get the Odin flashable tar file which is looks likely the same as the image below.
2) Run Odin Downloader v3.07 flasher program.
3) Load the binary file. Click on the PDA button then browse to the folder where you extracted the stock ROM. Like for example I used UK firmware so it goes like this “I9300XXUGMK6_I9300OXAGMK6_I9300XXUGMK6_HOME.tar.m d5″
4. Do Not check the Re-Partition checkbox. Mark check these checkboxes Auto Reboot and F-Reset Time.
5. Reboot the phone in download mode: To reboot the Galaxy S3 into download mode , you need to turn the power off. After it completely shut down, just press and hold the Volume Down key, Home button and the Power ON/OFF button simultaneously.
You should then prompted into a warning screen and asking you to press volume up if you want to continue or volume down to cancel, just simply press volume up to get into download mode. The download mode then displays an Android robot and say’s “Downloading.. Do not turn off target!!”
6. Connect the phone to PC when it’s in the Download Mode screen.
7. Hit the “START’ button.
10. Wait until a word “PASS’ appears.
11. Remove the phone from PC once completely reboots.
Optional: Perform factory reset to gain a fresher firmware installation, this is very useful to get rid of unwanted reboots and lag issues.
You may then confirm the newly installed Jelly Bean from your device:
Settings–>About Phone–>Software info or type *#1234# and see if it’s already I9300XXUGMK6 or I9300XXUGML2 4.3 Jelly Bean build
Read More..

Saturday, August 30, 2014

»Chittagong Kings Theme Dj Remix mp3 3 87mb

Download Files:
Chittagong Kings Theme (Dj Remix).mp3 (3.87mb)
Read More..

Tuesday, August 26, 2014

Nokia x3 00 Rm 540 Latest Version 3 60 Flash Files Free Download

Nokia x3-00 Rm 540 Latest Flash Files Mcu Ppm Cnt Free Download
Nokia
DOWNLOAD LINKS
MCU,PPM ,CNT
Read More..

Tuesday, August 19, 2014

How to Root Galaxy S4 SGH M919 on Android 4 3 JB Without Tripping the KNOX Warranty Void Counter


This tutorial uses the Root Exploit package released by Senior XDA-Developers, k1mu. The Root Exploit package allows Galaxy S4 users to root their devices easily without tripping the KNOX warranty void counter.

Disclaimer: We and the developer of this rooting procedures shall not be held responsible if any undesirable outcomes may happen to your device. use of this root guide is solely at your own risk!


Pre-requisites

1. Install USB Drivers for Samsung Galaxy S4 on the computer.
2. Enable USB Debugging Mode on the phone. Go to Settings >> About Phone. Tap on Build Number several times till the message shows "You are now a Developer". Then enable USB debugging by navigating to Settings >> Developer Options.
3. Make a backup of all your important data before following the guide.
4. Ensure the battery of the phone is charged more than 80 percent.
5. The Root Exploit package works only on the T-Mobile version of the Galaxy S4 (SGH-M919). Applying this to any incorrect variant might brick the device. Verify the model number of the Galaxy S4 by navigating to Settings >> About Phone.


File Required

1. Root Exploit (saferoot.zip) - Mirror Link


Steps to Root Galaxy S4 (T-Mobile) SGH-M919 Running on Android 4.3 Jelly Bean

  • Extract the Root Exploit package to the computer using WinRAR/7-Zip/WinZip or any other extracting tool.
  • Connect the Galaxy S4 to the computer using USB cable.
  • On the computer, navigate to the extracted directory and double click "install.bat" file. You will see command prompt window which will detect your device and automatically run the scripts.
If you are using Linux or Mac OS X, navigate to the extracted directory in a terminal and run the following command. Please note that youll need to have the Android Debugging Bridge (adb) installed and configured on your path.


$ chmod +x install.sh
$ ./install.sh

  • Follow the on-screen instructions. Once the rooting procedure completes, your phone will reboot automatically.

Thats it! Samsung Galaxy S4 (T-Mobile) SGH-M919 running on Android 4.3 Jelly Bean is now rooted successfully. You can now install any app that requires root permission. Verify the root status of the device by downloading Root Checker app from Google Play Store.


Note: This exploit will NOT set the KNOX warranty void flag. It will set the "Custom" flag, but thats nothing to worry about.


Thanks to all fellas at XDA who first tried out this rooting technique. This method was originally posted via XDA-Developers original thread.
Read More..

Sunday, August 17, 2014

How to Root Samsung Galaxy Ace 3 GT S7270 GT S7272

Before you continue, a little review about samsung galaxy ace on 3. samsung galaxy ace gt-s7270 3 now comes with better performance. with a fast processor for the fastest connectivity options, this phone is also equipped with the latest OS with premium user interface. is packed with advanced features and services that have been perfected, your mobile experience. include sound and shot, cloud storage, S translator, the S voice and much more!


Above is a little review of the samsung website. before we do the root, you should prepare some components and equipment necessary for the root process takes place.

1. Samsung usb driver, download => here. (This is optional only if your device is not detected on the computer., if it is detected, the application could you pass or not in the download).

2. Odin v3.07, Download => hare

3. CWM nontouch recovery.tar, Download=> hare Or CWM touch recovery.tar, Download =>hare

4. Root.zip, Download => Hare.

5. A data cable and computer.

6.Listen, praying and trying.


Note: This method has been successfully carried out by one of the xda-forum xda-developer user and I thank you. if there are mistakes or errors when doing this root, DWYOR (do with your own risk).
If all the above components and equipment you already prepared, now is the stage of the root galaxy 3 gt - s7270 ace gt - s7272 or .

1 . Install samsung usb drivers on your computer when you are android can not connect to a computer using a data cable . if you can connect , you can skip this step .

2 . Extract Odin which you have already downloaded the above , then you run the " run administrator " . then click on " PDA " 

3 . Find and select the file you TAR between nontouch or touch that you have already downloaded . choose one only because it is CWMnya . ( I have yet to issue mengetaui difference is the difference between the two) .

4 . Download files root.zip above and place it on SDCARD memory , do not put in any folder . Next is enable " USB debugging " in galaxy ace 3 . if it is , you turn off android . here you have to go to the " download mode " . if android is completely dead , you press the " volume down + home + power " . it should launch a warning , press the " volume up " to continue .

5 . Connect android in the " download mode " using the data cable to the computer , then Odin will make the process of connection with the form there is a yellow color of the android port and make sure it says " added" .

6 . If android is already connected and odin already detect your device with the word " added" in Odin , then that is you press the " start " .

7 . Here you have to wait until the process of Odin finished . when done , then you will see the color green with the words " pass " . when it says " pass " then CWM already installed on android , you remove the data cable from the computer and turn off android . then , turn it back on your android by pressing the " volume up + home + power " , here you will get into CWM mode .

8 . Next is you use the volume key up or down to up and down . search and choose " install zip from SDCard " then "choose zip from sdcard " , you find the file you root.zip already put in SDcard by pressing up or down . if it is , you select root.zip by pressing the home button . then there will be an option, you select " yes - install root.zip from SDCARD " if not mistaken . then android will make the process of entering data into android root.zip . if it it says " completed " . then you select " reboot system now " .

9 . Android will reboot and its done all the rootnya , now samsung galaxy 3 gt - s7270 ace gt - s7272 and you are already in a state of the root . in the menu you will see the sign android application SuperSU and have succeeded in the root .

Now completed ... good luck ...
Read More..

Wednesday, August 13, 2014

Android 4 3 Jelly Bean update for Samsung Galaxy S4 LTE model released S3 version coming soon

The Android 4.3 Jelly Bean update for the Samsung has S4 has begun to roll out to its international models this week.
The latest Android 4.3. 1 official firmware has been releaesd by Samsung for Galaxy S4 I9500 and I9505 models, which includes the LTE models.
Samsung Galaxy S4 owners in Germany with the unlocked GT-19505 model have already received the OS update. Updates to Galaxy S4 users in North America will be available shortly.
The upgrade brings compatibility with the Galaxy Gear smartwatch, and provides a friendlier user interface with improved graphics performance, stability and security.

Users must beware that once their device is upgraded to Android 4.3, downgrading is not a possibility due to security concerns.
Click here for the full guide to updating the Exynos 5 octa-core version of Galaxy S4 with model number GT-I9500 with the Android 4.3.
HTC owners on Americas AT&T and Sprint network have already received the Android 4.3 update.
The Android 4.3 Jelly Bean update for the Samsung Galaxy S4 has begun to roll out right on time, aspromised by Samsung during the Galaxy Note 3 unveiling in September.
Samsung also announced that it will upgrade its mobile OS for the Galaxy S3 some time in October.
All software updates will be available over-the-air (OTA).
Android 4.3 was only launched by Google in the summer with the launch of the Nexus 7. The tech giant is expected to launch Android 4.4 KitKat with the highly anticipated Nexus 5 and Nexus 10 2 by the end of this month. However, Android 4.4 KitKat is not expected to roll out to any other Samsung devices before the end of this year.
Read More..

How to esay Update Galaxy S3 I9300 with Android 4 3 XXUGML2 Jelly Bean Official Firmware

Samsung Galaxy S3 (GT-I9300) users in Switzerland just got the Android 4.3 Jelly Bean update to the latest firmware build number I9300XXUGML2. New official firmware and is currently available as an Over-The-Air (OTA) update via Samsung Kies as well.

Update firmware
PDA: I9300XXUGML2
CSC: I9300AUTGML1
MODEM: I9300XXUGMK6
Version: Android 4.3
Build date: December 13, 2013
Regional: Switzerland

users of Samsung Galaxy S3 I9300 who missed the OTA update notification or can not access the update via Samsung Kies, and those who live outside the area supported can now download and install the same manually, using a step-by-step guide.

Pre-requisites

1. Install USB Drivers for Samsung Galaxy S3 on the computer.
2. Enable USB Debugging Mode on the phone by navigating to Settings >> Developer Options.
3. Make a backup of all your important data before following the guide.
4. The Galaxy S3 should be factory unlocked and not locked to any particular carrier.
5. Ensure the battery of the phone is charged more than 80 percent.
6. The Android 4.3 XXUGML2 Jelly Bean firmware is compatible only with the international version of Samsung Galaxy S3 (GT-I9300). Applying this to any incorrect variant might brick the device. Verify the model number of the Galaxy S3 by navigating to Settings >> About Phone.


Files Required

Steps to Update Galaxy S3 I9300 with Android 4.3 XXUGML2 Jelly Bean Firmware 

Step 1:
Extract Firmware zip file using winrar/7zip/winzip or any other extracting tool, you will get a .tar.md5 file and some other files.
Step 2: Extract Odin zip file and you will get Odin3 v3.07.exe along with few other files.
Step 3: Switch off the Galaxy S3.
Step 4: Boot the device into Download Mode by pressing and holding Volume Down, Homeand Power buttons together until a construction Android robot icon with a warning triangle appears on screen. Now press the Volume Up button to enter Download Mode.
Step 5: Run Odin on the computer as an Administrator.
Step 6: Connect the Galaxy S3 to the computer using USB cable while it is in the Download Mode. Wait until Odin detects the device. When the device is connected successfully, the ID: COM box will turn to light blue with the COM port number. Additionally, the successful connected will be indicated by a message saying Added.

Note: If the Added message does not appear, then try re-install USB drivers or changing the port on the computer.
Step 7: Select the following files in Odin from extracted I9300XXUGML2 firmware folder:
  • Click the PDA button and select the .tar.md5 file.
  • Click the Phone button and select file with MODEM in its name. Ignore if there is no such file.
  • Click the CSC button and select file with CSC in its name. Ignore if there is no such file.
  • Click the PIT button and select the .pit file. Ignore if there is no such file.

Step 8: In Odin, enable Auto Reboot and F. Reset Time checkboxes. Also, ensure the Re-Partition checkbox is chosen only if a .pit file was chosen in the previous step.
Step 9: Verify everything suggested in Step 7 and Step 8 is done correctly. Then hit the Startbutton to begin the installation process.
Step 10: Once the installation process is completed, your phone will restart and soon you will see a PASS message with green background in the left-most box at the very top of the Odin. You can now unplug the USB cable to disconnect your device from the computer.

Samsung Galaxy S3 I9300 should be now updated with official Android 4.3 XXUGML2 Jelly Bean. Head over to Settings >> About Phone to verify the software version running on the device.

Note: If Galaxy S3 I9300 stuck at booting animation after Step 10 then go to recovery mode (press and hold the Volume Up, Home and Power buttons together) and perform Wipe data/Factory Reset and Wipe Cache Partition task before selecting reboot system now function. In recovery mode use Volume keys to navigate between options and Power key to select the option. Please note, performing wiping task will erase your device internal memory data and not external SD card data.
Read More..