Showing posts with label sony. Show all posts
Showing posts with label sony. Show all posts
Thursday, November 20, 2014
Sony Ericsson K800i K790i Ringer Buzzer Ways


Wednesday, November 5, 2014
How to Root Sony Xperia Z on both Locked and Unlocked Bootloaders
Sony Xperia Z is the latest and by far the most promising Android Smart Phone by Sony. Rooting in Android is an act of accessing root user permissions which can be useful to install Apps that need root access and boost up the performance of your Android device.

Note that rooting may void your device warranty, So Try this at your own risk.
The following rooting method applicables for both unlocked and locked bootloaders. Refer this XDA thread to unlock and re-lock the bootloader of Sony Xperia Z.
Read More..
Note that rooting may void your device warranty, So Try this at your own risk.
The following rooting method applicables for both unlocked and locked bootloaders. Refer this XDA thread to unlock and re-lock the bootloader of Sony Xperia Z.
Pre-Requisites
- This rooting method is for Sony Xperia Z which comes with Jelly Bean Android version (10.1.D.0.317, 10.1.D.0.322, 10.1.A.1.350).You can check Android version by visiting Settings >> About the Phone
- You need to install ABD drivers on your Windows PC. Get the drivers from here.
- Windows 8 users follow this guide to change the settings before installing the drivers mentioned above.
- Download this rooting tool kit (1.9Mb)
Rooting
follow the steps sequentially- You need to increase screen timeout to 10 mins : Settings >> Display >> Sleep >> 10 mins
- Enable USB Debugging mode : Settings >> Developer options >> Enable and Settings >> Developer options >> USB Debugging (check the option)
- Enable install from “unknown sources” option : Settings >> Security >> Unknown source (check the option)
- Save the rooting tool kit (.zip file) mentioned above in C drive (C:) and Extract it there itself.
- Quit applications like PC Suite, PC Companion, Flashtool, etc. as they will interfere with the rooting process.
- Now Connect your phone to PC and run “runme.bat” file from the extracted folder (step 4)
- Wait for few seconds till you get the option “press the button to restore the data in your phone”
- Now do not down your Phone screen, it will start an App automatically and Select Restore data.
- You will see the message “if Restoring data is complete” in command prompt
- Now open your phone and dial this number *#*#7378423#*#*
- Select the option “Service tests” in your phone operation
- Now select the option “Display”. Now the screen will turn white and few commands will be executed automatically.
- Now press the power button to turn off screen, wait for few seconds and press it again (repeat it a few times) and keep observing the command prompt for outputs
- Finally you will see the messages like “transfer files to your phone part2“, “installing busybox,su,Superuser,etc…” & finally “Cleaning up“
- Now your phone will automatically restart.
Wednesday, October 29, 2014
How to Master Reset or Hard Reset a Sony Ericsson Z750a
To perform a master/hard reset on your Sony Ericsson Z750a you will need to:
Menu > Settings > scroll down to master reset > reset all
Read More..
Menu > Settings > scroll down to master reset > reset all
Friday, October 17, 2014
How to Use Car Infotainment System on Sony Xperia Z1 Compact
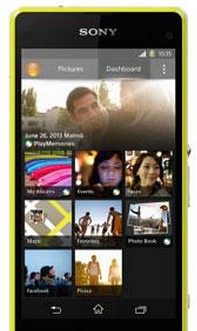 Connect your device to a MirrorLink™ certified car infotainment system using a USB cable to, for example, use a navigation app or play music from your device while driving. The car infotainment system mirrors all features on your device and gives you access to all applications. When connected, you can navigate the apps using the car infotainment system controls.
Some applications may not be available in driving mode. Also, protected data, such as videos that are strictly protected under Digital Rights Management (DRM), is not made available via MirrorLink™.
To connect your device to a car infotainment system
• Connect your device and the car infotainment system using a USB cable. The Lcd of your device appears on the Lcd of the infotainment system.
Warning: You may need to start MirrorLink™ manually if the connection between your device and the infotainment system is not established automatically.
To start MirrorLink™ manually
1. Make sure that your device is connected to the car infotainment system using a USB cable.
2. From your Home Lcd, tap Apps icon.
3. Find and tap Settings > Xperia™ Connectivity > Start MirrorLink™.
4. Tap OK.
Friday, September 26, 2014
How to Start the Smart Connect Application on Sony Xperia Z2
Wouldnt it be nice if youre phone automatically plays your song list right when you step in your car? Or what about letting you show your whole day agenda the moment you arrive at your work table between 8-9am? These are just examples on how Sony Xperia Z2s Smart Connect app works. With this app, you can set an event to happen on your device at certain times or what will happen when you connect/disconnect accessories like headset or charger. Hereshow to use it.
1. On your devices home Lcd, tap on .
.
2. Look for Smart Connect and tap on it.
3. If its your first time opening the said app, tap on OK to close the introduction Lcd.
4. Go to Events tab and tap on the plus (+) icon.
5. Type in a name for the event and tap on Create.
6. Under When, add either an accessory ( like what happens on your device when you connect your headset) or a time interval or could be both.
7. Under Do This, add what you want to happen on your device.
8. Under At the End, add what you want to happen to your device when you disconnect your accessory or when the time interval ends.
9. Press on Back Arrow to save the event.
Read More..
1. On your devices home Lcd, tap on
.2. Look for Smart Connect and tap on it.
3. If its your first time opening the said app, tap on OK to close the introduction Lcd.
4. Go to Events tab and tap on the plus (+) icon.
5. Type in a name for the event and tap on Create.
6. Under When, add either an accessory ( like what happens on your device when you connect your headset) or a time interval or could be both.
7. Under Do This, add what you want to happen on your device.
8. Under At the End, add what you want to happen to your device when you disconnect your accessory or when the time interval ends.
9. Press on Back Arrow
to save the event.Monday, September 22, 2014
How to Share Contacts Music Files Photos or Videos and Web Address Using NFC on Sony Xperia Z2
1. On your Home Lcd, tap the > Settings.
2. Then go to More.
3. Mark the NFC checkbox.
To share a contact with another device using NFC
1. Make sure that both devices have the NFC function turned on, and that both Lcds are active.
2. To view contacts, go to your Home Lcd, tap, then tap Person icon.
3. Tap the contact that you want to share.
4. Hold your device and the receiving device back to back so that the NFC detection areas of each device touch each other. When the devices connect, a thumbnail of the contact appears.
5. Tap the thumbnail to start the transfer.
6. When the transfer is done, the contact information is displayed on the Lcd of the receiving device and is also saved on the receiving device.
To share a music file with another device using NFC
1. Make sure that both your device and the receiving device have the NFC function turned on, and that both Lcds are active.
2. To open the "WALKMAN™" application, tap, then find and tap Walkman icon.
3. Select a music category and browse to the track you want to share.
4. Tap the track to play it. You can then tap Pause icon to pause the track. The transfer works whether the track is playing or paused.
5. Hold your device and the receiving device back to back so that the NFC detection areas of each device touch each other. When the devices connect, a thumbnail of the track appears.
6. Tap the thumbnail to start the transfer.
7. When the transfer is done, the music file plays immediately on the receiving device. At the same time, the file is saved on the receiving device.
To share a photo or video with another device using NFC
1. Make sure that both devices have the NFC function turned on, and that both Lcds are active.
2. To view photos and videos in your device, go to your Home Lcd, tap, then find and tap Album.
3. Tap the photo or video that you want to share.
4. Hold your device and the receiving device back to back so that the NFC detection areas of each device touch each other. When the devices connect, a thumbnail of the track appears.
5. Tap the thumbnail to start the transfer.
6. When the transfer is done, the photo or video is displayed on the Lcd of the receiving device. At the same time, the item is saved on the receiving device.
To share a web address with another device using NFC
1. Make sure that both devices have the NFC function turned on, and that both Lcds are active.
2. From your Home Lcd, tap.
3. To open the web browser, find and tap Chrome browser icon.
4. Load the web page that you want to share.
5. Hold your device and the receiving device back to back so that the NFC detection areas of each device touch each other. When the devices connect, a thumbnail of the track appears.
6. Tap the thumbnail to start the transfer.
7. When the transfer is done, the web page is displayed on the Lcd of the receiving device.
Read More..
> Settings.2. Then go to More.
3. Mark the NFC checkbox.
To share a contact with another device using NFC
1. Make sure that both devices have the NFC function turned on, and that both Lcds are active.
2. To view contacts, go to your Home Lcd, tap
, then tap Person icon.3. Tap the contact that you want to share.
4. Hold your device and the receiving device back to back so that the NFC detection areas of each device touch each other. When the devices connect, a thumbnail of the contact appears.
5. Tap the thumbnail to start the transfer.
6. When the transfer is done, the contact information is displayed on the Lcd of the receiving device and is also saved on the receiving device.
To share a music file with another device using NFC
1. Make sure that both your device and the receiving device have the NFC function turned on, and that both Lcds are active.
2. To open the "WALKMAN™" application, tap
, then find and tap Walkman icon.3. Select a music category and browse to the track you want to share.
4. Tap the track to play it. You can then tap Pause icon to pause the track. The transfer works whether the track is playing or paused.
5. Hold your device and the receiving device back to back so that the NFC detection areas of each device touch each other. When the devices connect, a thumbnail of the track appears.
6. Tap the thumbnail to start the transfer.
7. When the transfer is done, the music file plays immediately on the receiving device. At the same time, the file is saved on the receiving device.
To share a photo or video with another device using NFC
1. Make sure that both devices have the NFC function turned on, and that both Lcds are active.
2. To view photos and videos in your device, go to your Home Lcd, tap
, then find and tap Album.3. Tap the photo or video that you want to share.
4. Hold your device and the receiving device back to back so that the NFC detection areas of each device touch each other. When the devices connect, a thumbnail of the track appears.
5. Tap the thumbnail to start the transfer.
6. When the transfer is done, the photo or video is displayed on the Lcd of the receiving device. At the same time, the item is saved on the receiving device.
To share a web address with another device using NFC
1. Make sure that both devices have the NFC function turned on, and that both Lcds are active.
2. From your Home Lcd, tap
.3. To open the web browser, find and tap Chrome browser icon.
4. Load the web page that you want to share.
5. Hold your device and the receiving device back to back so that the NFC detection areas of each device touch each other. When the devices connect, a thumbnail of the track appears.
6. Tap the thumbnail to start the transfer.
7. When the transfer is done, the web page is displayed on the Lcd of the receiving device.
Sunday, September 21, 2014
How to Set Up Voicemail Service on Sony Xperia Z1s
Voicemail services depends on your subscription plan with your service provider. This feature allows caller to leave voice messages on your phone whenever you cant pick up. Your voicemail number may be found on your sim card or you can get it directly from your service provider. Here are the steps to set up voicemail service on Sony Xperia Z1s.
To set up your voicemail number:
1. On your devices homeLcd, tap on.
2. Go to Settings menu.
3. Select Call Settings and choose Voicemail Settings.
4. Tap on Voicemail number so you can enter your designated voicemail service number.
5. And lastly tap on OK.
To call your voicemail service number:
1. On your homeLcd, tap on the.
2. Look for Phone and tap it.
3. And touch and hold for seconds the number 1.
Read More..
To set up your voicemail number:
1. On your devices homeLcd, tap on
.2. Go to Settings menu.
3. Select Call Settings and choose Voicemail Settings.
4. Tap on Voicemail number so you can enter your designated voicemail service number.
5. And lastly tap on OK.
To call your voicemail service number:
1. On your homeLcd, tap on the
.2. Look for Phone and tap it.
3. And touch and hold for seconds the number 1.
Friday, September 19, 2014
How to Add a Geotag on a Photo on Sony Xperia Z1s
Adding a location to those photos somehow adds relevance and it gives you that flashback of memories when you view those nicely captured moments. Well, this feature is not new any longer since its been there online and you often use them on photo-filtered websites. But with Sony Xperia Z1s, you can now add geotags on your photos right on your handset. Heres how you can add geotag on your photos.
1. Open your photo gallery on your device.
2. When youre viewing a photo, just tap the Lcd and the toolbars will display.
3. Now tap to open the map Lcd.
4. Find and tap the desired location to put the map on the photo.
5. To adjust the location of the photo, just tap the location on the map to where you want to move the photo.
6. Tap OK when youre done and to save the geotag. You can then return to the photo viewer Lcd.
Read More..
1. Open your photo gallery on your device.
2. When youre viewing a photo, just tap the Lcd and the toolbars will display.
3. Now tap
to open the map Lcd.4. Find and tap the desired location to put the map on the photo.
5. To adjust the location of the photo, just tap the location on the map to where you want to move the photo.
6. Tap OK when youre done and to save the geotag. You can then return to the photo viewer Lcd.
Tuesday, September 16, 2014
Sony Xperia SP Tips and Tricks
How to Factory Reset Sony Xperia SP
Resetting your Sony Xperia SP will restore the default settings of your device. It will also delete all your files on your phone, so it is recommended to backup all your important files on your computer.
Follow these steps on how to reset the Sony Xperia SP:
How to Start a Conference Call on Sony Xperia SP
With conference call you can talk to two or more parties simultaneously right thru your phone. Adding multiple participants even if your on a call is just few taps away with Sony Xperia SP. Heres how to create a conference call.
1. If youre on an ongoing call, tap .
.
2. Then dial the number of the second participant and tap .
.
3. When the second participant answers the call, the first call is put on hold.
4. Tap on to start the conference call. Repeat the same steps to add more participants to the conference call.
To have a private conversation with one of the participants
1. Tap {0} participants during the ongoing conference call.
2. Then tap on the name of the participant you wish to talk privately.
3. To end the conversation and return to the conference call, tap.
To release a participant during the ongoing conference call
1. Tap the button showing the number of participants during the ongoing conference call.
2. Then tap next to the participant you want to release from the call.
To end the conference call
1. During the conference call, just tap End conference call.
How to Set Up Your Facebook Account on Sony Xperia SP
We simply cant get enough of Facebook. And this social networking giant made sure that they still exist even on your smartphones. Now you can set up a Facebook Account right on your Xperia SP phone which will give you easy navigation on Facebook. Heres how you can set up your Facebook account to work on your Xperia SP device.
1. On your devices homeLcd tap on
2. Then tap on Settings and go to Accounts & sync.
3. The Active auto-sync checkbox should be marked to make sure that applications can synchronise data automatically.
4. Tap on Add Account and then Xperia with Facebook.
5. Just follow the registration wizard to create an account or you can sign in if you already have one.
6. Once youre done, select a synchronisation option for your account and tap on Finish.
Your Facebook account is now set up to work on your phone.
How to Save Battery Life on Sony Xperia SP
How to Turn on Mobile Bravia Engine on Sony Xperia SP
Read More..
Resetting your Sony Xperia SP will restore the default settings of your device. It will also delete all your files on your phone, so it is recommended to backup all your important files on your computer.
Follow these steps on how to reset the Sony Xperia SP:
- From your Home Lcd, tap the Menu icon.
- Tap Settings, then select Backup and Reset.
- Tap Factory data reset. (If you want to delete your internal files, just check Erase Internal Storage checkbox.)
- Tap Reset phone.
- Then you need to confirm by tapping Erase everything.
With conference call you can talk to two or more parties simultaneously right thru your phone. Adding multiple participants even if your on a call is just few taps away with Sony Xperia SP. Heres how to create a conference call.
1. If youre on an ongoing call, tap
.2. Then dial the number of the second participant and tap
.3. When the second participant answers the call, the first call is put on hold.
4. Tap on
to start the conference call. Repeat the same steps to add more participants to the conference call.To have a private conversation with one of the participants
1. Tap {0} participants during the ongoing conference call.
2. Then tap on the name of the participant you wish to talk privately.
.To release a participant during the ongoing conference call
1. Tap the button showing the number of participants during the ongoing conference call.
next to the participant you want to release from the call.To end the conference call
1. During the conference call, just tap End conference call.
How to Set Up Your Facebook Account on Sony Xperia SP
We simply cant get enough of Facebook. And this social networking giant made sure that they still exist even on your smartphones. Now you can set up a Facebook Account right on your Xperia SP phone which will give you easy navigation on Facebook. Heres how you can set up your Facebook account to work on your Xperia SP device.
1. On your devices homeLcd tap on
2. Then tap on Settings and go to Accounts & sync.
3. The Active auto-sync checkbox should be marked to make sure that applications can synchronise data automatically.
4. Tap on Add Account and then Xperia with Facebook.
5. Just follow the registration wizard to create an account or you can sign in if you already have one.
6. Once youre done, select a synchronisation option for your account and tap on Finish.
Your Facebook account is now set up to work on your phone.
Battery Life depends on how you use your device. For Sony Xperia SP device, if you want to save your battery to last longer hours, you may need to adjust your settings. Follow these suggestions:
• Turn on the power-saving option on the device. Then lessen the Lcd brightness and theLcd lock timeout. On the HomeLcd, tap on Menu icon. Select Settings > Power management.
- Use the Stamina mode and Low battery mode features.
- To activate the STAMINA mode: While you are in the Power management, tap on Point icon next to STAMINA mode, then tap Activate.
• Turn down your device volume with the volume keys.
• Close any apps or features when you are done using it so they will not continuously running in the background.
• Turn off the network connection if you are out of range so that your device will stop searching for a network signal.
• You should use the latest version of the software update. Software updates improves some features and fixes some bugs on the previous software version.
How to Import Contacts From Old Phone to New Phone (on Sony, iPhone, Samsung, HTC and Nokia)
• Turn on the power-saving option on the device. Then lessen the Lcd brightness and theLcd lock timeout. On the HomeLcd, tap on Menu icon. Select Settings > Power management.
- Use the Stamina mode and Low battery mode features.
- To activate the STAMINA mode: While you are in the Power management, tap on Point icon next to STAMINA mode, then tap Activate.
• Turn down your device volume with the volume keys.
• Close any apps or features when you are done using it so they will not continuously running in the background.
• Turn off the network connection if you are out of range so that your device will stop searching for a network signal.
• You should use the latest version of the software update. Software updates improves some features and fixes some bugs on the previous software version.
How to Import Contacts From Old Phone to New Phone (on Sony, iPhone, Samsung, HTC and Nokia)
Contacts is very important for everyone of us. We cant connect to our friends without a contact number. If you have a new phone, saving contacts on the phone one by one is so hassle. But now, theres an easy way how to transfer or import your contacts from your old phone to your new phone.
Use your PC to transfer contacts to your new phone. This process is applicable in several phone brands, including iPhone, Samsung, HTC and Nokia.
You just need an Internet Connection on your PC, your old and new phone and their own USB cable.
If you are not prompted with a pop-up window to install the PC Companion, you can also download the PC Companion here.
How to Make Your Sony Xperia SP a Wi-Fi Hotspot
Ever imagine how you can make your own Sony Xperia SP a WiFi hotspot? Well, sure you can. This feature allows for your other devices to pick up your mobile hotspot settings on your Sony Xperia SP. This is more preferable when you’re in public trying to locate a WiFi connection. You can connect up to eight devices on your Sony Xperia SP. Check out these steps for easy, convenient and a money-saver internet experience.
1. On your devices homeLcd tap on.
2. Then tap on Settings and go to select More...
3. Choose Tethering & portable hotspot.
4. Tap Portable Wi-Fi hotspot settings, then Configure Wi-Fi hotspot.
5. Enter the Network SSID for the network, and tap the Security field to select a
security type. (Enter a password if required).
6. Tap Save.
7. Mark the Portable Wi-Fi hotspot checkbox. Your device starts broadcasting its
Wi-Fi network name (SSID).
8. Unmark the Portable Wi-Fi hotspot checkbox when you want to stop sharing
your data connection via Wi-Fi.
How to Set Up Voicemail Service on Sony Xperia SP
Voicemail services depends on your subscription plan with your service provider. This feature allows caller to leave voice messages on your phone whenever you cant pick up. Your voicemail number may be found on your sim card or you can get it directly from your service provider. Here are the steps to set up voicemail service on Sony Xperia SP.
To set up your voicemail number:
1. On your devices homeLcd, tap on Menu icon to enter your voicemail number.
2. Go to Settings menu.
3. Select Call Settings > Select SIM card,
4. Select a SIM that you want to use, then tap Voicemail Settings.
4. Choose Voicemail Number so you can enter your designated voicemail service number.
5. And lastly tap on OK.
To call your voicemail service number:
1. On your homeLcd, tap on the Menu icon.
2. Look for Phone and tap it.
3. And touch and hold for seconds the number 1.
How to Add a Shortcut on Sony Xperia SP HomeLcd
Use your PC to transfer contacts to your new phone. This process is applicable in several phone brands, including iPhone, Samsung, HTC and Nokia.
You just need an Internet Connection on your PC, your old and new phone and their own USB cable.
Then you need to install the PC Companion program. This is a free application and the installation files are already saved on your new phone. This program can also be used in updating your phone software.
Please note that if you are using the Microsoft Windows 7 operating system on your PC, make sure that the AutoPlay setting is enabled.
To check your settings:
Click Start > Control Panel, then type "autoplay" on the search box. Click the AutoPlay, and mark the check box Use AutoPlay for all media and devices.
Installing the PC Companion:
Installing the PC Companion:
- Turn on your new Phone and connect it to your PC.
- On your new Phone, tap "Install" to install PC Companion on the PC.
- On your computer, if a pop-up window that appears notifies you about available PC Software, select Run Startme.exe.
- Then click Install to start the installation and then follow the instructions to complete the installation.
If you are not prompted with a pop-up window to install the PC Companion, you can also download the PC Companion here.
Transferring your contacts to your new phone:
- Make sure that PC Companion is installed on your PC.
- Open the PC Companion application on your PC.
- Then click Contacts Setup and follow the instructions to transfer your contacts.
How to Make Your Sony Xperia SP a Wi-Fi Hotspot
Ever imagine how you can make your own Sony Xperia SP a WiFi hotspot? Well, sure you can. This feature allows for your other devices to pick up your mobile hotspot settings on your Sony Xperia SP. This is more preferable when you’re in public trying to locate a WiFi connection. You can connect up to eight devices on your Sony Xperia SP. Check out these steps for easy, convenient and a money-saver internet experience.
1. On your devices homeLcd tap on
.2. Then tap on Settings and go to select More...
3. Choose Tethering & portable hotspot.
4. Tap Portable Wi-Fi hotspot settings, then Configure Wi-Fi hotspot.
5. Enter the Network SSID for the network, and tap the Security field to select a
security type. (Enter a password if required).
6. Tap Save.
7. Mark the Portable Wi-Fi hotspot checkbox. Your device starts broadcasting its
Wi-Fi network name (SSID).
8. Unmark the Portable Wi-Fi hotspot checkbox when you want to stop sharing
your data connection via Wi-Fi.
Voicemail services depends on your subscription plan with your service provider. This feature allows caller to leave voice messages on your phone whenever you cant pick up. Your voicemail number may be found on your sim card or you can get it directly from your service provider. Here are the steps to set up voicemail service on Sony Xperia SP.
To set up your voicemail number:
1. On your devices homeLcd, tap on Menu icon
to enter your voicemail number.2. Go to Settings menu.
3. Select Call Settings > Select SIM card,
4. Select a SIM that you want to use, then tap Voicemail Settings.
4. Choose Voicemail Number so you can enter your designated voicemail service number.
5. And lastly tap on OK.
To call your voicemail service number:
1. On your homeLcd, tap on the Menu icon
.2. Look for Phone and tap it.
3. And touch and hold for seconds the number 1.
Just like a desktop, it also works best on any smartphones to add a shortcut on a homeLcd. This r somehow makes navigation, especially to important files/apps, more accessible. Its less hassle and less tapping. Sony Xperia SP definitely allows you to make your device experience stress-free by adding a shortcut to important apps on your homeLcd. Heres how to do it.
1. On your devices homeLcd, touch and hold and empty area until the device vibrates.
2. After doing so, tap on Apps.
3. Then go to Shortcuts and select a shortcut.
4. Or another option, just go directly to the Application Lcd and touch and hold the application.
How to Add and Resize Widgets on Sony Xperia SP
Adding Widgets on your HomeLcd will help you improve your productivity in using your Sony Xperia SP. If you dont know what widgets means, Widgets are small applications that you can directly use on your HomeLcd. These will serve as your shortcut icon so will no longer need to access your Menu.
Follow these steps on how to add widgets on your HomeLcd.
How to resize a Widget:
1. On your devices homeLcd, touch and hold and empty area until the device vibrates.
2. After doing so, tap on Apps.
3. Then go to Shortcuts and select a shortcut.
4. Or another option, just go directly to the Application Lcd and touch and hold the application.
How to Add and Resize Widgets on Sony Xperia SP
Adding Widgets on your HomeLcd will help you improve your productivity in using your Sony Xperia SP. If you dont know what widgets means, Widgets are small applications that you can directly use on your HomeLcd. These will serve as your shortcut icon so will no longer need to access your Menu.
Follow these steps on how to add widgets on your HomeLcd.
- On your devices homeLcd, press the Four Horizontal Line icon.
- After doing so, tap on Add.
- Then go to Widgets and select a widget.
How to resize a Widget:
- Tap and hold the widget you want to resize until it magnifies and the device vibrates. You can tell if the widget is resizeable if the highlighted frame and resizing dots appear.
- You just need to Drag the dots for your preferred size.
- Then tap anywhere on the HomeLcd to confirm the new size of the widget.
Mobile Bravia Engine is a pre-installed technology on Sony Xperia Z which allows you to view photos and videos in a clearer, sharper and more natural way. This technology might consume more battery but its worth it when you use it to view images in a nicer way. Heres how you can turn on Mobile Bravia Engine on Sony Xperia Z.
1. On your devices homeLcd, tap .
.
2. Then find and tap Settings.
3. Go to Display.
4. And mark the Mobile BRAVIA Engine 2 checkbox if its not marked.
Now youre ready to view those captured moments in a clearer, sharper and more natural way.
1. On your devices homeLcd, tap
.2. Then find and tap Settings.
3. Go to Display.
4. And mark the Mobile BRAVIA Engine 2 checkbox if its not marked.
Now youre ready to view those captured moments in a clearer, sharper and more natural way.
How to Screen Mirror Sony Xperia SP to Show the Screen on a TV
The Screen Mirroring will allow you to show the Lcd of your device on a TV or other large display without using a cable connections. It uses the Wi-Fi Direct technology that create a wireless connection between two devices. You can also use this feature to listen to music from your phone via the TVs speakers.
How to mirror the Lcd of your Sony Xperia SP on a TV:
1. First you need to turn on the Lcd mirroring function on your TV. Just follow the instructions in the User Guide of your TV.
2. From your Home Lcd, tap on the Menu icon
3. Select on Settings, and tap Xperia™.
4. Choose Screen mirroring.
5. Tap to turn on the Screen mirroring and select a device.
Warnings:
When using Lcd mirroring, the image quality may sometimes negatively impacted if there is a Wi-Fi interference.
When using Lcd mirroring, do not cover the Wi-Fi antenna area of your device.
How to mirror the Lcd of your Sony Xperia SP on a TV:
1. First you need to turn on the Lcd mirroring function on your TV. Just follow the instructions in the User Guide of your TV.
2. From your Home Lcd, tap on the Menu icon
3. Select on Settings, and tap Xperia™.
4. Choose Screen mirroring.
5. Tap to turn on the Screen mirroring and select a device.
Warnings:
When using Lcd mirroring, the image quality may sometimes negatively impacted if there is a Wi-Fi interference.
When using Lcd mirroring, do not cover the Wi-Fi antenna area of your device.
Monday, September 8, 2014
Sony Ericsson 240X320 Mobile Java Games And player

Sony Ericsson 240X320
Mobile Java Games And player 22-Pack... Download,
Sony Xperia TL LT30at Factory data reset
- select Apps from home Lcd or press Menu Key
- select Settings
- select Backup & reset
- select Factory data reset
- select Reset phone
- select Erase everything
To avoid permanent damage to your device, do not restart your device while a reset procedure is underway.
Warning! All data will be erased from device memory, including system and application data, settings and downloaded applications. Back up your important data. The device will restore to factory settings.
Performing Soft Reset
If your phone or tab hangs or does not responding, try to Press and hold the power and volume up keys for 5 seconds. After the phone vibrates once, release the keys. The phone will restart automatically.
How to Share Contacts Music Files Photos or Videos and Web Address Using NFC on Sony Xperia Z1s
1. On your Home Lcd, tap the > Settings.
2. Then go to More.
3. Mark the NFC checkbox.
To share a contact with another device using NFC
1. Make sure that both devices have the NFC function turned on, and that both Lcds are active.
2. To view contacts, go to your Home Lcd, tap, then tap Person icon.
3. Tap the contact that you want to share.
4. Hold your device and the receiving device back to back so that the NFC detection areas of each device touch each other. When the devices connect, a thumbnail of the contact appears.
5. Tap the thumbnail to start the transfer.
6. When the transfer is done, the contact information is displayed on the Lcd of the receiving device and is also saved on the receiving device.
To share a music file with another device using NFC
1. Make sure that both your device and the receiving device have the NFC function turned on, and that both Lcds are active.
2. To open the "WALKMAN™" application, tap, then find and tap Walkman icon.
3. Select a music category and browse to the track you want to share.
4. Tap the track to play it. You can then tap Pause icon to pause the track. The transfer works whether the track is playing or paused.
5. Hold your device and the receiving device back to back so that the NFC detection areas of each device touch each other. When the devices connect, a thumbnail of the track appears.
6. Tap the thumbnail to start the transfer.
7. When the transfer is done, the music file plays immediately on the receiving device. At the same time, the file is saved on the receiving device.
To share a photo or video with another device using NFC
1. Make sure that both devices have the NFC function turned on, and that both Lcds are active.
2. To view photos and videos in your device, go to your Home Lcd, tap, then find and tap Album.
3. Tap the photo or video that you want to share.
4. Hold your device and the receiving device back to back so that the NFC detection areas of each device touch each other. When the devices connect, a thumbnail of the track appears.
5. Tap the thumbnail to start the transfer.
6. When the transfer is done, the photo or video is displayed on the Lcd of the receiving device. At the same time, the item is saved on the receiving device.
To share a web address with another device using NFC
1. Make sure that both devices have the NFC function turned on, and that both Lcds are active.
2. From your Home Lcd, tap.
3. To open the web browser, find and tap Chrome browser icon.
4. Load the web page that you want to share.
5. Hold your device and the receiving device back to back so that the NFC detection areas of each device touch each other. When the devices connect, a thumbnail of the track appears.
6. Tap the thumbnail to start the transfer.
7. When the transfer is done, the web page is displayed on the Lcd of the receiving device.
Read More..
> Settings.2. Then go to More.
3. Mark the NFC checkbox.
To share a contact with another device using NFC
1. Make sure that both devices have the NFC function turned on, and that both Lcds are active.
2. To view contacts, go to your Home Lcd, tap
, then tap Person icon.3. Tap the contact that you want to share.
4. Hold your device and the receiving device back to back so that the NFC detection areas of each device touch each other. When the devices connect, a thumbnail of the contact appears.
5. Tap the thumbnail to start the transfer.
6. When the transfer is done, the contact information is displayed on the Lcd of the receiving device and is also saved on the receiving device.
To share a music file with another device using NFC
1. Make sure that both your device and the receiving device have the NFC function turned on, and that both Lcds are active.
2. To open the "WALKMAN™" application, tap
, then find and tap Walkman icon.3. Select a music category and browse to the track you want to share.
4. Tap the track to play it. You can then tap Pause icon to pause the track. The transfer works whether the track is playing or paused.
5. Hold your device and the receiving device back to back so that the NFC detection areas of each device touch each other. When the devices connect, a thumbnail of the track appears.
6. Tap the thumbnail to start the transfer.
7. When the transfer is done, the music file plays immediately on the receiving device. At the same time, the file is saved on the receiving device.
To share a photo or video with another device using NFC
1. Make sure that both devices have the NFC function turned on, and that both Lcds are active.
2. To view photos and videos in your device, go to your Home Lcd, tap
, then find and tap Album.3. Tap the photo or video that you want to share.
4. Hold your device and the receiving device back to back so that the NFC detection areas of each device touch each other. When the devices connect, a thumbnail of the track appears.
5. Tap the thumbnail to start the transfer.
6. When the transfer is done, the photo or video is displayed on the Lcd of the receiving device. At the same time, the item is saved on the receiving device.
To share a web address with another device using NFC
1. Make sure that both devices have the NFC function turned on, and that both Lcds are active.
2. From your Home Lcd, tap
.3. To open the web browser, find and tap Chrome browser icon.
4. Load the web page that you want to share.
5. Hold your device and the receiving device back to back so that the NFC detection areas of each device touch each other. When the devices connect, a thumbnail of the track appears.
6. Tap the thumbnail to start the transfer.
7. When the transfer is done, the web page is displayed on the Lcd of the receiving device.
Thursday, September 4, 2014
How to Share Contacts Using NFC on Sony Xperia Z
NFC feature is a must-have for any smartphones these days. Near-field communication or NFC works similarly like bluetooth. By touching your NFC-enabled phones against each other, you can then share contacts, music and photos. Well, heres how you can easily share contacts on Sony Xperia Z uisng NFC feature.
1. On your device, enable content sharing in Settings.
2. Then go to Wireless and Networks.
3 And choose on More menu.
When the phone vibrates, tap the onscreen message that says "touch to beam".
Read More..
1. On your device, enable content sharing in Settings.
2. Then go to Wireless and Networks.
3 And choose on More menu.
When the phone vibrates, tap the onscreen message that says "touch to beam".
Monday, September 1, 2014
Sony Xperia L C2105 Flash Repair Done With Factory Firmware
Sony Xperia L ( C2105 ) Flash Repair Done With Factory Firmware
Here Flash Log:-
Tested By Me
Here Flasher Link:-
Flashtool-0.9.11.0-windows
Here Firmware Link:-
Sony Xperia L (C2105)_15.3.A.0.26_Philippines.part1
Sony Xperia L (C2105)_15.3.A.0.26_Philippines.part2
Or
C2105_15.0.A.2.17_PT. TELETAMA ARTHA MANDIRI.part1
C2105_15.0.A.2.17_PT. TELETAMA ARTHA MANDIRI.part2
Read More..

Here Flash Log:-
Code:
16/033/2013 12:33:42 - INFO - <- This level is successfully initialized
16/033/2013 12:33:42 - INFO - Flashtool Version 0.9.11.0 built on 2013-06-04 22:50:00
16/033/2013 12:33:42 - INFO - Device disconnected
16/034/2013 12:34:39 - INFO - Selected Sony Xperia L (C2105) / 15.3.A.0.26 / Philippines
16/034/2013 12:34:39 - INFO - Preparing files for flashing
16/034/2013 12:34:53 - INFO - Please connect your device into flashmode.
16/035/2013 12:35:53 - INFO - Device connected in flash mode
16/035/2013 12:35:54 - INFO - Opening device for R/W
16/035/2013 12:35:54 - INFO - Reading device information
16/035/2013 12:35:54 - INFO - Phone ready for flashmode operations.
16/035/2013 12:35:54 - INFO - Current device : C2105 - ZH8000Z963 - 1271-3303_R5A - 1269-5420_15.0.A.1.36 - WORLD-i_15.0.A.1.36
16/035/2013 12:35:54 - INFO - Start Flashing
16/035/2013 12:35:54 - INFO - Processing loader
16/035/2013 12:35:54 - INFO - Checking header
16/035/2013 12:35:54 - INFO - Flashing data
16/035/2013 12:35:54 - INFO - Loader : S1_Root_dbe9 - Version : loader_MSM8X30_10 / Bootloader status : ROOTABLE
16/035/2013 12:35:54 - INFO - Processing partition-image.sin
16/035/2013 12:35:54 - INFO - Checking header
16/035/2013 12:35:54 - INFO - Flashing data
16/035/2013 12:35:54 - INFO - Processing kernel.sin
16/035/2013 12:35:54 - INFO - Checking header
16/035/2013 12:35:54 - INFO - Flashing data
16/035/2013 12:35:56 - INFO - Processing fotakernel.sin
16/035/2013 12:35:56 - INFO - Checking header
16/035/2013 12:35:56 - INFO - Flashing data
16/035/2013 12:35:57 - INFO - Processing modem.sin
16/035/2013 12:35:57 - INFO - Checking header
16/035/2013 12:35:57 - INFO - Flashing data
16/036/2013 12:36:05 - INFO - Processing rpm.sin
16/036/2013 12:36:05 - INFO - Checking header
16/036/2013 12:36:05 - INFO - Flashing data
16/036/2013 12:36:05 - INFO - Processing ftma.sin
16/036/2013 12:36:05 - INFO - Checking header
16/036/2013 12:36:05 - INFO - Flashing data
16/036/2013 12:36:06 - INFO - Processing ramdumper.sin
16/036/2013 12:36:06 - INFO - Checking header
16/036/2013 12:36:06 - INFO - Flashing data
16/036/2013 12:36:06 - INFO - Processing cache.sin
16/036/2013 12:36:06 - INFO - Checking header
16/036/2013 12:36:06 - INFO - Flashing data
16/036/2013 12:36:07 - INFO - Processing system.sin
16/036/2013 12:36:07 - INFO - Checking header
16/036/2013 12:36:07 - INFO - Flashing data
16/038/2013 12:38:49 - INFO - Processing userdata.sin
16/038/2013 12:38:49 - INFO - Checking header
16/038/2013 12:38:49 - INFO - Flashing data
16/038/2013 12:38:54 - INFO - Ending flash session
16/038/2013 12:38:54 - INFO - Flashing finished.
16/038/2013 12:38:54 - INFO - Please unplug and start your phone
16/038/2013 12:38:54 - INFO - For flashtool, Unknown Sources and Debugging must be checked in phone settings
16/038/2013 12:38:54 - INFO - Device connected in flash mode
16/039/2013 12:39:13 - INFO - Device disconnected
16/039/2013 12:39:57 - INFO - Device connected in flash mode
16/040/2013 12:40:38 - INFO - Please connect your device into flashmode.
16/040/2013 12:40:39 - INFO - Opening device for R/W
16/040/2013 12:40:39 - INFO - Device connected in flash mode
16/040/2013 12:40:39 - INFO - Reading device information
16/040/2013 12:40:39 - INFO - Phone ready for flashmode operations.
16/040/2013 12:40:39 - INFO - Current device : C2105 - ZH8000Z963 - 1271-3303_R5A - 1269-5420_15.0.A.1.36 - WORLD-i_15.0.A.1.36
16/040/2013 12:40:39 - INFO - Processing loader
16/040/2013 12:40:39 - INFO - Checking header
16/040/2013 12:40:39 - INFO - Flashing data
16/040/2013 12:40:40 - INFO - Loader : S1_Root_dbe9 - Version : loader_MSM8X30_10 / Bootloader status : ROOTABLE
16/040/2013 12:40:40 - INFO - Start Reading unit 000008B2
16/040/2013 12:40:40 - INFO - Reading TA finished.
Tested By Me
Here Flasher Link:-
Flashtool-0.9.11.0-windows
Here Firmware Link:-
Sony Xperia L (C2105)_15.3.A.0.26_Philippines.part1
Sony Xperia L (C2105)_15.3.A.0.26_Philippines.part2
Or
C2105_15.0.A.2.17_PT. TELETAMA ARTHA MANDIRI.part1
C2105_15.0.A.2.17_PT. TELETAMA ARTHA MANDIRI.part2
Thursday, August 21, 2014
Sony Ericsson X10i Charging Ways fix problem
Use original usb cable and charger for this model only.
Phone might not work when using not original charger.
Chk Our Previous Post :IPhone5 All How to Fix problem
Sony Ericsson X10i Charging ways Jumper How to Fix problem,Sony Ericsson X10i Charging line How to Fix problem,Sony Ericsson X10i Charging ways damage How to Fix problem,Sony Ericsson X10i Charging How to Fix problem ways repair,Sony Ericsson X10i Charging ic ways line jumper How to Fix problem

Sony Ericsson X10i Charging ways Jumper How to Fix problem,Sony Ericsson X10i Charging line How to Fix problem,Sony Ericsson X10i Charging ways damage How to Fix problem,Sony Ericsson X10i Charging How to Fix problem ways repair,Sony Ericsson X10i Charging ic ways line jumper How to Fix problem
Phone might not work when using not original charger.
Chk Our Previous Post :IPhone5 All How to Fix problem
Sony Ericsson X10i Charging ways Jumper How to Fix problem,Sony Ericsson X10i Charging line How to Fix problem,Sony Ericsson X10i Charging ways damage How to Fix problem,Sony Ericsson X10i Charging How to Fix problem ways repair,Sony Ericsson X10i Charging ic ways line jumper How to Fix problem
Sony Ericsson X10i Charging ways Jumper How to Fix problem,Sony Ericsson X10i Charging line How to Fix problem,Sony Ericsson X10i Charging ways damage How to Fix problem,Sony Ericsson X10i Charging How to Fix problem ways repair,Sony Ericsson X10i Charging ic ways line jumper How to Fix problem
Monday, August 18, 2014
Sony Xperia tipo ST21i ST21A factory data reset
| Sony Xperia tipo ST21i/ST21A factory data reset |
Performing factory data reset ( master reset or hard reset ) Sony Xperia tipo ST21i/ST21A via Settings menu:
Performing factory data reset
- Tap Applications from Home screen
- Tap Settings
- Tap Backup & reset
- Tap Factory data reset
- Tap Reset phone
- Tap Erase Everything
Warning! All data will be erased from device memory, including system and application data, settings and downloaded applications. Back up your important data. The device will restore to factory settings.
If your phone hangs or does not responding, Press and hold power key about 10 seconds. It will rebooting automatically. Or remove and re insert the battery and SIM Card.
Subscribe to:
Posts (Atom)